


9
6. Powering PiGear Nano
If you have installed the OS into your CM4's eMMC, or you have inserted an SD card with OS
installed, you can power the board and boot the system.
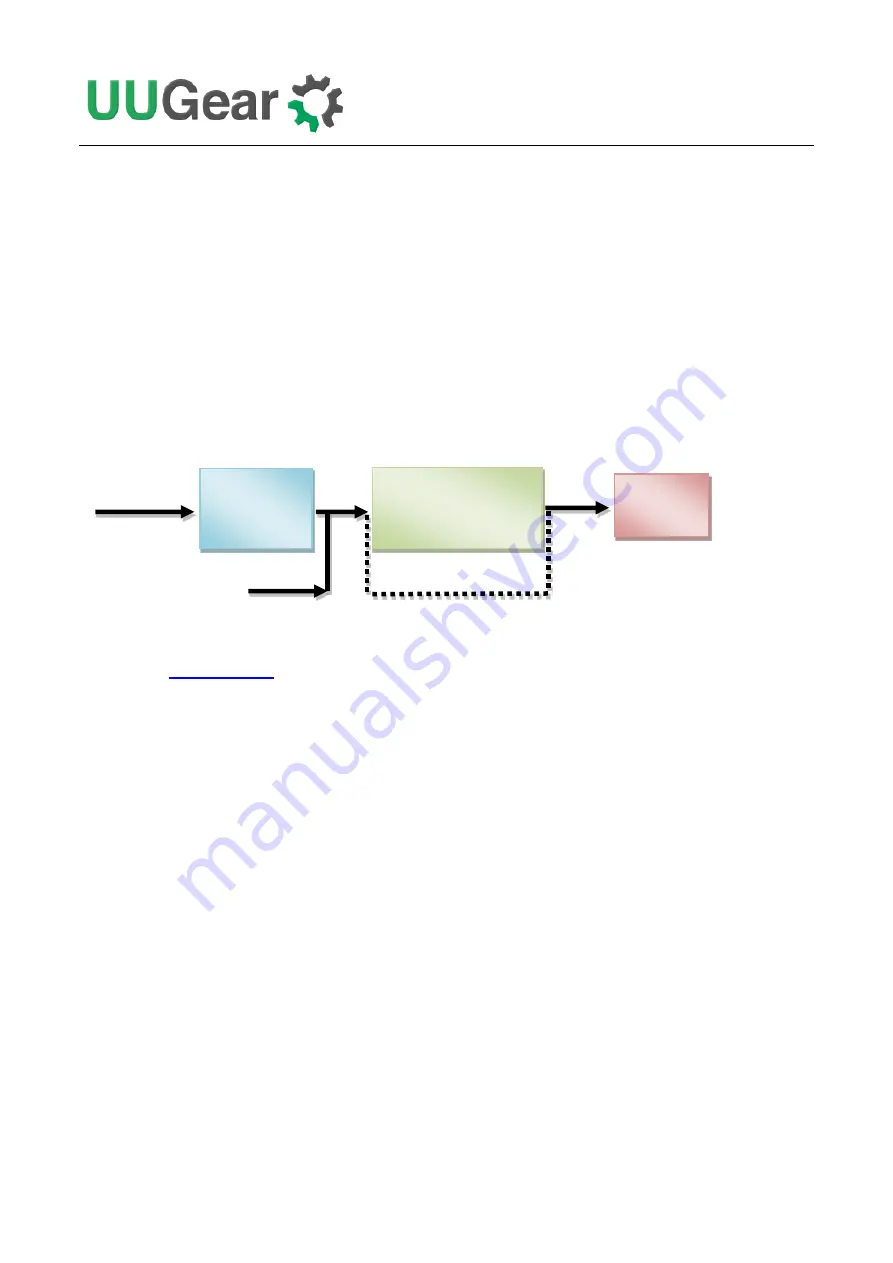
You can power PiGear Nano with DC 7~30V via the universal 2-pin power connector, or you can
power it with DC 5V via the USB Type-C connector.
When powering via the universal 2-pin power connector, the input voltage will go through a DC/DC
convertor (SY8204) and output 5V for powering the system. Please make sure the input voltage is no
higher than 30V. You can also bypath the DC/DC convertor and power the board directly with DC 5V
via the USB Type-C connector. Either way you can optionally enable the e-latch power switch, which
allows you to turn on/off the system with a single tape on the button.
Our software installation script will enable the e-latch power switch support for you, however you will
Note:
when e-latch power switch is in used, after the power is fully cut, please
wait a few seconds
before trying to boot your PiGear Nano again, because the internal RC circuit needs some time to
discharge the capacitor and restore to the standby status.
Note:
if you are going to connect some high-current devices to PiGear Nano, it is recommended to
power the board with higher voltage via the universal 2-pin power connector. In such case the
internal DC/DC converter will output 5V up to 4A.
7. Software Installation / Update
After you boot the system up for the first time, please run our software installation script. The script
will do these tasks for you:
Create a backup of the current config.txt and cmdline.txt files.
Modify your config.txt and cmdline.txt for correctly supporting the hardware.
Install the daemon script to initialize the hardware and support e-latch power switch.
Install the PiGearNano.sh application.
DC 7~30V
DC/DC
Converter
5V
E-Latch
Power Switch
System
5V
5V via USB Type-C
Jumper
Summary of Contents for PiGear Nano
Page 5: ...2...


