3
NOTE!
The IP address 192.168.1.13 in this example is the default IP address. Please replace it with the actual address
of your camera if it has been changed.
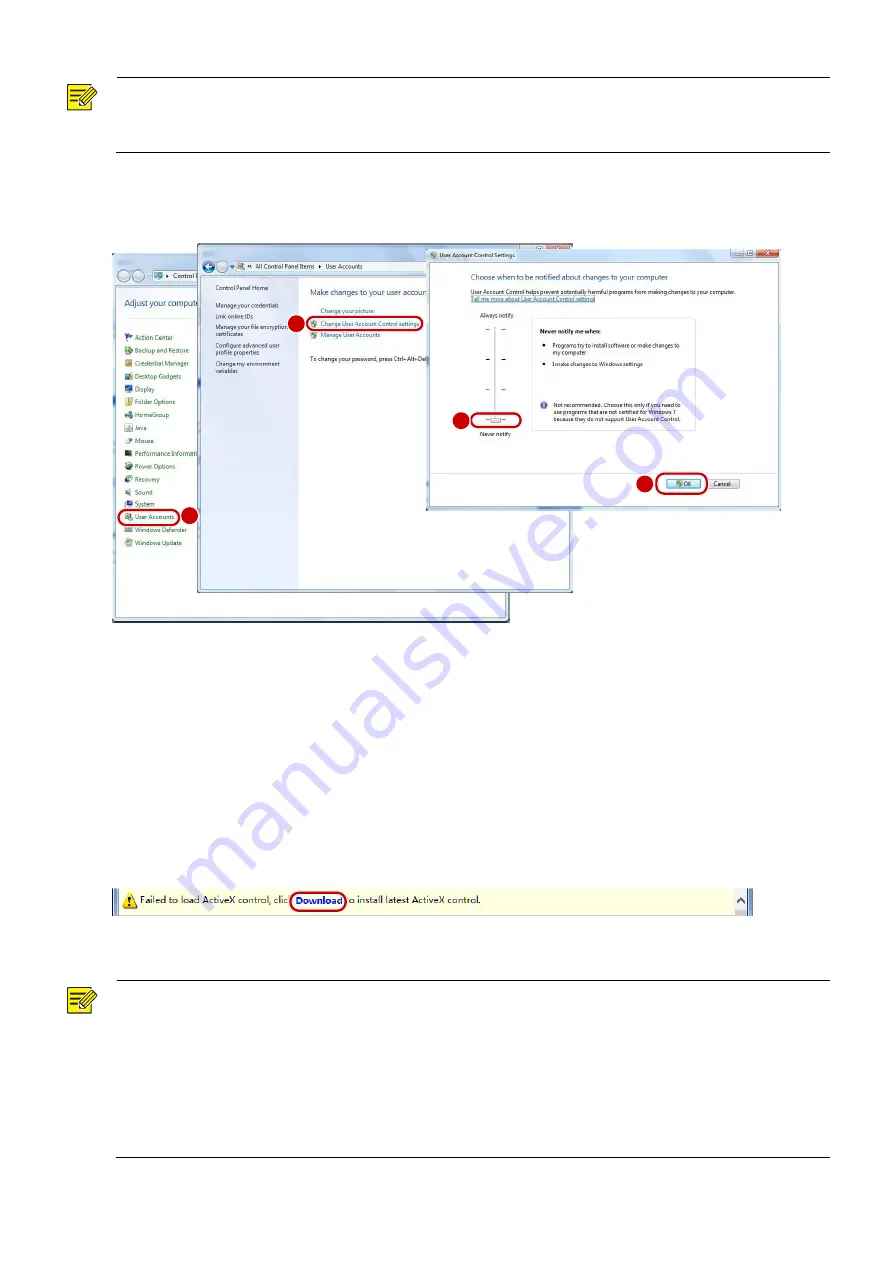
(Optional) Modify user access control settings
Before you access the camera, follow the steps to set
User Account Control Settings
to
Never notify
.
Logging In to the Web Interface
The default static IP address of the camera is 192.168.1.13, and the default subnet mask is 255.255.255.0.
DHCP is turned on by default. If a DHCP server is used in the network, the IP address of your camera may be
assigned dynamically, and you need to use the correct IP address to log in. Use the EZStation client to view
the dynamic IP address of your camera.
The following takes IE as an example to describe the login procedure.
1.
Browse to the login page by entering the correct IP address of your camera in the address bar.
2.
If you log in for the first time, follow system prompts and install the ActiveX. You need to close your
browser to complete the installation.
NOTE!
To manually load the ActiveX, type
http
://
IP address
/ActiveX/Setup.exe in the address bar and press
Enter
.
The default password is used for your first login. To ensure account security, please change the
password after your first login. You are recommended to set a strong password (no less than eight
characters).
The camera protects itself from illegal access by limiting the number of failed login attempts. If login
fails six times consecutively, the camera locks automatically for ten minutes.
1
2
3
4


