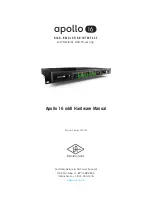
Front Panel
11
Apollo 16 mkII Hardware Manual
Clock
Apollo 16’s clock source and status are displayed with these indicators. Either internal
(INT) or external (EXT) is displayed. The clock source is set within the Console appli-
cation; see the
Apollo Software Manual
for details.
Internal Clock
When Apollo 16 is set to internal clock, the INT indicator is illuminated white.
External Clock
Apollo 16 can use an external clock from the Word Clock or AES/EBU inputs. The EXT
indicator has two possible states:
White – When set to external clock and a valid clock signal is detected at the specified
port, the EXT indicator is illuminated white and Apollo 16 is synchronized to the external
clock source.
Red – When set to external clock and a valid clock signal is NOT detected at the
specified port, the EXT indicator is illuminated red and the internal clock remains active
instead. In this situation, if/when the specified external clock becomes available, Apollo
16 switches back to the external clock, and the EXT indicator is illuminated and white.
Important:
When set to use any external clock source, Apollo 16’s sample rate
must be manually set to match the sample rate of the external clock.
Meter
The METER indicator reflects the state of the Channel Meters (#4). The I/O state of the
Channel Meters is changed with the METER switch (#1).
IN – When IN is illuminated, the channel meters display analog input signal levels.
OUT – When OUT is illuminated, the channel meters display analog output signals levels.
(3) Sample Rate Indicators
These indicators display the current sample rate setting for A/D and D/A conversion.
The sample rate is set within the Console application or the host DAW; see the Apollo
Software Manual for details.
(4) Channel Level Meters
The 10-segment LED channel meters display the input or output signal peak levels for
analog channels 1 – 16. Input or output metering is selected with the METER switch
(#1), and the input/output state is shown by the METER indicators (#2).
The dB values of the meter LEDs are indicated between the meters for channels 4 & 5
and 12 & 13. “0” indicates a level of 0 dBFS. When digital clipping occurs (when 0
dBFS is exceeded), the red “C” (clip) LED illuminates.


