18
Quick guide
Q u i c k G u i d e
the same icons in the list. At the end if the list
you will get back to the first 5 icons.
This way you do not need to navigate through
several menus, but can jump directly to what
you want. Some icons will be direct functions,
and others will change the icon list to give you
more choices.
The center icon will be enlarge and a help text
is shown below it. This way it should be easy
to learn the icons. We use a common way of
combining icons into one.
Analyze
Setup
Information
Select
The combination can then be like this:
Information about GPS satellites.
Analyze lap times.
TURNING UNIGO ON
There are 4 different ways to turn UniGo on:
1.
Press one of the two buttons on the right
shortly to start the Laptimer manually.
2.
Start the engine and UniGo will start when
it detects the RPM signal.
3.
Connect the USB / charger cable into a
charger or computer.
4.
Start the engine if the RPM wires is connect-
ed to a UniBox.
UniGo start by turning on the backlight at
25% and show a Unipro splash screen. This is
showing as fast as it is possible, and it will stay
there until UniGo is fully booted.
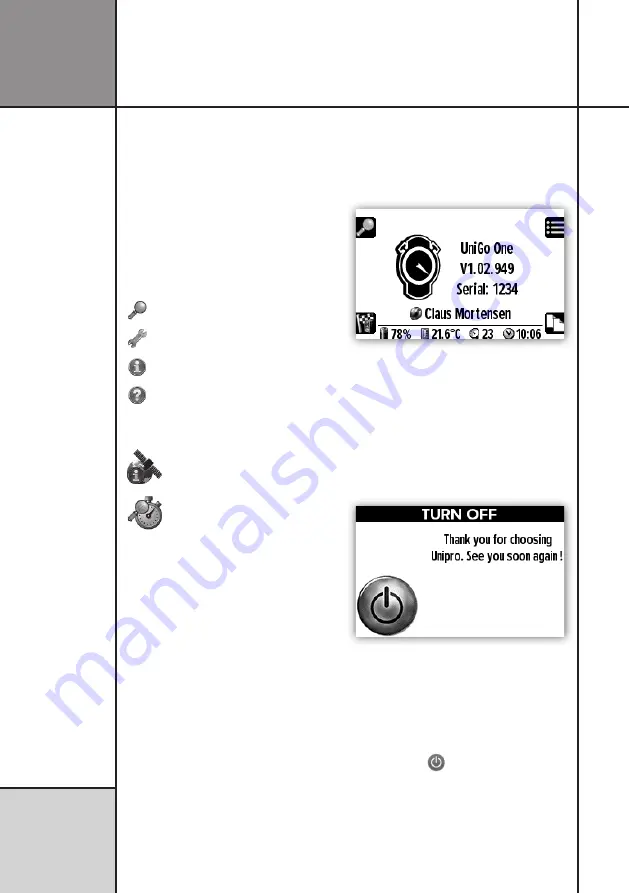
After booting up, UniGo starts by showing the
startup screen including information about
firmware version number, serial number,
battery capacity, the environment temperature,
GPS satellites fixed, and the time of day. If
the driver’s name is entered, it will show that
below the Unipro logo.
Startup screen with information about
firmware version and serial number
TURNING UNIGO OFF
There are different ways to turn UniGo off.
Press the top right button and hold it down to
turn UniGo off. When you see “TURN OFF” in
the display, you can release the button again.
Power off screen when UniGo is turning off.
UniGo will also turn itself off if no button
is pressed and no RPM, speed or trigger is
detected after a preselected time. Please see
”AUTO POWER OFF TIME” on page 31.
You can also turn it off from the rolling menu
by pressing the
icon.
BUILT-IN HELP
When you move around in menus, UniGo will
display one line of help text at the bottom of
the display. Use this line to get familiar with
the different settings in UniGo.
Summary of Contents for 03-05-001
Page 6: ...VI This page was intentionally left blank...
Page 10: ...10 I n t r o d u c t i o n Examples...
Page 34: ...34 Setup mode C o n f i g u r i n g t h e L a p t i m e r...
Page 55: ...55 I n d e x...
Page 56: ...Unipro ApS Viborg Hovedvej 24 DK 7100 Vejle Denmark Tel 45 7585 1182 www uniprolaptimer com...


