background image

70

Conducting calls – with multiple users

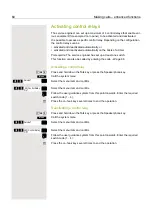
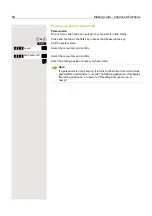
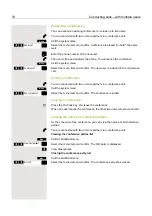
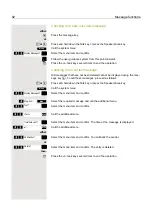
Expanding a conference

You can expand an existing conference to include up to five users.

p

You are connected with two or more partners in a conference call.

Call the system menu.

> < 

 [

Select the menu item and confirm. Conference is placed "on hold", the users 
wait.

o

Enter the phone number of the new user.

p

The user is free and answers the phone. You announce the conference.

Call the system menu.

> < 

 [

Select the menu item and confirm. The new user is included in the conference 
call.

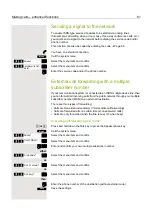
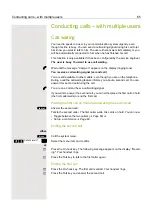
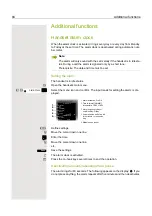
Ending a conference

p

You are connected with two or more partners in a conference call.

Call the system menu.

> < 

 [

Select the menu item and confirm. The conference is ended.

Leaving a conference

a

Press the On-hook key. You leave the conference.

When one user leaves the conference, the other two users remain connected.

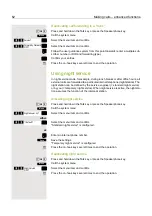
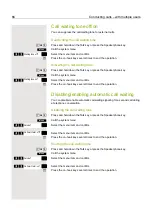
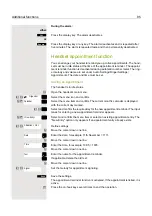
Viewing the names of conference parties

As the convener of the conference, you can view the names of all conference 
parties.

p

You are connected with two or more partners in a conference call.

Viewing the conference parties list

Call the additional menu.

> < 

 [

Select the menu item and confirm. The first party is displayed.

>

View other parties.

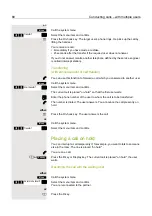
Closing the conference party list

Call the additional menu.

> < 

 [

Select the menu item and confirm. The conference party list is closed.

Menu

Add party?

Menu

Conference?

Menu

End conference?

Mnu

View conf parties?

Mnu

Exit list?

Summary of Contents for Gigaset S4

Page 1: ...Gigaset S4 professional HiPath Cordless Office User Guide A31003 G2100 U113 2 7619 ...

Page 2: ...escriptions or characteristics of performance which in case of actual use do not always apply as described or which may change as a result of further development of the products An obligation to provide the respective characteristics shall only exist if expressly agreed in the terms of contract Availability and technical specifications are subject to change without notice Unify OpenScape OpenStage...

Page 3: ... explosion degradation of battery cladding functional interference and handset damage Avoid contact with fire and water Only use the approved C39280 Z4 C373 power supply unit to operate the charging shell Note All electrical and electronic products should be disposed of separately from the municipal waste stream via designated collection facilities appointed by the government or the local authorit...

Page 4: ...can be performed via your handset are described here If some of the required functions are not available on your handset it may be due to one of the following The function is not configured for you or your handset please contact your system administra tor Your communications platform does not feature this function please contact your Unify contract partner to upgrade ...

Page 5: ...e 2 Display 11 Mute key 3 Display keys 12 Hash key 4 Control key 13 Number keys 5 Speakerphone key 14 On hook and on off key 6 Talk key 15 Message key 7 Headset connection 16 Volume key 8 Star key 9 R key How to use the keys Æ Page 10 1 2 3 4 5 15 6 14 12 8 11 9 13 10 16 7 ...

Page 6: ...er 18 Connecting a headset 18 Connecting a USB data cable 19 Setting the handset display language 20 Setting up the handset 21 Setting the volume 21 During the call 21 In idle status 21 Advisory tones 22 Setting the ringer 22 Setting ringing tones and pictures with resource directory 24 Viewing screensaver CLIP images playing sounds 24 Renaming deleting image CLIP images sound 25 Checking the avai...

Page 7: ...al 46 System telephone directory 47 Telephone database LDAP 48 Handset phonebook 49 Saving an entry 50 Finding and dialing an entry 50 Dialing an entry with the speed dialing digit 51 Viewing an entry 51 Changing an entry 51 Deleting an entry or phonebook 52 Displaying available memory 52 Send an entry or phonebook to a handset or system 52 Directed assignment of an MSN multiple subscriber number ...

Page 8: ...ng a message advisory message 79 Sending calling text messages 80 Answering a message or voice mail message 81 Caller list 83 Additional functions 84 Handset alarm clock 84 Headset appointment function 85 System appointment function 87 Selecting a base 88 Setting the base 89 Speed dialing 89 Speed access to functions 90 Data communication with the PC 90 Bluetooth interface 91 Phonebook transfer 91...

Page 9: ...Contents 9 Appendix 99 Troubleshooting 99 Taking care of the handset 100 Documentation 101 Technical data 101 Charging shells 101 Accessories 101 EU Directive 102 Declaration of conformity 102 Index 103 ...

Page 10: ...set on or off c Talk key Answer a call Dial a phone number Open the redial list Access telephone system functions d Speakerphone key Answer a call Dial a phone number Toggle between handset to speakerphone mode Access telephone system functions f Message list Access message lists Star key Activate deactivate the ringer Hash key Activate deactivate keypad lock h Mute key Mute microphone S R key R k...

Page 11: ...n Situation t Press top of key s Press bottom of key u Press left side of key v Press right side of key In idle status Open the hand set s phonebook Open the list of handsets Open the handset s main menu During a call Set the voice telephone volume Open the hand set s phonebook Select Loud speaker Vol GAP DTMF Base Set tings In the main menu Select a menu icon Select a menu icon Select a menu icon...

Page 12: ...ide keys Press the keys on the right of the handset to set the volume for earpiece ringtone speakerphone mode alarm appointment signaling and the headset depending on the situation Icon Use Open menu varies depending on the situation Confirm your selection Move character by character word by word from right to left Go back one menu level cancel action Save input Open the redial list Back Save Curr...

Page 13: ... mode are marked with an icon To change see Æ Page 29 Icon Name Use Resource Directory Manage images and tones Screensavers Caller Pictures Sounds Capacity Bluetooth Configure Bluetooth interface Activation Search for Headset Search Data Device Known Devices Own Device Additional Features see Resource Directory Alarm Clock Configure alarm call function Call Lists Open call list if calls are availa...

Page 14: ...ngs Handset Volume Advisory Tones Ringtones Handset Display Screensaver Large Font Colour Schemes Backlight Language Registration Register Handset De reg Handset Select Base Telephony Auto Answer Area Codes System Handset PIN Handset Reset Base Reset Menu View Icon Name Use Ï ...

Page 15: ...nd remove the clip on the opposite side Remove the protective cover from the display before putting the handset into service Note Please observe the safety notes Æ Page 3 Only use approved batteriesÆ Page 18 Always replace both batteries at the same time and only use two batteries of the same type from the same manufacturer Open the battery compartment in a dust free environment only Your telephon...

Page 16: ...rting the batteries Insert the batteries making sure the poles are facing the correct direction see schematic diagram The poles are indicated in or on the battery compartment 4 Closing the battery compartment Insert the battery cover first with the lateral recesses on the tip of the inside of the housing Then press the cover until it snaps into place 3 ...

Page 17: ...harging Charge the batteries for at least 10 hours without a break regardless of the charging status icon Without replacing it in the charging shell use the handset until the battery low beep is heard This action aligns the charge status display with the op erating times of the batteries To attain full operating and charging times Æ Page 17 Without replacing it in the charging shell use the handse...

Page 18: ...ver for the headset port to achieve optimum sound in speakerphone mode Connecting a headset Once the plastic cover has been removed you can connect a headset to the left side of the handset using a 2 5 mm jack The headset volume is the same as the volume set for the earpiece Æ Page 21 Replace the plastic cover after using the headset to achieve optimum sound in speakerphone mode Nickel Metal Hydri...

Page 19: ...data cable You can connect a standard USB data cable with a mini B jack to the back of your handset to connect the handset to a PC Æ Page 90 Remove belt clip if attached Æ Page 15 Remove battery cover Æ Page 16 Connect the USB data cable to the USB port 1 1 ...

Page 20: ...second sub menu s t Select the menu item and confirm Selecting a language s t Select and confirm the language you require a Press the on hook key several times to end the operation Settings Ï Language Deutsch English Francais Italiano Espanol Portugues Nederlands Dansk Norsk Svenska Suomi Cesky Polski Turkce Ellinika Magyar Russkij Hrvatski Slovenscina Romana Srpski Catalan Bulgarski Bosanski Ukra...

Page 21: ...ys to open the Handset Volume menu ø Adjust earpiece or speakerphone volume or t Press the control key to view the Handset Volume menu r Set earpiece or speakerphone volume Save the settings or The setting is saved automatically after approx three seconds In idle status In idle mode you can adjust the call volume via the menu v Open the handset s main menu u v Select the menu icon and confirm s t ...

Page 22: ...s t Select the menu item and confirm s t Select the menu item and confirm s t Select the required menu item and confirm Note Can be set only when the menu item is visible To change see Æ Page 29 Advisory tone Meaning Key Tones Every keystroke is confirmed Confirmation Confirmation tone when saving inputs settings and when placing the handset in the charging shell Error beep decrescendo tone sequen...

Page 23: ...t the menu item and confirm s t Select the required menu item u v Define settings Press the display key Setting time control for external calls You can enter a period of time when the phone should not ring e g at night s t Select the menu item and confirm u v Set On or Off If activated s t Select the required menu item o Enter the time Save the settings Volume Save Volume For internal calls and ap...

Page 24: ...and sounds from your PC Æ Page 90 If there is not enough space available you need to delete one or several images or sounds before Viewing screensaver CLIP images playing sounds v Open the handset s main menu u v Select the menu icon and confirm s t Select the required menu item and confirm s t Select the entry Screensaver CLIP images Press the display key s t Switching between the images If you h...

Page 25: ...s t Select the entry Press the display key If an image sound is locked è the options are not avail able s t Select the menu item and confirm The name of the entry can be modified Length up to 16 characters Then confirm your entry or s t Select the menu item and confirm The entry is deleted Checking the available memory You can view the remaining memory available v Open the handset s main menu u v ...

Page 26: ...until a confirmation tone is emitted Press the Display key within three seconds The warning tone is activated The volume of the warning tone is coupled with the volume of the external ringer Deactivating the warning tone Hold down the key until a confirmation tone is emitted Activating deactivating automatic call answering This function allows you to accept calls by removing the handset from the c...

Page 27: ...tings A number of options are available for setting the display You can set the screen saver screen picture the color scheme the font size and the display lighting You can also change the name displayed for the base station Screensaver In idle mode you can view an image from the resource directory Æ Page 24 or set the time as a screensaver It replaces the display in idle mode This covers up the ca...

Page 28: ...the menu item and confirm s t Select the menu item and confirm s t Select the entry Press the display key Lighting You can activate or deactivate the display lighting regardless of whether the handset is in the base charging or not If it is activated the display illuminates continuously at reduced intensity If the display lighting is deactivated when any key is touched the screen illuminates In th...

Page 29: ...u icon and confirm s t Select the menu item and confirm s t Select the menu item and confirm The conversion table is displayed o Change entry Press the up down navigation key to navigate to another input field Press the left right navigation key to move the cursor within an input field Save setting a Press the on hook key several times to end the operation Setting the menu view You can define whet...

Page 30: ...firm s t Select the menu item and confirm s t Select the menu item and confirm A security check question appears Confirm the security check question The handset is returned to the default Note Can be set only when the menu item is visible To change see Æ Page 29 Feature Action Sound settings are reset System registration is retained Phonebook is retained Redial list is deleted Settings Ï System Ha...

Page 31: ... Warning tone audible approxi mately five minutes before the battery runs out on Confirmation tone indicates whether actions were successful or unsuccessful on Auto Answer Call is automatically accepted by removing the handset from the charging shell on Select Base Select the base 4 retained Lighting Display lighting In Charger on out of the charg ing shell off Screen Pic ture Display in idle stat...

Page 32: ...nal and external calls Internal calls are calls that you make within the range of a communication system forexample within your company you make between networked communication systems for example to differ ent company locations External calls are calls that you conduct with users of the public telephone net work ...

Page 33: ... consult your system administrator in the event of range problems Charging batteries You may only use the charging shell provided for the handset The handset charges when sitting in the charging shell even when deactivated If the handset is active the charging status display flashes on the display If the handset deactivates because the batteries are flat it automatically reacti vates and is ready ...

Page 34: ...uired phone no and correct individual characters as necessary us ing the Delete Display key S Press for 2 seconds Insert a dial pause A P appears between the digits entered You may have to insert a pause forexample between the prefix and the phone number or when checking a mailbox Dial c or d Press the Talk key or Speakerphone key within 30 seconds The user will be called either p The user answers...

Page 35: ...cable If you want to see details on the selected phone number Press the display key either c or d Press the Talk or Speakerphone key briefly The connection is set up or Open the redial menu The menu contains the following functions Æ Page 43 Copy to Directory Automatic Redial Display Number Delete Entry Delete all s t Select the menu item and confirm o Change or complete the phone number for examp...

Page 36: ...call You will receive the callback as soon as the user you want has hung up or the first time he uses his telephone The following appears on your handset display Callback c or d Press the Talk or Speakerphone key briefly The connection is set up Deleting a callback request c or d Press and hold down the Talk key or press the Speakerphone key Call the system menu Select the menu item and confirm Se...

Page 37: ...y key to cancel the callback You are reconnected to the first partner During the consultation you can Book a callback Æ Page 36 Activate call waiting Æ Page 65 or Override Æ Page 67 The consultation is ended and you return to the waiting call either The second station hangs up You are reconnected to the first partner or Call the system menu Select the menu item and confirm You are reconnected to t...

Page 38: ...or to set up a conference Æ Page 69 Rejecting a call If you do not wish to be disturbed you can reject the call Confirm the message displayed with one of the two display keys The call is re jected and the caller hears the busy tone You are connected to the other party s mailbox if configured or can program a callback Æ Page 36 Picking up a call in a call pickup group You can use your handset to pi...

Page 39: ...mes to end the operation Deactivating call forwarding Prerequisite The room monitor function is activated c or d Press and hold down the Talk key or press the Speakerphone key Call the system menu Select the menu item and confirm a Press the On hook key briefly to end the operation Activating or deactivating the keypad lock This feature protects against accidentally pressing buttons when the hands...

Page 40: ...twork The name of the base flashes on the display The handset tries again to synchro nize with the base The intervals between synchronization attempts increase on account of the integrated power saving function You can switch off your handset to save the batteries ...

Page 41: ...orm the other party when you want to activate the speakerphone to let others listen in Switching between speakerphone and handset mode d Press the Speakerphone key The handset switches from speakerphone to handset mode or vice versa The Speakerphone key lights up if speakerphone mode is active It does not light up if speakerphone mode is deactivated and handset mode is activated Setting the speake...

Page 42: ...d at the Bluetooth headset Registering a Bluetooth headset on the handset Set the headset to login mode see the user manual supplied with your headset v Open the handset s main menu u v Select the menu icon and confirm s t Select the menu item and confirm The handset searches for a Bluetooth head set and sets up a wireless connection The name of the devices found are dis played s t Select the requ...

Page 43: ...dset is deactivated You can continue the call directly on the handset De registering the Bluetooth headset at the handset To improve protection against unauthorized tapping de register the Bluetooth headset at the handset if you no longer wish to use it v Open the handset s main menu u v Select the menu icon and confirm s t Select the menu item and confirm The name of the registered or detected Bl...

Page 44: ...ial list is displayed s t Select the required telephone number Press the display key either s t Select the menu item and confirm The telephone number is deleted or s t Select the menu item and confirm The redial list is deleted a Press the on hook key several times to end the operation Adding a telephone number to the redial list During dial preparation you can add a number from your handset s red...

Page 45: ...equired code 3 digits 000 999 Dialing a system speed dialing destination with suffix dialing or a DID number System speed dialing destinations can be saved in your communication system and then dialed by means of suffix dialing or DDIA These speed dialing desti nations let you enter an additional suffix dialing or DID number up to five sec onds after entering the three digit service code If you do...

Page 46: ... Speakerphone key Call the system menu Select the menu item and confirm Select the menu item and confirm Call the first destination Call the next destination Call the additional menu Select the menu item and confirm o Enter the external phone number with external code Save the settings a Press the on hook key several times to end the operation Dialing an individual speed dialing destination c or d...

Page 47: ...ctory The first entry appears If applicable If more than one telephone directory is configured Select the menu item and confirm Finding an entry o Enter the first letters of the name you are looking for The name search begins The search result becomes more precise as each letter is entered i e the num ber of names found is reduced Select the user you want Dialing the entry Confirm your selection T...

Page 48: ...veral times If you want to enter e g an r you need to press the 7 key three times o Enter the name you want to find maximum 16 characters Partial entries are accepted forexample mei for Meier The more characters entered the more precise the search result If configured you can search for first and last names First and last names must be separated by a space Do this by pressing the 0 key Partial ent...

Page 49: ... your cordless Gigaset phone and your PC You can use it to load data from your PC to your Gigaset via data cable or Bluetooth and synchronize con tacts with Microsoft Outlook Microsoft Outlook Express and contacts in Mi crosoft Windows Vista You can save the following contact information for every entry in the phonebook new for vCard format Change search string Change search string Show results In...

Page 50: ...t you could insert a space or a digit before the first letter of the surname These entries then move to the beginning of the phonebook Names with a star in front of them are at the end of the phonebook Finding and dialing an entry s Open the phonebook s t or o Browse to the required entry or enter the first letter of the entry If necessary press a key several times in succession to enter the requi...

Page 51: ...uccession to enter the required letter Press the display key The entry s data is displayed Confirm to return to the list Changing an entry s Open the phonebook s t or o Browse to the required entry or enter the first letter of the entry If necessary press a key several times in succession to enter the required letter either Press the display keys one after the other The entry s data is displayed o...

Page 52: ...ook to other handsets or to the communications system To transfer the phonebook in vCard format via Bluetooth see Æ Page 91 If your handset and the recipient s handset have phone numbers between 1 and 99 you can send or receive a list or entry directly from one handset to the other If the handsets phone numbers start at 100 you must first send the list or entry to the communication system The reci...

Page 53: ...e phone number 00 or 99 c or d Press and hold down the Talk key or press the Speakerphone key Call the system menu Select the menu item and confirm Select the menu item and confirm The handset starts to load the list entry a Press the on hook key several times to end the operation Deleting a list or entry in the communication system Prerequisite A currently unused list or entry is saved on the com...

Page 54: ...g calls using identification codes In the case of calls you make to external partners you can enter and charge the call costs on the basis of individuals customers accounts and private calls forexample by means of account codes The account code ACCT can contain up to 11 characters and is included in the data printout The ACCT is only trans ferred after a call has been completed The ACCT can be ent...

Page 55: ...e Temporary phone function is discontinued again after the call is complete Deactivating the phone number display Your service engineer can deactivate the display of your phone number and name on the called party s display for external outgoing calls You can also acti vate and deactivate the phone number display on your own handset yourself Deactivating the phone number display c or d Press and ho...

Page 56: ...al callers hear the busy tone while external callers reach another telephone defined by the service engineer intercept position Authorized internal callers automatically override the do not disturb after five seconds Activating do not disturb c or d Press and hold down the Talk key or press the Speakerphone key Call the system menu Select the menu item and confirm a Press the on hook key several t...

Page 57: ...e menu item and confirm Select the menu item and confirm a Press the on hook key several times to end the operation Call trace You can apply to your carrier for call tracing on malicious calls An authorized extension is then in a position to request the identification of the phone number This also works for 30 seconds after the malicious caller has hung up However you should not hang up This funct...

Page 58: ...ther c Press the Talk key within 30 seconds You are connected immediately to the door opener or c If more than 30 seconds have passed Press and hold down the Talk key o Enter the internal phone number for the door opener You are connected to the door opener Using the handset to open the door opener during a call Select the menu item and confirm Using the handset to open the door opener without hol...

Page 59: ...onfirm Select the menu item and confirm a Press the on hook key several times to end the operation TDS telephone data service You can use your handset to operate connected computers and their programs forexample access hotel services or information systems This function can also be called by entering the code Æ Page 96 c or d Press and hold down the Talk key or press the Speakerphone key Call the ...

Page 60: ...age 96 Activating a control relay c or d Press and hold down the Talk key or press the Speakerphone key Call the system menu Select the menu item and confirm Select the menu item and confirm o Follow the user guidance system from this point onwards Enter the required switch code 1 4 a Press the on hook key several times to end the operation Deactivating a control relay c or d Press and hold down t...

Page 61: ...ard all incoming calls from the public network through your multiple subscriber number MSN to an external destination There are three types of forwarding Calls are forwarded immediately 1 immediate call forwarding Calls are forwarded after a certain time 2 unanswered calls Calls are only forwarded when the line is busy 3 when busy Activating call forwarding to a trunk c or d Press and hold down th...

Page 62: ...e service engineer standard night service or by you temporary night service When night service is active the night sta tion assumes the function of the intercept station Activating night service c or d Press and hold down the Talk key or press the Speakerphone key Call the system menu Select the menu item and confirm either Select the menu item and confirm Standard night service is configured or o...

Page 63: ...t applica tions Automatic tone dialing is not active During a connection you must first switch to dual tone multifrequency signaling p You are on a call Call the system menu Select the menu item and confirm Select the menu item and confirm o Enter the numbers All entries are sent as DTMF signals Automatic tone dialing is active o Enter the numbers All entries are sent as DTMF signals Parking activ...

Page 64: ... Speakerphone key Call the system menu Select the menu item and confirm Select the menu item and confirm o Enter the parking position number you have noted Menu Service 56 Retrieve call Note If a parked call is not picked up it returns to the station from which it was parked after a certain time recall The following appears on the display Recalling phone no or name or Recalling from phone no or na...

Page 65: ...e call waiting feature informs you about a second call You can answer this second call during the call p You are on a call and hear a call waiting signal If you want to answer the second call you can either place the first call on hold the first caller waits or end the first call Placing the first call on hold and answering the second call Answer the second call Talk to the second caller The first...

Page 66: ...tion Disabling enabling automatic call waiting You can disable enable automatic call waiting signaling for a second call during a telephone conversation Disabling the call waiting tone c or d Press and hold down the Talk key or press the Speakerphone key Call the system menu Select the menu item and confirm Select the menu item and confirm a Press the on hook key several times to end the operation...

Page 67: ...e handset transferring a call transferring a call means that you wish to hand over a call you are conducting on your handset to another user Transferring without announcing the transfer p You can use this function to forward a call which you answered to another user Call the system menu Select the menu item and confirm The current call is placed on hold so that the first user waits o Enter the pho...

Page 68: ...current call is placed on hold so that the first user waits o Enter the phone number of the user to whom the call is to be transferred p The number is dialed The user answers You announce the call presently on hold either a Press the On hook key The user answers the call or Call the system menu Select the menu item and confirm Placing a call on hold You can interrupt a call temporarily if forexamp...

Page 69: ... You can include up to 4 external users in the conference For information purposes you will hear a warning tone every 30 seconds during a conference call can be disabled ask your service engineer Setting up a conference You decide to set up a conference while talking to a user p You are on a call and wish to start a conference Call the system menu Select the menu item and confirm o Enter the phone...

Page 70: ...nference call Call the system menu Select the menu item and confirm The conference is ended Leaving a conference a Press the On hook key You leave the conference When one user leaves the conference the other two users remain connected Viewing the names of conference parties As the convener of the conference you can view the names of all conference parties p You are connected with two or more partn...

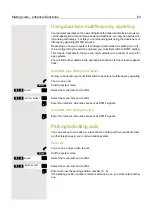
Page 71: ... parties remain in a conference Otherwise the remaining two users conduct a one to one call p You are connected with two or more partners in a conference call Call the system menu Select the menu item and confirm The first party is displayed a Press the On hook key You leave the conference the remaining parties are connected with each other Using the second call function The second call is an inco...

Page 72: ...unt group or group c or d Press and hold down the Talk key or press the Speakerphone key Call the system menu either Select the menu item and confirm You have now left the hunt group or group or Select the menu item and confirm You have now re joined the hunt group or group then a Press the on hook key several times to end the operation You are a member of several groups Leaving and re joining ind...

Page 73: ... Press the on hook key several times to end the operation Ringing group on You can have calls to your handset signaled acoustically on up to five other tele phones The call is received by the person who answers the call first Adding users to a group First user c or d Press and hold down the Talk key or press the Speakerphone key Call the system menu Select the menu item and confirm Select the menu...

Page 74: ...UCD Universal Call Distribution This function enables calls to be distributed in a team An incoming call is always delivered to the team member who has been idle longest Team members can also work in separate rooms forexample on the company s premises and at a teleworking station The teams call distribution groups and team members are set up by the service engineer Logging on off You must log on a...

Page 75: ...and hold down the Talk key or press the Speakerphone key Call the system menu Select the menu item and confirm Select the menu item and confirm Select the menu item and confirm a Press the on hook key several times to end the operation Wrap up time If you need more time than the actual call lasts you can request activate a wrap up time for the last call This can be a fixed length of time or altern...

Page 76: ...ribution destination Night destination on c or d Press and hold down the Talk key or press the Speakerphone key Call the system menu Select the menu item and confirm Select the menu item and confirm Select the menu item and confirm a Press the on hook key several times to end the operation Night destination off c or d Press and hold down the Talk key or press the Speakerphone key Call the system m...

Page 77: ...te the group call function for your handset s line forward the lines of the Mulap group to internal or external destinations Activating deactivating group calls c or d Press and hold down the Talk key or press the Speakerphone key Call the system menu Select the menu item and confirm Select the menu item and confirm either Select the menu item and confirm or Select the menu item and confirm then a...

Page 78: ...irm o Enter the destination number Save the settings a Press the on hook key several times to end the operation Forwarding off c or d Press and hold down the Talk key or press the Speakerphone key Call the system menu Select the menu item and confirm Select the menu item and confirm Select the menu item and confirm o Enter a line number a Press the on hook key several times to end the operation Me...

Page 79: ...m in room These advisory messages are standard texts and may have been changed in your communication system Activating an advisory message c or d Press and hold down the Talk key or press the Speakerphone key Call the system menu Select the menu item and confirm either Select the required advisory message If necessary o Expand the message as necessary Save the settings or Select the menu item and ...

Page 80: ...text messages are standard texts and may have been changed in your communication system Send a text message c or d Press and hold down the Talk key or press the Speakerphone key Call the system menu Select the menu item and confirm o Enter the phone number for the required internal user or the group either Select the required advisory message or Select the menu item and confirm o Enter the require...

Page 81: ...tion messages or voice mails have been received for you Viewing a new message either f Press the message key or c or d Press and hold down the Talk key or press the Speakerphone key Call the system menu Select the menu item and confirm Select the required message and confirm your selection then Call the additional menu Select the menu item and confirm Call the additional menu Select the menu item ...

Page 82: ...ese messages proceed as follows c or d Press and hold down the Talk key or press the Speakerphone key Call the system menu Select the menu item and confirm Select the required message and call the additional menu Select the menu item and confirm Call the additional menu Select the menu item and confirm The time of the message is displayed Call the additional menu either Select the menu item and co...

Page 83: ...he caller list p During a call you can save the other party s phone number in your caller list forexample to remind you to call again later Call the system menu Select the menu item and confirm The caller s phone number is saved Deleting a caller from the caller list u Press INT key Select the menu item and confirm The caller lists for missed and answered calls are displayed Select caller list Sel...

Page 84: ...he on hook key several times to end the operation Deactivating an alarm repeating after a pause The alarm rings for 60 seconds The following appears on the display ì If you do not press anything the alarm repeats after five minutes and then deactivates Note The alarm will only sound with the set melody if the handset is in idle sta tus During a call the alarm is signaled only by a short tone Prere...

Page 85: ...firm The current month s calendar is displayed with the current day marked u v Select and confirm the required day for the new appointment reminder The input mask for entering a new appointment reminder appears s t Select and confirm the menu item or select an existing appointment entry The New Entry option only appears if an appointment entry already exists u v Define settings s Move the cursor d...

Page 86: ...t you want to deactivate Call the additional menu s t Select the menu item and confirm The appointment reminder marked is deacti vated not ticked Save setting a Press the on hook key several times to end the operation Deleting an appointment The handset is in idle status v Open the handset s main menu u v Select the menu icon and confirm s t Select the menu item and confirm The calendar for the cu...

Page 87: ...ings for approx 20 seconds to re mind you of your appointment The entered appointment appears on the display This appointment call is deleted when you confirm it Alternatively it is deleted automatically after it has been repeated 5 times at one minute intervals This function can also be called by entering the code Æ Page 132 Saving an appointment c or d Press and hold down the Talk key or press t...

Page 88: ...to this base You can change the base name that is displayed on the handset at any time v Open the handset s main menu u v Select the menu icon and confirm s t Select the menu item and confirm s t Select the menu item and confirm s t Select the required base and confirm The selected base is ticked Base 1 4 Selecting base n defines one specific HiPath cordless system where the handset is registered ...

Page 89: ...t the menu item and confirm s t Select the menu item and confirm Select the required menu item and confirm Speed dialing As number can be assigned to the number keys Q and 2 to O The num ber is then dialed by pressing the key Configuring speed dialing Q 2 to O Press the required number key briefly If a function has not already been assigned to the key a new number can be as signed to the key Press...

Page 90: ...nect the handset to your PC via Bluetooth Æ Page 91 or a USB data cable Æ Page 19 If you want to use the Bluetooth connection on your PC your PC must have a corresponding dongle Transferring data Launch the Gigaset QuickSync application Now you can Synchronize your handset s address book with Outlook Transfer CLIP images bmp jpg gif from the computer to the handset Transfer images bmp jpg gif as a...

Page 91: ...m s t Select the menu item and confirm The handset searches for Bluetooth enabled devices This can take several minutes If devices are found these are displayed as a list s t Select the required device for example the other handset Press the display key s t Select the menu item and confirm s t Enter the Bluetooth PIN and confirm default 0000 The device is recorded in the list of known devices On t...

Page 92: ...nt to the target device Now follow the instructions on your handset display Deactivating the Bluetooth interface If you are not using the Bluetooth interface for an extended period deactivate it This increases your handset s standby time v Open the handset s main menu u v Select the menu icon and confirm s t Select the menu item and confirm The active Bluetooth function is ticked Confirm to reacti...

Page 93: ...lect the menu item and confirm o Enter the old PIN If a PIN has not yet been set then enter 0000 o Enter the new PIN s Move the cursor down one line o Repeat the new PIN Confirm your entries a Press the on hook key several times to end the operation Battery charging when PIN lock active If the handset has deactivated because the batteries are flat it automatically ac tivates when you place it in t...

Page 94: ...nting unauthorized use in your absence forexample Prerequisite You have defined a personal code or use the default code 00000 Lock handset c or d Press and hold down the Talk key or press the Speakerphone key Call the system menu Select the menu item and confirm o Enter the PIN code 5 digits default 00000 a Press the on hook key several times to end the operation Menu Service 93 Change PIN Note If...

Page 95: ... to prevent unauthorized use If the user has locked his handset and has forgotten the individual password he has set you can unlock the phone again using this function c or d Press and hold down the Talk key or press the Speakerphone key Call the system menu Select the menu item and confirm Select the menu item and confirm Select the menu item and confirm o Enter a user s phone number either Lock ...

Page 96: ... confirm the function or Select the menu item and confirm Select the menu item and confirm Select and confirm the function a Press the on hook key several times to end the operation Calling functions via codes c or d Press and hold down the Talk key or press the Speakerphone key either o Enter code according to table Æ Page 97 or o Enter code according to table Æ Page 97 then a Press the on hook k...

Page 97: ...ork off 403 Available 402 Not available 402 UCD night on 404 UCD night off 404 No of calls 405 Override authorized telephone only 62 Call forwarding for MULAP on 501 Call forwarding for MULAP off 501 Speaker calling 80 Call trace 84 Flex Call 508 Messages Send 68 View sent message 68 Conference on 3 off 3 Call Charge Display 65 Use speed dialing 7 Change Speed Dial 92 Toggle 2 Tone dialing 53 Nigh...

Page 98: ...e PIN 93 Recall to Network flash 51 Language selection 48 Changeover on 66 Changeover off 66 Directory system LDAP 54 Tel data service 42 Timed reminder on 46 Timed reminder off 46 Door release ON 89 Door release OFF 89 Door opener 61 Pickup group 57 Pickup directed 59 Forwarding on 1 Forwarding off 1 Trunk FWD on 64 Trunk FWD off 64 Forwarding after timeout off 495 FWD VAR RNA BOTH on 495 Telepho...

Page 99: ...istered Register handset Intervals between synchroniza tion attempts are too long Switch off the handset and switch it back on again No ringtone on the handset Ringer is deactivated Activate ringer Do Not Disturb is activated Deactivate Do Not Disturb Nothing audible during a call The R key was pressed the microphone and the earpiece inset are muted Press the Delete display key to re activate the ...

Page 100: ...ch as knives or tools etc We recommend using a protective pouch Æ Page 101 The following appears Currently not accessible Function is currently not avail able Wait and try again later No connection available under the phone number dialed Enter the phone number correct ly or call the attendant console The following appears Not possible or Incorrect input or Nothing stored Speed dial number not avai...

Page 101: ...er Technical data Charging shells Accessories Only use original accessories This will help you avoid injury and property damage and you can ensure that all relevant regulations are observed Maximum sound pressure level as per TBR10 Annex D less than 118 dB a Operating and charging times Æ Page 17 Permissible ambient conditions for opera tion 5 C to 45 C 20 to 75 relative humidity Weight incl batte...

Page 102: ... observed The device complies with the basic requirements of the R TTE Directive and therefore displays the CE symbol Extract from original declaration We declare that the product Gigaset S4 professional S30852 H2156 R to which this declara tion relates conforms to the following European Directives and European standards Directive 99 5 EEC Radio and Telecommunication Terminal Equipment The Declara...

Page 103: ...Battery tone function 31 setting 22 Bluetooth 42 Bluetooth interface 91 C Call answering group 38 Call charge display 57 Call charges 57 Call forwarding 39 Call forwarding to a fixed destination 39 Call pickup group 38 Call trace 57 Call waiting 65 Automatic 66 Call waiting tone off on 66 Callback 36 Caller list 83 Calls Anonymous 55 answering 38 directed transfer 56 making 34 dialing a phone numb...

Page 104: ...6 Door release activating 59 deactivating 59 E Earpiece inset 5 Entering codes 96 Entrance telephone 58 Entry changing 51 deleting 44 52 dialing 35 44 50 saving 50 searching for 51 Viewing 51 Entry sending 52 EU directives 102 Everyday dirt 100 External call forwarding 61 F Function keys 10 Functions and codes 97 G Group call Activating deactivating 72 Group functions 72 H Handset locking unlockin...

Page 105: ...key 5 10 On hook key 5 10 Opening closing battery compartment 16 Override 67 P Parking 63 Parts of the device 5 Phone number changing 51 dialing 34 dialing from the phonebook 50 saving 50 suppressing 55 Phonebook handset 49 LDAP 48 System 47 Phonebook entries sorting 50 Phonebook copying 52 Picking up a call 38 PIN 33 93 94 95 Placing a call on hold 68 Prefixes converting 29 Programming keys quick...

Page 106: ...g parties 69 System speed dialing 45 System speed dialing individual 46 T Talk key 5 10 TDS telephone data service 59 Technical data 101 Telephone blocking 94 Telephone conference 69 Telephone lock 94 95 Telephone volume 21 Temporary phone 55 Text message 80 Time setting 27 Toggle 69 Tone dialing 63 Tones 22 Transfer 67 Transfering 67 Transfering a call 67 Troubleshooting 99 U UCD night service 76...

Reviews: