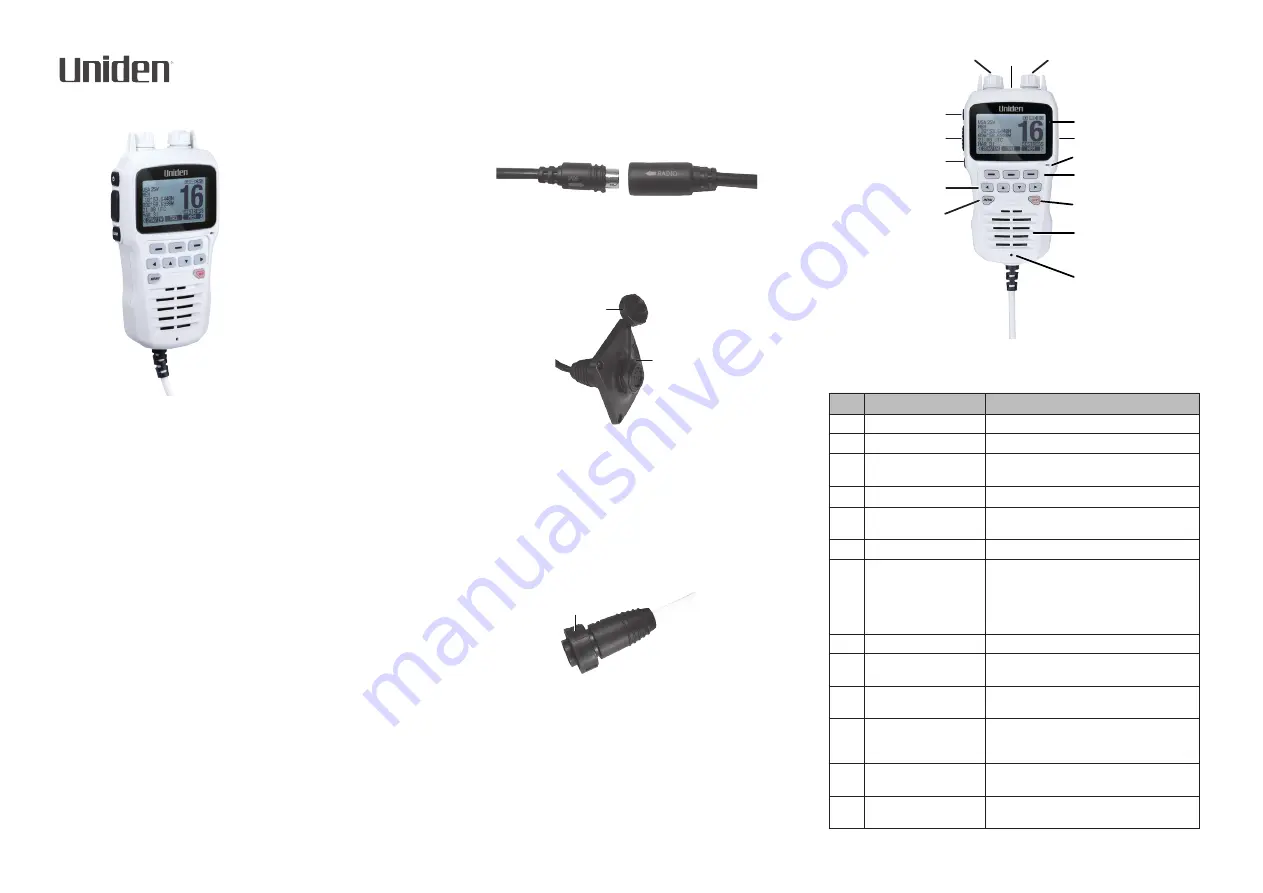
UMRMIC
UMRMIC (BK)
Remote Microphone
OWNER’S MANUAL
Thank you for purchasing Uniden’s UMRMIC remote station microphone.
It is designed and engineered to provide fully remote control of Uniden’s
UM725, UM725G, and UM725GBT marine radios, including channels, DSC
distress. NOAA weather channels, and more. It also provides an intercom
function between the remote microphone and the radio at the primary
station.
The UMRMIC kit comes with a 23-foot extention cable. The UMRMIC can
also be extended to over 70 feet using 2 optional 25-foot cables. Contact a
Uniden representative for further information.
At Uniden, we’ll take care of you! If you need any assistance with this
product, please visit our website at www.uniden.com.
HARDWARE
The following hardware is included in your UMRMIC kit:
• UMRMIC microphone with attached coiled cable
• 23-foot extension cable
• Mounting bracket and screws
• Protective cap for remote mic jack
• Hex nut
INSTALLING THE MICROPHONE
1. Determine where the remote microphone will be located (secondary
station). Place the remote microphone cable base at that location and
mark the screw holes and cable access hole. Remove the cable base.
2. Drill the cable access hole (and pilot holes for the screws if desired).
CAUTION: Be careful when drilling the holes; the type of surface being
drilled into may require special treatment to avoid cracking or splitting.
3. Run the cable from the primary station to the secondary station as
determined in Step 1. Secure the cable as needed.
4. Align the 23-foot routing cable 8-pin connector labeled “RADIO
→
” to
the radio’s 8-pin connector labeled “
←
RM.” Connect the cables.
5. Replace the cable base and insert and tighten the screws.
6. Insert the cable through the access hole from the back. Insert the rubber
cap and hexagonal nut.
NOTE: Keep the cap closed when the microphone is not connected.
Protective
Cap
Hexagonal
Nut
7. Securely tighten the hexagonal nut.
CAUTION: Do not over-tighten the hexagonal nut; it should fit snugly.
Over-tightening it could cause it to break.
8. Insert the microphone cable’s 8-pin connector into the routing cable.
Tighten the microphone cable’s round nut, making sure it is a snug fit
and not too tight.
WARNING: Do not connect or disconnect the microphone when the radio
is turned on. The radio should be turned off.
Microphone cable
round nut
9. Turn on power to the radio; the UMRMIC also turns on.
OPERATING THE MICROPHONE
The UMRMIC operates the same as the UM725 marine radio series with the
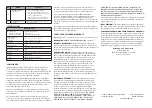
exception of key placement. The following illustration and table define the
microphone keys and other operational elements and their purpose.
NOTE: Since the microphone’s directivity is sharp in order to reduce
ambient noise, speak directly into the front of the microphone hole.
1
13
11
10
9
8
7
6
5
4
3
2
14
15
12
NOTE: Refer to the applicable UM725 Owner’s Manual for operation
details.
NO.
NAME
PURPOSE
1
VOLUME
Turn to raise and lower volume.
2
POWER
Press to turn power on and off.
3
PUSH-TO-TALK
Push and hold button to speak into mic.
Release to listen.
4
CLEAR
Press to return to the main screen.
5
LEFT/UP/DOWN/RIGHT
SELECTION
Press to scroll through menus and move
through screen selections.
6
MENU
Press to display the Main Menu.
7
DRAINAGE HOLE
Should water get into the unit, it will drain
through this hole.
NOTE: Refer to the UM725 Owner’s Manual
for procedures for how to properly drain the
microphone.
8
SPEAKER
Listen to responses and alerts, etc.
9
16/P
Cycles through the current channel, channel
16, and any priority channels.
10
SOFT KEY SELECTION
Press button corresponding to soft key on the
screen to access that menu.
11
MICROPHONE
Hold the microphone element approximately
2 inches in front of your mouth to be sure your
transmission is clearly understood.
12
USB PORT
Remove cover and insert USB plug to update
the microphone’s firmware as required.
13
LCD SCREEN
Displays menus, channel numbers, and other
information.


