background image

9

Installing the BCT8

For Home Use (Desktop Installation)

1. Insert the DC plug end of the AC Adapter into the DC 12V jack on the rear panel.

2. Plug the AC Adapter into a standard 120V AC wall outlet.

3. Plug the Telescoping Antenna into the ANT connector.

Extend the antenna to its full height. For frequencies higher than 406 MHz, shortening
the antenna may improve the reception.

4. Use the desktop stand for a better viewing and operating angle.

Helpful Hints

• If strong interference or electrical noise is received, relocate the scanner or its antenna

away from the source.

• If you are operating the scanner in a fringe area or need to improve reception, use an

optional antenna designed for multi-band coverage. (You can purchase this type of
antenna at a local electronics store.)

• If the optional antenna has no cable, use 50-70 ohm coaxial cable for lead-in. A mating

plug may be necessary for the optional antennas.

For Mobile Use (In-Car Installation)

Installation for Temporary Use:

A Cigarette Lighter Power Cord is provided for easy, temporary installation.

Warning:

Do not use the cigarette lighter power cord in a positive ground vehicle.

Plug one end of the Cigarette Lighter Power Cord into the cigarette lighter jack and the other
end into the DC 12V jack on the back of the scanner.

Connecting the Antenna Plug

Connect the mobile antenna plug into the ANT connector on the rear panel. (For more
information on antenna installation, please refer to the instruction guide that came with your
antenna.)

The BCT8 can be mounted using the supplied mounting bracket.

1. Select an ideal location in your vehicle to mount the BCT8. Avoid a location that could

interfere with your driving. In a passenger car, the ideal location is underneath the
dashboard on the passenger side.

2. Use the supplied mounting bracket as a template for marking the location of the

mounting screws. Note: If there are screws already holding the dashboard, you can use
the same screw holes to mount the bracket.

Summary of Contents for BCT8

Page 1: ......

Page 2: ...duct in any way other than as detailed by this Operating Guide could void your authority to operate this product The screen displays used in this manual are representations of what might appear when y...

Page 3: ...able 13 Scanning Overview 14 Turn the Scanner On 14 How Squelch Works 15 Setting the Squelch 15 Highway Patrol Scanning 16 Selecting the State 16 Scanning Highway Patrol Frequency 16 Highway Patrol Sc...

Page 4: ...ity in Trunking Mode 37 Moving between Scan List Memories 37 Multi Track 38 EDACS Reception 39 EDACS Tracking 39 Programming EDACS System Frequencies 39 An EDACS Trunked system 40 Special EDACS Featur...

Page 5: ...w identifies the scanner band numbers the frequency range the modulation mode and the default step size settings 1 2 3 4 5 6 7 8 9 10 11 12 13 AM FM FM FM AM FM FM FM FM FM FM FM FM 5kHz 5kHz 5kHz 5kH...

Page 6: ...T push FLASH MUTE ALERT 7 RMT 2 51 100 5 201 250 8 0 3 101 150 6 9 E M LOCK HOLD RESUME 12 13 4 2 3 1 5 6 7 8 9 10 11 19 20 18 17 16 1415 21 Antenna Connector ANT 22 External Speaker Jack EXT SP 23 DC...

Page 7: ...list number 12345 8 Remote control mode RMT 9 Memory locked M LOCK 10 Highway Patrol scan mode HWY 11 Private bank scan mode PVT 12 Police scan mode POL 13 Weather scan mode WX 14 Fire and Emergency...

Page 8: ...the scanning cycle resumes until another transmission is received What is Searching The BCT8 can search each of its 13 bands to find active frequencies This is different from scanning because you are...

Page 9: ...reak during the conversation you re monitoring it s possible that the talkgroup will be assigned to a completely different frequency in the trunked system This type of scanning is difficult and frustr...

Page 10: ...and 800 MHz 5 Banks 5 banks with 50 channels each are useful for storing similar frequencies to maintain faster scanning cycles or for storing all the frequencies of a trunked system 25 MHz 956 MHz In...

Page 11: ...your area contact one of the following Scanner Master 1 800 Scanner 722 6637 Hours are from 10 00 a m to 5 00 p m Eastern Time Monday through Friday frequencies scannermaster com To obtain another cop...

Page 12: ...mmediately contact your place of purchase or Uniden Customer Service at 800 297 1023 8 00 a m to 5 00 p m Central Time Monday through Friday Optional Accessories The following optional accessories for...

Page 13: ...r the optional antennas For Mobile Use In Car Installation Installation for Temporary Use A Cigarette Lighter Power Cord is provided for easy temporary installation Warning Do not use the cigarette li...

Page 14: ...h battery terminal positive or negative is grounded to the engine block or chassis Most of today s vehicles use a negative ground If your vehicle has a negative ground follow Steps 2 and 3 Otherwise s...

Page 15: ...8 x 176 5 x 152 5 mm Caution Be sure to avoid obstructions behind the mounting surface Follow these steps to mount the scanner in your vehicle 1 Choose a mounting location then use the supplied mounti...

Page 16: ...ner s DC 12V jack The supplied DC power cord meets these specifications Using a power cord that does not meet these specifications could damage the scanner or the adapter Always connect the adapter or...

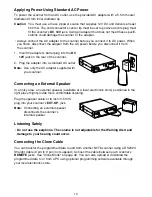
Page 17: ...t Note Use only the AC adapter supplied with your scanner Connecting an External Speaker In a noisy area an external speaker available at a local electronics store positioned in the right place might...

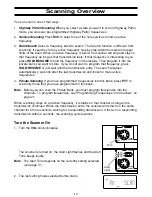
Page 18: ...earch resumes automatically 2 seconds after the last transmission and looks for more active frequencies 4 Private Scanning If you have programmed frequencies into this bank press PVT to scan only thos...

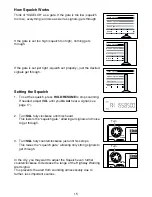
Page 19: ...se until hiss heard This lowers the squelch gate allowing all signals and noise to get through 3 Turn SQL fully counterclockwise just until hiss stops This raises the squelch gate allowing only strong...

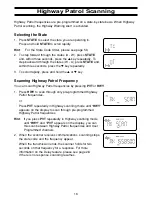
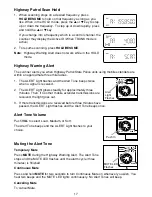
Page 20: ...ing Highway Patrol Frequency You can scan Highway Patrol frequencies by pressing PVT or HWY 1 Press HWY to scan through only pre programmed Highway Patrol frequencies or Press PVT repeatedly in Highwa...

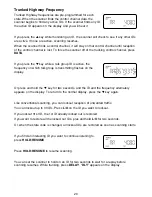
Page 21: ...ed 2 The ALERT Light glows steadily for approximately three minutes Then if no other mobile extender transmissions are received the light goes out 3 If more transmissions are received before three min...

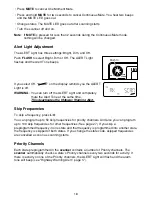
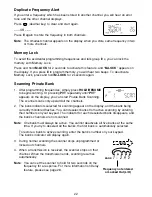
Page 22: ...same time This deactivates the Highway Warning Alert Skip Frequencies To skip a frequency press L O You can program up to 50 skip frequencies for priority channels And also you can program up to 100 s...

Page 23: ...nd aircraft to car operations Mobile extenders re transmit every radio broadcast received on the patrol car radio to the officer s walkie talkie at low power Every time any officer or dispatcher talks...

Page 24: ...ich talk group is transmitting flashes on the display Or press and hold the key for two seconds and the ID and the frequency alternately appears on the display To return to the normal display press th...

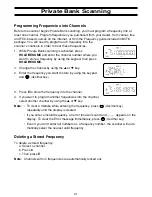
Page 25: ...the channel by using the or key 2 Enter the frequency you want to store by using the keypad and decimal key 3 Press E to store the frequency into the channel 4 If you want to program another frequenci...

Page 26: ...can start Private Bank Scanning The scanner scans only upward all the channels 2 The bank indicators selected for scanning appear on the display and the bank being currently monitored flashes You can...

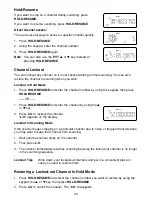
Page 27: ...ess HOLD RESUME OR 1 Press HOLD RESUME and enter the channel by using the or key 2 Press L O to lockout the channel L O appears on the display Lockout in Scanning Mode If the scanner keeps stopping on...

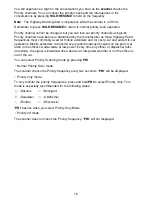
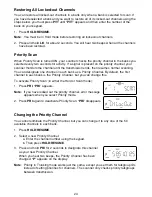
Page 28: ...hannel in each bank as a Priority Channel By default the first channel in each bank is the Priority Channel but you can change this To activate Priority Scan in either the Hold or Scan mode 1 Press PR...

Page 29: ...rvice is displayed 3 After a three second delay scanning begins If you want to start scanning immediately press HOLD RESUME Notes Press HOLD RESUME at any time to hold the frequency Press the or key t...

Page 30: ...speed up to 300 steps per second for bands having 5 kHz steps Turbo Search While searching you can change the search direction by using the or key Make sure which of icon SRCH or SRCH appears on the...

Page 31: ...pause momentarily on an unwanted signal but will resume searching in two or three seconds The Data Skip feature is active as well as Scan mode and Service Search mode Data Skip does not function duri...

Page 32: ...After storing the frequency it moves to the Search Hold mode If there is no free channel the frequency you want to store will automatically be stored in the first channel in the selected bank 4 Press...

Page 33: ...la Type II 800 however you can change this if the system in your area is different The types of systems are discussed below The frequencies for many of the trunked public safety systems are listed in...

Page 34: ...or example if you are programming Bank 4 you can only select channels 151 200 with the or key IMPORTANT If you are programming an EDACS trunked system you must enter the frequencies in a specific orde...

Page 35: ...n to the previous menu screen press HOLD RESUME in the Trunk Programming mode Programming Talk Group ID Scan Lists Scan Lists Each bank of your BCT8 can be a trunk tracking bank and it can be a conven...

Page 36: ...by using the keypad ID Block number Fleet number decimal key Subfleet number 2 Press E To enter a Full EDACS ID 1 Enter the Agency number 2 Press decimal key for the dash 3 Enter the Fleet number and...

Page 37: ...r you can manually specify a talkgroup with DIRECT ENTRY in ID HOLD ID LOCKOUT works with Search and Scan to exclude talkgroups that you don t want to hear ID DELAY works with each talkgroup to be del...

Page 38: ...all the frequencies for a trunked system Search will let you immediately start hearing transmissions When in the Trunking mode press SRCH and the scanner begins to find any active IDs When the scanner...

Page 39: ...ntinue listening to it Press HOLD RESUME to stop the search If you want to listen to a specific ID while in Hold mode Use the keypad to enter the ID you want and press the key If you want to resume se...

Page 40: ...mple prevent Search from stopping on any of hundreds of talkgroups in the Utilities agency You can do this with just a few key presses To use this mode just enter the Agency part or the Agency Fleet p...

Page 41: ...or 2 seconds in ID Scan Hold mode After you ve set up your Scan List press PRI to activate it It s very similar to conventional priority although there is no interrupt during the transmissions Priorit...

Page 42: ...s for up to 1 second If it finds no activity on your programmed talkgroups it moves on to conventional channels in the same bank or to the next active bank If the scanner finds a talkgroup in one of y...

Page 43: ...en the thirteen system frequencies Notice how the dotted line shows talkgroup 02 023 moving from channel to channel Your BCT8 can clearly and automatically follow this talkgroup or any other as you se...

Page 44: ...lude nearby related channels in the same Fleet or Agency You can just as easily exclude entire unwanted Fleets and Agencies When in Search mode with the system frequencies programmed and your scanner...

Page 45: ...can use this feature to translate decimal talkgroups lists to the much more powerful AFS format Examples of how you might use AFS are shown above in the description of an EDACS trunked system and else...

Page 46: ...umbers These numbers are in the form AHHUUU where A Area code 0 or 1 H Home repeater 01 through 20 U User ID 000 through 254 When the scanner receives a transmission on a channel set to the LTR mode i...

Page 47: ...atabase instead of reprogramming individual radios Another difference between the systems is that Type I systems are arranged in a Fleet Subfleet hierarchy For example its possible for a city using a...

Page 48: ...rogram your own Fleet Map Selecting Preset Fleet Map 1 Press and hold TRUNK for 1 5 seconds and select the bank you want to change 2 Use the or key to select Type 1 system then press E 3 Use the or ke...

Page 49: ...Motorola VHF UHF Trunked Systems To properly track Motorola VHF and UHF trunked systems you must enter what is known as the Base Spacing Frequencies and Offset Channels for each system To find these o...

Page 50: ...g system 1 Press and hold TRUNK for 1 5 seconds and select the bank you want to change 2 Use the or key to select Motorola TYPE2 800MHz Motorola Type2 VHF or Motorola Type2 UHF then press E 3 Use the...

Page 51: ...n then either search the system to find new IDs or you can program IDs into memory and then scan them The Control Channel Only feature is an extremely powerful tool You can use it to determine if syst...

Page 52: ...the RS232C straight cable into the remote port which is on the rear of the scanner Plug the other end of the cable DB 9 serial connector into a personal computer s serial port A few PC s may require...

Page 53: ...Time Monday through Friday scanner uniden com PC Control Parameter For your information Transfer speed 9600 19200 38400 57600 bps adjustable Start Stop bit 1 bit 1 bit Data Length 8 bit Parity Check...

Page 54: ...anners turn the radios ON Prepare each scanner for clone mode as follows After connecting the two scanners make sure the scanners are turned off 1 While you press and hold E turn the radio on for each...

Page 55: ...complete displays If the data transfer is not successful the following error message will appear Note To clear press decimal key Note Once you have completed the cloning of the scanners reset the scan...

Page 56: ...le a higher elevation may provide better reception Cleaning Disconnect the power to the unit before cleaning Clean the outside of the scanner with a mild detergent To prevent scratches do not use abra...

Page 57: ...1 Check the antenna connection 2 Move the scanner 3 You may be in a remote area which could require an optional multi band antenna Check with your dealer or local electronics store 1 Adjust squelch th...

Page 58: ...e squelch for Trunking mode refer to page 29 2 Missing the frequency used for the data channel Check your frequency list 1 Change a Type 1 scanner setup Review Fleet Map Programming on page 44 2 Try a...

Page 59: ...450 MHz 70 cm Amateur Band 450 470 MHz UHF Standard Band 470 512 MHz UHF T Band 806 956 MHz 800 Band Operating Temperature 20 C to 60 C 4 F to 140 F Scan Rate 100 channels per second conventional mod...

Page 60: ...ana Kansas Kentucky Louisiana Massachusetts Maryland Maine Michigan Minnesota Missouri Mississippi Montana North Carolina North Dakota Nebraska New Hampshire New Jersey New Mexico NO Code State Name N...

Page 61: ...SIZE CODE 4 SIZE CODE 12 SIZE CODE 12 SIZE CODE 4 SIZE CODE 4 SIZE CODE 4 SIZE CODE 4 Block 1 0 2 3 4 5 6 7 E1P7 Size Code SIZE CODE 10 SIZE CODE 10 SIZE CODE 11 SIZE CODE 4 SIZE CODE 4 SIZE CODE 4 S...

Page 62: ...SIZE CODE 3 SIZE CODE 3 SIZE CODE 11 SIZE CODE 4 SIZE CODE 4 SIZE CODE 0 SIZE CODE 0 SIZE CODE 0 Block 1 0 2 3 4 5 6 7 Size Code SIZE CODE 4 SIZE CODE 4 SIZE CODE 4 SIZE CODE 11 SIZE CODE 11 SIZE COD...

Page 63: ...three digits identify which Fleet is active and the last digit s identifies the Subfleet Your task is to program your fleet map with the same size code assignments as the trunked system If you do this...

Page 64: ...mpted for the next available block when programming a Fleet Map For example if you assign Block 0 as an SIZE CODE 12 you will be prompted for Block 2 the next block available instead of Block 1 And if...

Page 65: ...61 MEMO...

Page 66: ...62 MEMO...

Page 67: ...or or its representatives in connection with the performance of this warranty Warrantor at its option may replace the unit with a new or refurbished unit THE LIMITED WARRANTY SET FORTH ABOVE IS THE SO...

Page 68: ......

Reviews: