


Instruction for use (rev 141119)
e.ON 200 NEO / e.ON 250 NEO
UGIN DENTAIRE
10
4.
INSTALLATION AND START-UP
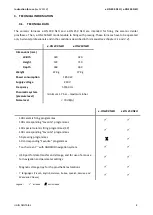
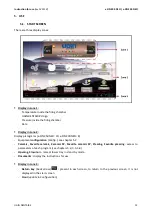
4.1.
UNPACK
Unpack e.ON 200 NEO / e.ON 250 NEO and check that it is in perfect order (furnace and accessories)
Any defects can be reported to the carrier
Remember to get the carrier to sign the delivery note
NOTE: keep the original packaging to transport the furnace (see chapter 3.2)
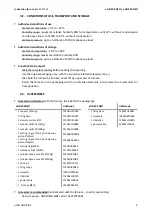
4.2.
INSTALLATION
Install in a room aired. Observe the conditions indicated in chapter 3.2
Place the furnace on a level and aired surface. Keep a distance from other objects around not less than
10 or 15 cm. Keep it away from heat sources (for example, radiators and/or other equipment that
release heat). Avoid vibrations and shocks
Do not install in a place with explosion hazard
Its forbidden placing inflammables, toxic, volatile or explosives around the furnace
Place the vacuum pump near to the furnace
This unit requires its own power line and has to be connected to a circuit breaker.
Grounding is mandatory to avoid accidents and the dangers of overheating the power line.
Due to the power of furnace: connect it directly to the mains, do not use multiple sockets (risk
of electrical interference)
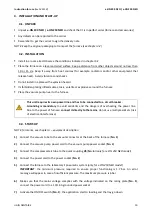
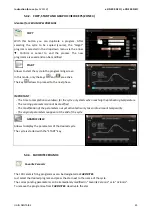
4.3.
START-UP
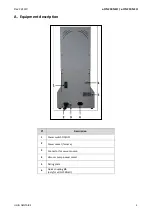
NOTE: for marks, see chapter A – equipment description
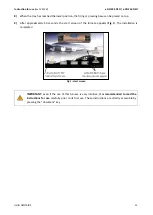
1)
Connect the vacuum tube to the vacuum connector at the back of the furnace (No. 3)
2)
Connect the vacuum pump power cord to the vacuum pump power socket (No. 4)
3)
Connect the compressed-air tube to the quick coupling Ø6 (No. 6) (only for e.ON 250 NEO model)
4)
Connect the power cord to the power socket (No. 2)
5)
Connect the furnace to the laboratory’s pneumatic system (only for e.ON 250 NEO model)
IMPORTANT: the minimum pressure required to ensure proper functioning is 1.7 bar. An error
message will appear in case of insufficient pressure. The maximum pressure is 6 bar
6)
Make sure that the mains voltage complies with the voltage indicated on the rating plate (No. 5),
connect the power cord to a 10/16 A grounded power socket
7)
Activate the ON/OFF switch (No. 1): the application start to loading and the tray go down
Summary of Contents for e.ON 200 NEO
Page 2: ......


