www.beer-co.com
39
AURORA
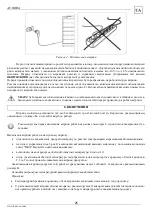
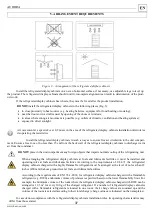
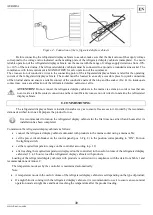
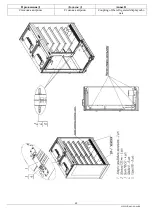
Figure 4 – Connection of the refrigerated display cabinets
Before connecting the refrigerated display cabinets to a socket, make sure that the limit values of the supply voltage
correspond to the voltage value indicated on the marking plate of the refrigerated display cabinets (nameplate). To ensure
reliable operation of the refrigerated display cabinets, use the mains with the range of voltage supply deviations from -10%
to +10 % of the rated value. The refrigerated display cabinets must be connected to a properly grounded mains socket. The
compliance with this requirement is MANDATORY for safe operation of the equipment.
The cross-section of conductive wires to the connecting point of the refrigerated display cabinets is rated for the operating
current of the refrigerated display cabinets. The socket must be located in an easily accessible place for quick connection
of the product and must ensure a reliable contact of the conductive parts of the plug and the socket (Fig. 4). An inadequate
contact may cause a malfunction of the refrigerated display cabinets or a fire.
ATTENTION!
Do not connect the refrigerated display cabinets to the mains via extension cords or tees that can
not provide a reliable contact connection and have insufficient cross-section of wires for operating the refrigerated
display cabinets.
8. COMMISSIONING
The refrigerated display cabinets is installed in such a way as to ensure free access to it. Guided by the recommen-
dations described in Annex B, prepare the product for use.
It is recommended to turn on the refrigerated display cabinets for the first time no earlier than 4 hours after its
installation has been completed.
Commission the refrigerated display cabinets as follows:
•
connect the refrigerated display cabinets unloaded with products to the mains socket using a mains cable;
•
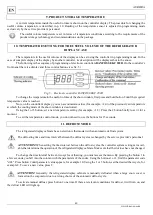
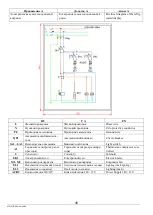
set the power circuit-breaker on the control panel (pos. 6 Fig. 2) to the position corresponding to “ON”. Turn on
the lighting switch;
•
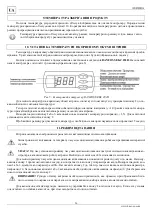
set the required temperature range on the controller according to p. 10;
•
after reaching the required temperature (displayed on the controller) in the useful volume of the refrigerated display
cabinets (1,5 to 2 hours), load the refrigerated display cabinets with products.
Loading of the refrigerated display cabinets with products is carried out in compliance with the data from Table 1 and
recommendations of Annex C.
The temperature mode set by the controller is maintained automatically.
Note:
•
A temperature mode in the useful volume of the refrigerated display cabinets is set depending on the type of product;
•
If a night blind is coming with the refrigerated display cabinets, it is recommended to use it to ensure an economical
operation mode at night time and faster reaching the temperature after the product loading.
Summary of Contents for AURORA
Page 1: ......
Page 4: ...4 www beer co com AURORA...
Page 7: ...www beer co com 7 AURORA 3 2 1 2 3 4 5 6 7 8 9 10 11...
Page 8: ...8 www beer co com AURORA 4 IEC 60529 2013 IEC 61140 2012 80 100...
Page 9: ...www beer co com 9 AURORA 5 3 3 0 2 15 UL 471 18 450...
Page 11: ...www beer co com 11 AURORA 4 10 10 4 8 4 6 2 10 1 5 2 1...
Page 13: ...www beer co com 13 AURORA 12 3 3 3...
Page 14: ...14 www beer co com AURORA 13 4 4 6...
Page 15: ...www beer co com 15 AURORA 15 3 16 25 55 80 16 www beer co com...
Page 18: ...18 www beer co com AURORA...
Page 21: ...www beer co com 21 AURORA 3 2 1 2 3 4 5 6 7 8 9 10 11...
Page 22: ...22 www beer co com AURORA 4 IEC 60529 2013 IEC 61140 2012 80 100...
Page 23: ...www beer co com 23 AURORA 5 3 3 0 2 15 UL 471 18 450...
Page 25: ...www beer co com 25 AURORA 4 10 10 4 8 4 6 2 10 1 5 2 1...
Page 27: ...www beer co com 27 AURORA 2 12 3 3 3...
Page 28: ...28 www beer co com AURORA 13 4 4 6...
Page 29: ...www beer co com 29 AURORA 15 3 16 25 55 80 17 www beer co com...
Page 48: ...48 www beer co com Annex D Coupling of the refrigerated display cabi nets...
Page 49: ...www beer co com 49...
Page 50: ...50 www beer co com...
Page 51: ...www beer co com 51...

