INSTRUCTION MANUAL
JUG KETTLE WITH TEA STRAINER
SAVE THESE INSTRUCTIONS!
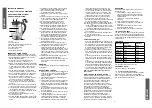
PRODUCT DESCRIPTION
3
6
4
7
1
5
2
1. Cover
2. Soft Eject Button
3. ON/OFF & Temperature control Switch
4. MAX Water Level Indicator
5. Cordless Power Base
6. 360° Connector
7. Detachable tea strainer
IMPORTANT SAFEGUARDS
When using your kettle, basic safety precautions
should always be followed, including the following:
1. Read all instructions carefully, even if you are
familiar with the appliance.
2. Close supervision is necessary when any
appliance is used by or near children.
3. Before connecting the kettle, check if the voltage
indicated on the appliance corresponds with the
mains voltage in your home. If this is not the
case, contact your dealer and do not use the
kettle.
4. Switch off and unplug from the outlet before
filling, emptying or cleaning, or when not in use.
5. Do not overfill as boiling water may be ejected.
The maximum level is marked on the kettle.
6. Do not operate or place any part of this
appliance on or near any hot surface (such as
gas or electric burner or in a heated oven).
7. Do not let the cord hang over the edge of a
table or counter. Do not let the cord touch hot
surfaces.
8. Never yank on the cord as this may damage the
cord and eventually cause a risk of electric shock.
9. If the supply cord of this appliance is damaged,
it must only be replaced by a repair shop
appointed by the manufacturer, because special
purpose tools are required.
10. Avoid touching hot kettle surfaces - use the
handle and the knobs.
11.
To avoid possible steam damage, turn the spout
away from walls or cabinets when operating the
kettle.
12. If operated on wood furniture, use a protective
pad to prevent damage to delicate finishes.
13. To avoid scalding, always ensure the lid is
correctly positioned before operating.
14. Scalding may occur if the lid is removed whilst
heating.
15. Extreme caution must be used when moving the
kettle containing hot water. Never lift the kettle
by it’s lid. Always use the body handle.
16. Do not switch your kettle on if it is empty.
17. To protect from electrical hazard, do not
immerse this kettle or cordset in any liquid.
18. Use the kettle only with the supplied base unit.
Do not use the base unit for other purposes.
19. To protect against fire, do not operate in the
presence of explosive and/or flammable fumes.
20. A kettle should not be left connected to a wall
socket when the room temperature is likely to
fall to outdoor winter temperatures. At sub-zero
temperatures the automatic control thermostat
may reset to boil and energize the element.
21. Do not use the kettle for any purpose other
than heating water. Other liquids or food will
contaminate the interior.
22. This product has not been designed for any
other uses than those specified in this manual.
23. This appliance is not intended for use by
persons (including children) with reduced
physical, sensory or mental capabilities, or lack
of experience and knowledge, unless they have
been given supervision or instruction concerning
use of the appliance by a person responsible for
their safety.
24. Children should be supervised to ensure that
they do not play with the appliance.
25. Repairs and other work undertaken on the unit
must only be done by authorised specialist
personnel!
WARNING:
Compare the local voltage with the voltage declared
on the device.
NSTRUCTIONS FOR USE
1. Before first use, fill the kettle with clean water to
maximum capacity and boil (p
ress the
button
1x, the water boils up to 100°C)
. Discard the
water and repeat.
2. The kettle should always be unplugged when
filling or adding water.
3. Fill the kettle with water to the desired level. Do
not overfill or there will be a risk of spillage or
spitting. Do not forget to close the lid after filling,
otherwise the kettle will not automatically switch
off after use.
4. Do not fill with less than 0.5 litre of water (up to
„MIN“ indication) to prevent the kettle runnning
dry while operating.
5. Do not fill with more than 1.8 litres of water (up
to „MAX“ indication).
6. An automatic safety cut-out has been fitted for
protection against overheat ing. It will operate
if the kettle is switched on when containing
insufficient water. Always ensure that the water
inside the kettle covers the minimum mark.
If the automatic safety cut-out has operated,
disconnect from the power outlet and allow the
kettle to cool down for 5 to 10 minutes. Then
refill with water and switch on - the kettle will
then boil and cut off as in normal operation.
7. Place the power base on a dry flat surface.
8. Place the kettle on the power base. The
electrical connections will be made automatically
as the kettle slides onto the power base.
9. Plug the cordset into an earthed power socket.
10. Press the
button. The electric kettle heats up
to 100°C and brings the water to the boil. After
the water has boiled, the indicator turns off. After
the water has boiled the indicator turns off.
11. When the water has boiled, the kettle will switch
off automatically.
12. Do not remove the kettle from the power base
without switching off first.
13. To pour water, lift the kettle from the power base
and pour.
ADVANCED OPERATION:
1. Press and hold the
button for 3 seconds; the
electric kettle heats up to 100°C and initiates the
warming mode. The red indicator light switches
on after the water has boiled. The electric kettle
maintains the water temperature at 85°C for 2
hours. The indicator light remains on.
2. Press the
button once, the indicator light of
60°C turns on green. The heating element will
switch off when the water temperature reaches
60°C.
Press the
button twice, the indicator light of
70°C turns on blue. The heating element will
switch off when the water temperature reaches
70°C.
Press
for 3 times the indicator light of 80°C
turns on yellow. The heating element will switch
off when the water temperature reaches 80°C.
Press
for 4 times the indicator light of 90°C
turns on purple. The heating element will switch
off when the water temperature reaches 90°C.
After use, please remove the plug from the
power outlet.
HOW TO CARE FOR YOUR KETTLE
Wipe the exterior of the kettle with a soft, damp
cloth or sponge. Remove stubborn spots with a
cloth moistened with mild liquid detergent. Do not
use abrasive
scouring pads or powders. Never
immerse the kettle in water or other liquids.
From time to time depending on the nature of
your water supply, a lime scale deposit is naturally
formed and can be found mostly adhered to
the heating element and reduces the heating
capacity. The amount of lime scale deposited (and
subsequently the need to clean or descale) largely
depends on the water hardness in your area and
the frequency with which the kettle is used.
Limescale is not harmful to your health. But if
poured into your beverage, it can give a powdery
taste to your drink. Therefore, the kettle should be
descaled periodically as indicated below:
DESCALING
Descale the kettle regularly. With normal use, at
least twice a year.
1. Fill the kettle up to „MAX“ with a mixture of
one part ordinary vinegar and two parts water.
Switch on and wait for the appliance to switch
off automatically.
2. Let the mixture remain inside the kettle
overnight.
3. Throw the mixture away next morning.
4. Fill the kettle with clean water up to „MAX“ and
boil again.
5. Throw away this boiled water to remove any
remaining scale and vinegar.
6. Rinse the inside of the kettle with clean water.
360° CONNECTOR BASE
The 360° connector between the kettle and its base
means that the kettle can be located at any point on
the base. This is ideal for left and right-handed users
as the kettle can be positioned conveniently on your
kitchen counter.
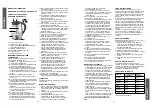
TEA TABLE
Tea variety Brewing
temperature
Steeping
time
Green tea
70°C
3 min
Yellow tea
70°C
3 min
White tea
70°C
4 min
Herbal tea
90°C
6 min
Black tea
90°C
4 min
Oolong tea
80°C
3 min
Fruit tea
90°C
7 min
The specified values are indicative only.
TECHNICAL DATA:
220-240V • 50/60Hz • 1850-2200W
Environment friendly disposal
You can help protect the environment! Please
remember to respect the local regulations:
hand in the non-working electrical equipments to an
appropriate waste disposal center.
3
ENGLISH
2
ENGLISH


