background image

2.

Set the Time Zone:

The TOS Aurora application has its own timezone, independent of your host node and the default is UTC. If UTC is

not the timezone you want to use, see

https://forum.tufin.com/support/kc/aurora/Content/ST2/ManagingTOS/SetTimeZone.htm

.

3.

Set up your IP Addresses:

To set up your Syslog VIP address, see

https://forum.tufin.com/support/kc/aurora/Content/ST2/ManagingTOS/VIP-syslog.htm

.

Primary and VIP addresses can be changed if needed. For more information, see

https://forum.tufin.com/support/kc/aurora/Content/ST2/ManagingTOS/ChangingIPAddress.htm

.

4.

Add Nodes to your cluster:

TOS Aurora is deployed by default as a single node Kubernetes cluster. See

https://forum.tufin.com/support/kc/aurora/Content/ST2/ManagingTOS/MultiNodeProcessing.htm

for more information about adding

additional nodes.

Configure SecureChange

1.

Create a SecureTrack Administrator User:

a.

Go to at

https://<IP>

where IP is the cluster VIP.

b.

Log in to SecureTrack as

tufin-admin

with password

admin

.

c.

Create a new SecureTrack Administrator user.

Note:

If you are going to configure SecureChange for multi-domain management, make the user either a

super administrator or multi-domain administrator, depending on whether you want to restrict the
administrator to selected domains.

For more information, see

https://forum.tufin.com/support/kc/aurora/Content/Suite/1073.htm

.

2.

Log in to SecureChange:

a.

Go to

https://<IP>/securechangeworkflow

where 

<IP>

 is the cluster VIP.

b.

Log in to SecureChange as

tufin-admin

with password

admin

.

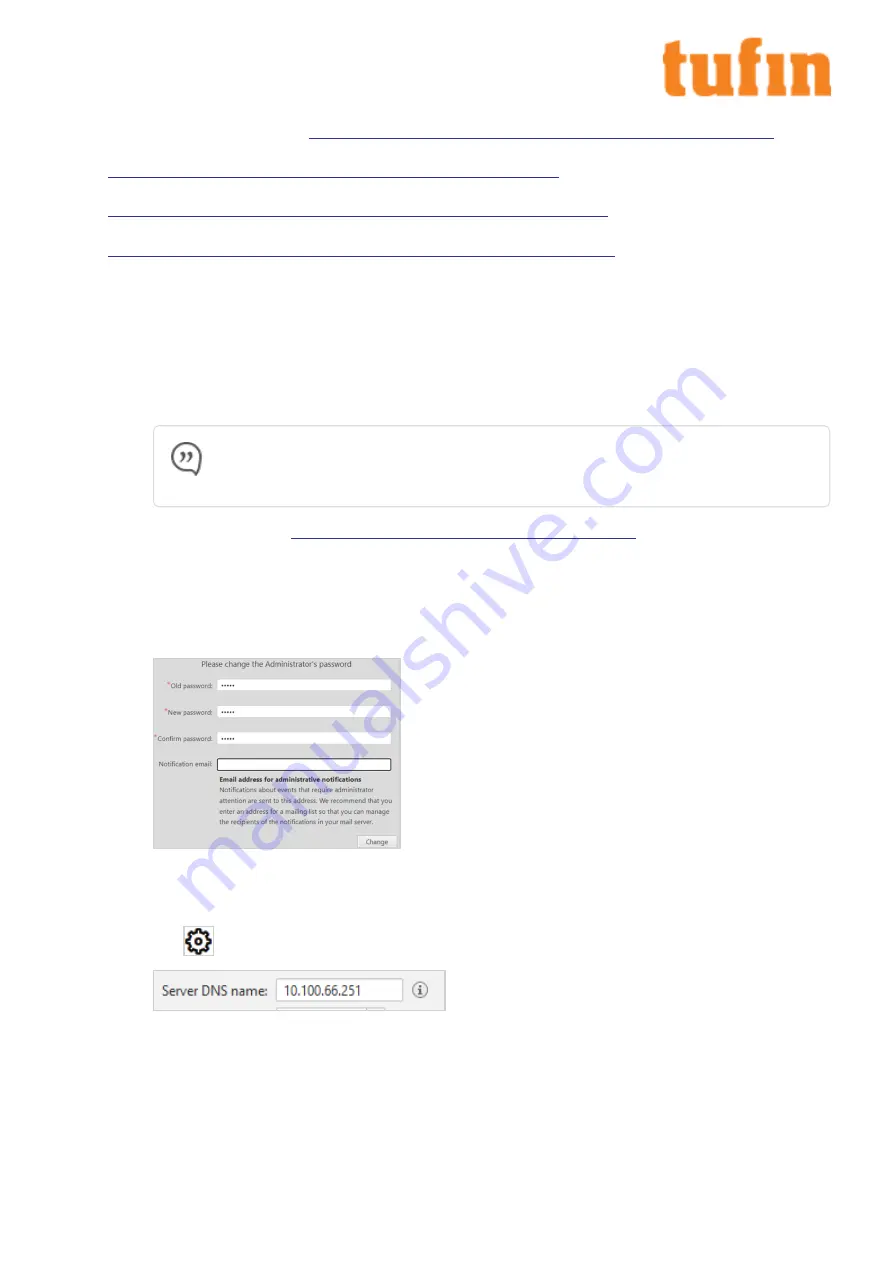
You are prompted to change the password. SecureChange users are separate from SecureTrack users; there is no connection
between a SecureTrack user and a SecureChange user with the same name.

On the prompt window, you can also enter an email address for administrative email notifications. We recommend using the
address of an email list so you can edit the list of recipients easily.

3.

Configure the SecureChange Settings

a.

Go to

Settings>Miscellaneous

.

b.

Enter a value for Server DNS name. The DNS server is used for links in email notifications. This can be an IP address in the
format

11.22.33.44

or a FQDN in the format

https://mydomain.com

.

The SecureChange DNS name is published by SecureChange so it can be accessed from external sources. For example, it is
embedded in notification mails sent by SecureChange, which include a link to a ticket, such as an email notifying a handler
assigned with a task, or informing a requester that the ticket has been successfully resolved.

T-800/1200 Quick Start Guide
Chapter 5: Installing and Configuring Tufin Orchestration Suite Aurora

Copyright 2003-2021, Tufin Software Technologies Ltd.

16

Summary of Contents for T-1200

Page 1: ...T 800 1200 Quick Start Guide Version 13 11...

Page 2: ...gure SecureChange 11 Chapter 5 Installing and Configuring Tufin Orchestration Suite Aurora 13 Network Requirements for Tufin Orchestration Suite Aurora 13 Install Tufin Orchestration Suite Aurora 13 C...

Page 3: ...liances come pre installed with TufinOS and are designed to support both Tufin Orchestration Suite Classic default and Aurora You will need to choose the desired Tufin Orchestration Suite product and...

Page 4: ...the front of the appliance Item Feature Description A Information LED Indicates system status as follows l Continuously on and red An overheat condition has occurred which may be caused by cable conge...

Page 5: ...the system is operating normally F UID button LED The unit identification UID button turns on or off the blue light function of the Information LED and a blue LED on the rear of the chassis These are...

Page 6: ...ts out management of the system I Serial port Standard serial port that gives you serial access to the system via console redirection J VGA port K 1 PCI E 3 0 low profile slot L 2 PCI E 3 0 full heigh...

Page 7: ...up the appliance by pressing the Power button on the front panel 3 Connect a network cable to the ethernet port 1 Chapter 2 Rear Panel item C and to a PC with a crossover cable or to a local network...

Page 8: ...classic sh filename The installation file is in opt tufin data classic d Follow the installation instructions in the command line If you disabled SecureTrack and will not be using it on this appliance...

Page 9: ...the End User License Agreement l Password Type system for the Old Password of the TufinOS root user and change the password T 800 1200 Quick Start Guide Chapter 4 Installing and Configuring Tufin Orch...

Page 10: ...interface l Time Configure date and time settings l User Details Configure the admin user s details Username and password cannot be changed in this page T 800 1200 Quick Start Guide Chapter 4 Installi...

Page 11: ...ing to your networking needs eth0 may still have the preconfigured IP address of 192 168 1 100 For instructions see https forum tufin com support kc latest Content Suite 1584 htm l Change the root pas...

Page 12: ...https forum tufin com support kc latest Content Suite 2353 htm To add devices to be monitored see the https forum tufin com support kc latest Content Suite 4034 htm To add SecureTrack on this applian...

Page 13: ...k IP that will serve as the internal IP address used by the administrator for CLI commands and this is the one you will use in all other steps of the installation l If additional nodes are subsequentl...

Page 14: ...y and DNS Servers to the IPs used by your organization l or Edit the configuration files directly 1 Edit the file etc sysconfig network scripts ifcfg eno1 2 Change line BOOTPROTO dhcp to BOOTPROTO sta...

Page 15: ...192 168 1 2 services network 10 10 10 0 24 The End User License Agreement EULA appears c After reading enter q to exit the document and then enter y to accept the EULA and continue until the commands...

Page 16: ...ict the administrator to selected domains For more information see https forum tufin com support kc aurora Content Suite 1073 htm 2 Log in to SecureChange a Go to https IP securechangeworkflow where I...

Page 17: ...n be done now or at a later stage l Connect to a mail server For instructions see https forum tufin com support kc aurora Content Suite 1794 htm l optional Connect to an LDAP directory to use LDAP use...

Page 18: ...twork as the appliance l Web browser We recommend Internet Explorer with anti virus enforcement and browser protection disabled l Java version 8 or later Ports The following ports must be open between...

Page 19: ...bnet Netmask ipmitool lan set 1 defgw ipaddr Default Gateway IP Address 3 Verify the configuration ipmitool lan print 1 4 Ping the RMM IP address to confirm connectivity ping RMM IP Address 5 Configur...

Page 20: ...using the username and password defined in the previous step https RMM IP Address Now you can securely connect to the RMM to do remote administration tasks For more about using the RMM refer to the I...

Page 21: ...ation using serial console l serial aurora For Aurora supported installation using serial console If there is no reply within 60 seconds all installation messages are directed to the serial console If...

Page 22: ...need immediate assistance please call 1 877 270 7711 Tufin at a Glance Offices North America EMEA and Asia Pacific Customers More than 2100 in over 50 countries Leading verticals Finance telecom energ...

Reviews: