OWNER’S
MANUAL
Model # XFT-400Revision: 041221
Atlas HD
Group Training System
Page 1: ...OWNER S MANUAL Model XFT 400 Revision 041221 Atlas HD Group Training System...
Page 2: ...ication sans pr avis Pour la plus jour le manuel du propri taire s il vous pla t visitez www truefitness com Pour documents dans des langues suppl mentaires veuillez www truefitness com resources docu...
Page 3: ...rcial and residential alike The proud manufacturing tradition of quality and the culture of innovation at TRUE have given rise to a full line of extraordinary cardio and strength equipment As a result...
Page 4: ...LIANCES 11 REQUIRED TOOLS 12 LABELS 12 PRE ASSEMBLY CHECKLIST 14 XFT 400 ASSEMBLY OVERVIEW 28 ASSEMBLY STEPS 29 CHAPTER 3 CARE MAINTENANCE 73 CARE MAINTENANCE 73 DAILY INSPECTION MAINTENANCE 73 WEEKLY...
Page 5: ...o perform stretching or body weight exercises This can result in machine instability and lead to serious crushing injuries 7 Keep children away from this equipment Adults should closely supervise use...
Page 6: ...nding this piece of equipment for safe access and operation Installation must meet ADA requirements for accessibility 3 Install this piece of equipment on a solid level surface that does not deviate m...
Page 7: ...n without binding Verify that safety catches and stops are in proper working order and engaged Verify that the exercise is performed smoothly free of noise and or binding If equipped with a weight sta...
Page 8: ...day This includes painted parts chrome parts and upholstered pads 5 Painted and chrome plated parts use Simple Green with a dilusion of 32 1 or similar cleaner for light dirt and grime Use Turtle Wax...
Page 9: ...familiar with the building to determine an appropriate fastening system for your floor 4 Use 3 8 10 mm diameter hardware to anchor the machine Anchors should have a minimum tensile force of 500 pound...
Page 10: ...eded X INSPECT All anti slip surfaces and replace as needed X INSPECT All adjustment pins weight stack pins set screws gas shocks snap links and pulleys if equipped X INSPECT All accessory bars and ha...
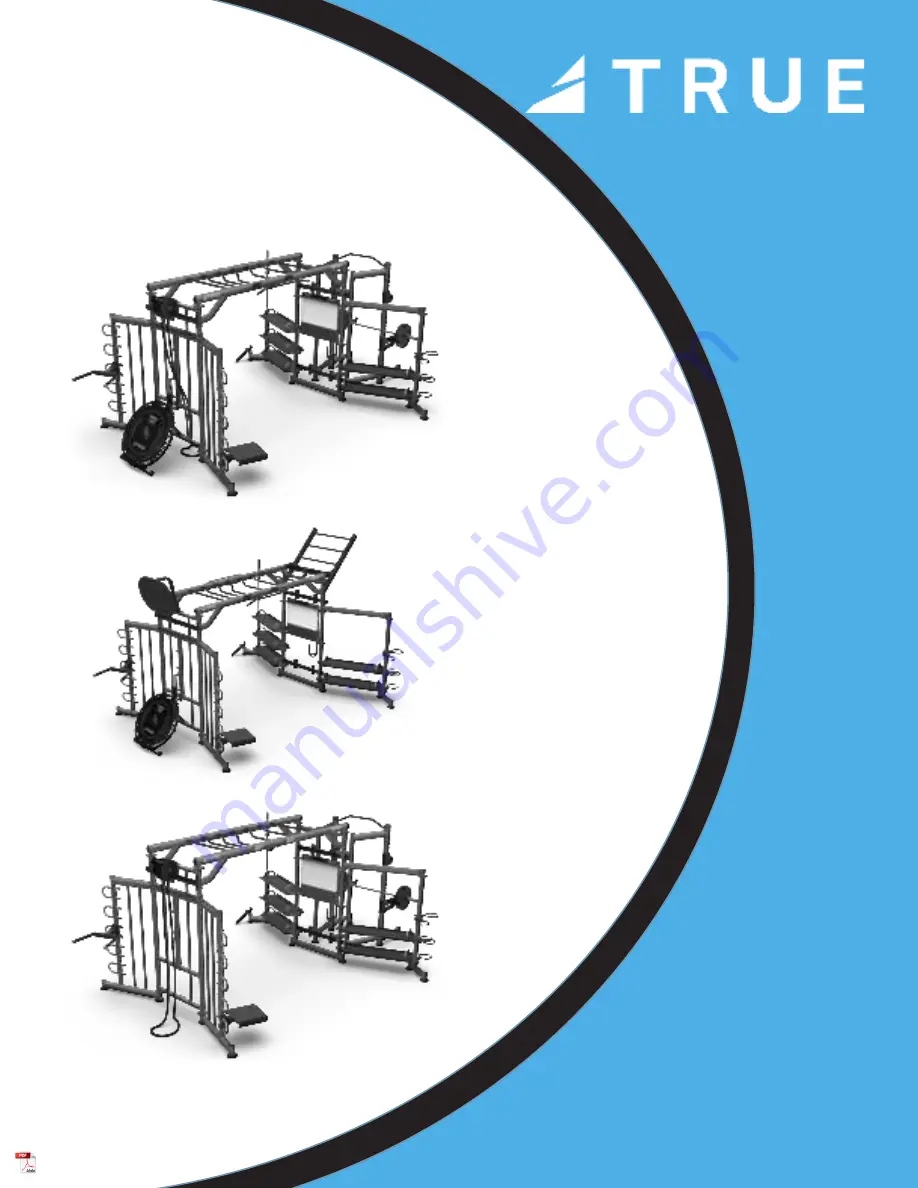
Page 11: ...ions do not include the optional functional trainer XFT 100 FS 100 XFT 900 FT 900 or Half Rack attached to the Center Main Frame or optional attachments listed in this manual Also shown below is the X...
Page 12: ...100 Truefitness com Page 12 of 81 CHAPTER 2 ASSEMBLY GUIDE Strength Atlas HD REQUIRED TOOLS LABELS Ratchet Handle Socket Head 9 16 1 2 Hex Bit Socket 5 16 1 4 9 16 wrench and 1 2 wrench OR Open Ended...
Page 13: ...True Fitness Technology O Fallon MO Phone 800 426 6570 636 272 7100 Truefitness com Page 13 of 81 CHAPTER 2 ASSEMBLY GUIDE Strength Atlas HD LABELS...
Page 14: ...n Quantity 1 XFT MKY7 100X Long Monkey Bar Side Weldment 2 2 XFT MKY7 200X Short Monkey Bar Side Weldment 2 3 XFT MKY BRK Monkey Bar Joining Weldment 4 4 XFT MKY 006 6 Offset Monkey Bar 2 5 XFT MKY 00...
Page 15: ...Quantity 1 XFT MKY10 001X 10 Bar Monkey Bar Left Assembly 2 2 XFT MKY10 002X 10 Bar Monkey Bar Right Assembly 2 3 XFT MKY BRK Monkey Bar Joining Weldment 4 4 XFT MKY 006 6 Offset Monkey Bar 2 5 XFT MK...
Page 16: ...rt Number Description Quantity 1 XFT400 ATT000X Conversion Attachment Bracket Assembly 3 2 XFT000 ATT900X XFT 900 FT 900 XFT HRK Attachment Kit 1 3 XFT000 ATT100X XFT 100 FT 100 Attachment Kit 1 4 XFT...
Page 17: ...of 81 CHAPTER 2 ASSEMBLY GUIDE Strength Atlas HD PRE ASSEMBLY CHECKLIST XFT 4RS CTN1 Carton Contents Item Part Number Description Quantity 1 XFT 4RS CTN1 Center Cage Weldment 1 Note Hardware item numb...
Page 18: ...BLY GUIDE Strength Atlas HD PRE ASSEMBLY CHECKLIST XFT 4RS CTN2 Carton Contents Item Part Number Description Quantity 1 XFT 4RS 100X Left Side Rack Station 1 2 XFT 4RS 200X Right Side Rack Station 1 N...
Page 19: ...of 81 CHAPTER 2 ASSEMBLY GUIDE Strength Atlas HD PRE ASSEMBLY CHECKLIST XFT RBRA Carton Contents Item Part Number Description Quantity 1 XFT RBRA Rebounder Attachment Assembly 1 Note Hardware item num...
Page 20: ...UIDE Strength Atlas HD PRE ASSEMBLY CHECKLIST XFT TEC Carton Contents Item Part Number Description Quantity 1 XFT000 CBR000X Strap Rack 1 2 XFT TRA 100X XFT 400 Tray 2 3 XFT000 CLM130X Tall End Column...
Page 21: ...ER 2 ASSEMBLY GUIDE Strength Atlas HD PRE ASSEMBLY CHECKLIST XFT SEC Carton Contents Item Part Number Description Quantity 1 XFT TRA 100X XFT 400 Tray 3 2 XFT000 CLM120X Short End Column 1 Note Hardwa...
Page 22: ...oam Roller Assembly 1 2 XFT RLR 300 Bosu Foam Roller Cross Bar 1 3 XFT RLR 400X Top Bosu Bar Assembly 1 4 XFT RLR 100 End Brackets Bosu Foam Roller Weldment 2 5 XFT RLR 500 Foam Roller Bar 4 6 XFT RLR...
Page 23: ...D PRE ASSEMBLY CHECKLIST XFT HVY4 XFT MBL Carton Contents Item Part Number Description Quantity Box 1 XFT HVY4 Heavy Bag 1 1 2 XFT000 ATT010 Upper Attachment Bracket Weldment 1 1 3 XFT MBL 100 Monkey...
Page 24: ...ASSEMBLY CHECKLIST XFT TRG XFT RPP4 Carton Contents Item Part Number Description Quantity Box 1 XFT TRG 001X Ball Target Attachment Bracket 1 1 2 XFT TRG 002X Ball Target Assembly 1 1 3 XFT RPP4 Rope...
Page 25: ...Y GUIDE Strength Atlas HD PRE ASSEMBLY CHECKLIST XFW83 CHBB01ASSY XFT SUS Carton Contents Item Part Number Description Quantity Box 1 XFW83 CHBB01ASSY Pull Up Bar 2 1 2 XFT SUS Suspension Bracket 4 2...
Page 26: ...EMBLY GUIDE Strength Atlas HD Item Part Number Description Quantity Box 1 XFT LMN015 Olympic Bar Storage 1 1 2 XFT CRT 100X Core Trainer Assembly 1 2 PRE ASSEMBLY CHECKLIST XFT CRT Carton Contents Not...
Page 27: ...gth Atlas HD PRE ASSEMBLY CHECKLIST XFT DIP XFT RRC XFT SPL Carton Contents Item Part Number Description Quantity Box 1 XFT DIP Dip Station 1 1 2 XFT RRC Battle Rope Hanger Assembly 1 2 3 XFT SPL Step...
Page 28: ...ersion Attachment Bracket to the Center Main Frame Assemble the optional functional trainer to the base XFT 400 configuration Page 29 36 37 49 End Column Configuration Required Attachments Optional Il...
Page 29: ...RED ASSEMBLY STEPS Step 1 Center Cage Weldment Assemble the Center Cage Weldment to the Rack Stations using the identified hardware Item Part Number Description Quantity 1 C1136 SHCS 3 8 16 3 3 4 4 2...
Page 30: ...cure the monkey bar sub assemblies together using the identified hardware Note XFT MKY7 seven monkey bar rungs shown if being assembled instead of XFT MKY10 ten monkey bar rungs Item Part Number Descr...
Page 31: ...A Monkey Bar Assembly Assemble the Monkey Bar Assembly to the Center Cage Weldment using the identified hardware Note Place a piece of carboard packing under the opposite ends of the Monkey Bar Assemb...
Page 32: ...APTER 2 ASSEMBLY GUIDE Strength Atlas HD REQUIRED ASSEMBLY STEPS Step 3B Monkey Bar Assembly Assemble the Monkey Bar Assembly to the Center Cage Weldment using the identified hardware Item Part Number...
Page 33: ...APTER 2 ASSEMBLY GUIDE Strength Atlas HD REQUIRED ASSEMBLY STEPS Step 4A Monkey Bar Assembly Assemble the Monkey Bar Assembly to the Center Main Frame using the identified hardware Item Part Number De...
Page 34: ...HAPTER 2 ASSEMBLY GUIDE Strength Atlas HD REQUIRED ASSEMBLY STEPS Step 4B Monkey Bar Assembly Assemble the Monkey Bar Assembly to the Center Main Frame using the identified hardware Item Part Number D...
Page 35: ...ars to the Monkey Bar Assembly using the identified hardware Note XFT MKY10 ten monkey bar rungs shown but the same assembly step applies to XFT MKY7 seven monkey bar rungs Note After completing this...
Page 36: ...ckets Secure the Pull Up Bars and Suspension Brackets to the Monkey Bar Assembly using the identified hardware Note If using XFT MK7 seven monkey bar rungs only one Pull Up Bar and two Suspension Brac...
Page 37: ...Attachment Bracket Assembly to the Center Main Frame using the identified hardware Note For the XFT 100 and FT 100 only the middle and bottom brackets will be used Note For the XFT 900 FT 900 and Half...
Page 38: ...owner s manual for assembly of the FS 100 Note The XFT 100 is shown in Steps 1 2C but the same assembly steps apply for securing the FS 100 to the XFT 400 Item Part Number Description Quantity 1 C 62...
Page 39: ...xt attach the Lower XFT 100 FS 100 Attachment Bracket to the XFT 100 FS 100 Assembly in the same location using the identified hardware Note Do not remove the XFT 100 FS 100 Upper Cross Brace Assembly...
Page 40: ...r Cross Brace Assembly as shown below Next attach the Upper XFT 100 FS 100 Attachment Bracket to the XFT 100 FS 100 Assembly in the same location using the identified hardware Item Part Number Descrip...
Page 41: ...Main Frame using the identified hardware Secure all hardware from Steps 9 10C Confirm the XFT 100 FS 100 Assembly is level using the leveling feet located throughout the machine Item Part Number Descr...
Page 42: ...two optional shelves shown below are assembled to the XFT 900 FT 900 then remove the bottom shelf The top shelf can remain in place as its removal is not needed for assembly to the XFT 400 Note Refer...
Page 43: ...LY STEPS Step 11A XFT 900 FT 900 Configurations Assemble the XFT 900 assembly to the XFT 900 Attachment Brackets using the identified hardware Item Part Number Description Quantity 1 C 629 SHCS Screw...
Page 44: ...Configurations Assemble the XFT 900 assembly to the center main frame using the identified hardware Secure all hardware from Steps 11 12B Confirm the XFT 900 FT 900 assembly is level using the levelin...
Page 45: ...MBLY STEPS Step 12A XFT HRK Configurations Assemble the Center Main Frame to the Half Rack Assembly Connectors using the identified hardware Item Part Number Description Quantity 1 C1136 SHCS Screw 3...
Page 46: ...ack sub assemblies using the identified hardware Note For Steps 13B 14 the XFT 200 201 Center Column Assembly is shown but the same assembly steps apply to the XFT 400 Item Part Number Description Qua...
Page 47: ...of 81 CHAPTER 2 ASSEMBLY GUIDE Strength Atlas HD OPTIONAL ASSEMBLY STEPS Step 12C XFT HRK Configurations Assemble the Chin Up Bar to the Half Rack using the identified hardware Item Part Number Descri...
Page 48: ...BLY GUIDE Strength Atlas HD OPTIONAL ASSEMBLY STEPS Step 12D XFT HRK Configurations Assemble the Half Rack sub assemblies using the identified hardware Fully tighten all hardware from Steps 13A 13D It...
Page 49: ...trength Atlas HD OPTIONAL ASSEMBLY STEPS Step 13 XFT HRK Configuration Assemble the optional Band Peg kit to the Half Rack using the identified hardware Note The band peg kit option is used only when...
Page 50: ...lumn assembly and Tall End Column using the identified hardware Confirm the Tall End Column configuration is level using the leveling feet Note XFT 100 FS 100 XFT 900 FT 900 Half Rack removed for clar...
Page 51: ...l and Short End Column Configurations Secure the Tray Guards to the trays using the identified hardware Note If installing the Short End Column configuration then three tray guards and the correspondi...
Page 52: ...Tall and Short End Column Configuration Secure the Medicine Ball Rings maximum of five allowed to the Tall or Short End Column using the identified hardware Note Step 16 shows the XFT 200 201 but it...
Page 53: ...81 CHAPTER 2 ASSEMBLY GUIDE Strength Atlas HD OPTIONAL ASSEMBLY STEPS Step 16A Bosu Ball and Roller Rack Secure the Bosu Ball and Roller Rack sub assemblies as shown below using the identified hardwar...
Page 54: ...81 CHAPTER 2 ASSEMBLY GUIDE Strength Atlas HD OPTIONAL ASSEMBLY STEPS Step 16B Bosu Ball and Roller Rack Secure the Bosu Ball and Roller Rack sub assemblies as shown below using the identified hardwa...
Page 55: ...6C Bosu Ball and Roller Rack Secure the Bosu Ball Roller Rack to the Tall or Short End Column and the Tall or Short End Column provided with the Bosu Ball and Roller Rack assembly using the identified...
Page 56: ...MBLY GUIDE Strength Atlas HD OPTIONAL ASSEMBLY STEPS Step 17 Olympic Bar Storage Secure the Olympic Bar Storage to the end column using the identified hardware Item Part Number Description Quantity 1...
Page 57: ...f 81 CHAPTER 2 ASSEMBLY GUIDE Strength Atlas HD OPTIONAL ASSEMBLY STEPS Step 18 Core Trainer Secure the Core Trainer to the end column using the identified hardware Item Part Number Description Quanti...
Page 58: ...anger to the end column using the identified hardware Note The Battle Rope Hanger can be secured in other column mounting locations dependent on your overall XFT 400 configuration Note Step 20 shows t...
Page 59: ...t Plate Storage Bar Secure the Weight Plate Storage Bar to the Tall End Column using the identified hardware Note The Short End Column can also be used Note Step 21 shows the XFT 200 201 but it applie...
Page 60: ...OPTIONAL ASSEMBLY STEPS Step 22A Rebounder Secure the Rebounder sub assemblies using the identified hardware Item Part Number Description Quantity 1 C1023 SHCS 3 8 16 1 4 2 C 749 Washer Lock 3 8 4 3...
Page 61: ...CHAPTER 2 ASSEMBLY GUIDE Strength Atlas HD OPTIONAL ASSEMBLY STEPS Step 22B Rebounder Secure the Rebounder to the Center Main Frame using the identified hardware Item Part Number Description Quantity...
Page 62: ...Ladder Weldment Secure the Monkey Bar Ladder Weldment to the Center Main Frame using the identified hardware Note Disregard Steps 24A 27 if the Monkey Bar Ladder Weldment is installed in the same moun...
Page 63: ...R 2 ASSEMBLY GUIDE Strength Atlas HD OPTIONAL ASSEMBLY STEPS Step 23B Monkey Bar Ladder Weldment Secure the Monkey Bar Ladder Weldment to the Center Main Frame using the identified hardware Item Part...
Page 64: ...ll Target Attachment Bracket to the Center Main Frame using the identified hardware Note Disregard Steps 23A 23B and Steps 25A 27 if the Ball Target is installed in the same mounting location as the m...
Page 65: ...HD OPTIONAL ASSEMBLY STEPS Step 24B Ball Target Secure the Ball Target to the Ball Target Attachment Bracket using the identified hardware Item Part Number Description Quantity 1 C1023 SHCS 3 8 16 1 2...
Page 66: ...ket to the Center Main Frame using the identified hardware Note Disregard Steps 23A 24B and Steps 26A 27if the Rope Flex is installed in the same mounting location as the mounting locations are shared...
Page 67: ...SSEMBLY GUIDE Strength Atlas HD OPTIONAL ASSEMBLY STEPS Step 25B Rope Flex Secure the Rope Flex to the Rope Flex Attachment Bracket using the identified hardware Item Part Number Description Quantity...
Page 68: ...he Heavy Bag Attachment Bracket to the Center Main Frame using the identified hardware Note Disregard Steps 23A 25B and Step 27 if the Heavy Bag is installed in the same mounting location as the mount...
Page 69: ...CHAPTER 2 ASSEMBLY GUIDE Strength Atlas HD OPTIONAL ASSEMBLY STEPS Step 26B Heavy Bag Secure the Heavy Bag Attachment Bracket to the Center Main Frame using the identified hardware Item Part Number D...
Page 70: ...ket to either end of the XFT 400 using the identified hardware Note Disregard Steps 23A 26B if the Suspension Bracket is installed in the same mounting location as the mounting locations are shared No...
Page 71: ...m Page 71 of 81 CHAPTER 2 ASSEMBLY GUIDE Strength Atlas HD OPTIONAL ASSEMBLY STEPS Step 28 Dip Station Assemble the dip station to the rack station Note Step 28 shows the XFT 200 201 but it applies to...
Page 72: ...age 72 of 81 CHAPTER 2 ASSEMBLY GUIDE Strength Atlas HD OPTIONAL ASSEMBLY STEPS Step 29 Step Platform Assemble the step platform to the rack station Note Step 29 shows the XFT 200 201 but it applies t...
Page 73: ...Y INSPECTION MAINTENANCE The following items are critical to the safety of users and maintenance staff as well as ensuring the optimum performance of the machines These inspections should be performed...
Page 74: ...TriFlow or a similar brand Linear Bearings Clean the linear shaft and lubricate as required with Teflon based grease Keeping linear bearings clean and lubricated is critical to long life and good per...
Page 75: ...ore often a piece of equipment is used the greater the likelihood that cable wear will occur This holds true for equipment made by any manufacturer and applies to urethane belts as well as wire rope c...
Page 76: ...ion needs to be adjusted To adjust the cable tension loosen the cable nut that is located on the cable bolt connected to the top plate Tighten the cable bolt until the top plate is barely lifted off o...
Page 77: ...ss com and use our dealer locator to obtain the contact information for the closest dealer You may also contact TRUE Fitness customer support team by calling 800 883 8783 or emailing us at service tru...
Page 78: ...have minimal damages and you are not sure if the actual product is damaged or not You must sign the bill of lading as damaged when accepting the shipment Once you have opened the box and you have det...
Page 79: ...labor warranty Attachment Kits and all other components and accessories not mentioned elsewhere are warranted for defects in material and workmanship for one year with one year labor warranty Ropeflex...
Page 80: ...and freight charges associated therewith except as expressly specified herein 7 This Limited Warranty shall not apply to Service calls to correct installation of the equipment or instruction to owners...
Page 81: ...ite ____ c Advertisement ____ d Referral ____ e Current Customer ____ f Other_______________ 2 Why did you purchase a TRUE product ___ a Design Appearance ___ b Dealer Suggestion ___ c Price Value ___...