769-25897 / 00
10/20
Operator’s Manual
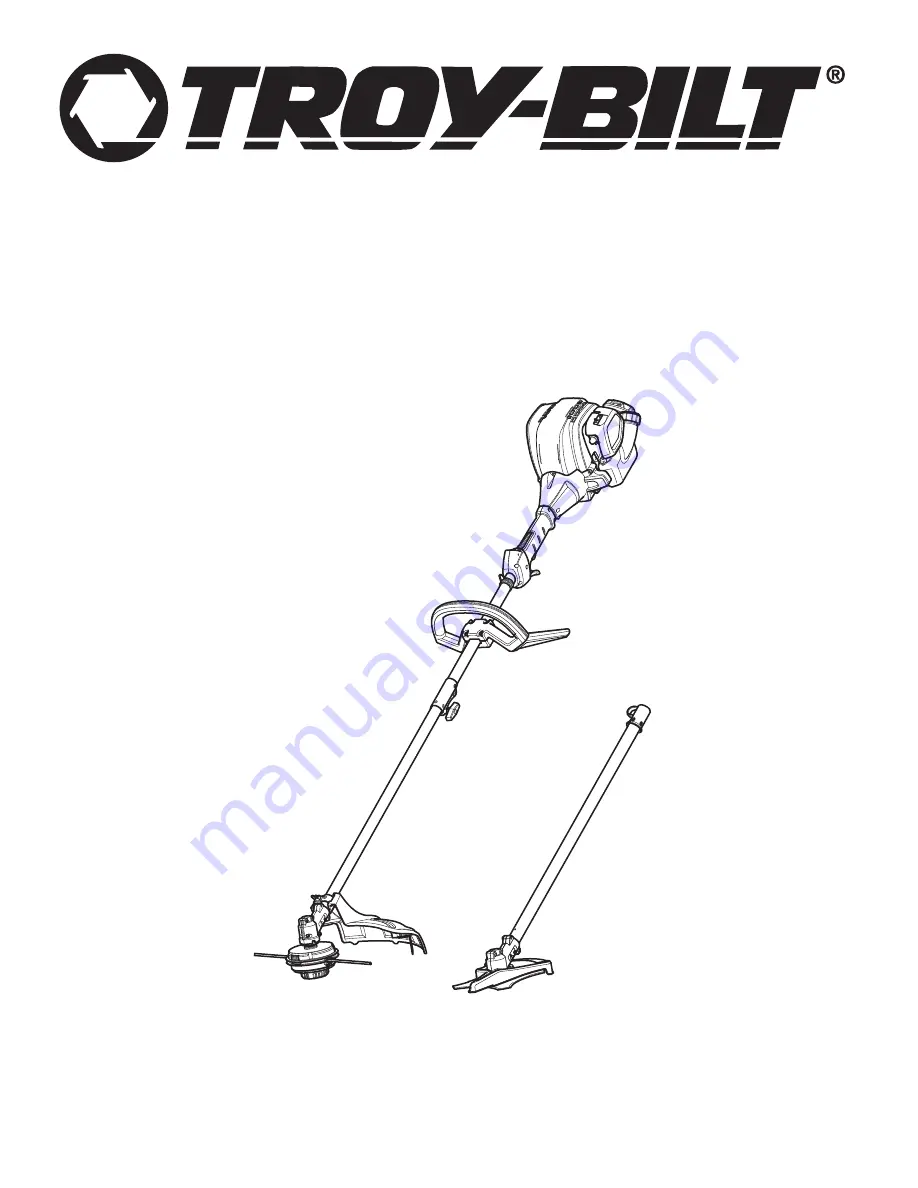
TB425 XP
4-Cycle Trimmer / Brushcutter
IMPORTANT: Read this manual thoroughly before using this product. Follow all instructions.
SAVE THESE INSTRUCTIONS
Page 1: ...769 25897 00 10 20 Operator s Manual TB425 XP 4 Cycle Trimmer Brushcutter IMPORTANT Read this manual thoroughly before using this product Follow all instructions SAVE THESE INSTRUCTIONS ...
Page 2: ...nal combustion engines operated on forest brush and or grass covered areas be equipped with a spark arrestor maintained in effective working order or the engine be constructed equipped and maintained for the prevention of fire Check with your state or local authorities for regulations pertaining to these requirements Failure to follow these requirements could subject you to liability or a fine Thi...
Page 3: ...ulling the starter rope The operator and unit must be in a stable position while starting Refer to Starting and Stopping Use the right tool Only use this tool for its intended purpose Only use the unit as described in this manual Always hold the unit with both hands when operating Keep a firm grip on both handles or grips Do not overreach Always keep proper footing and balance Take extra care when...
Page 4: ...his manual should be performed by an authorized service dealer Never remove modify or make inoperative any safety device furnished with the unit Before inspecting maintaining cleaning storing transporting or replacing any parts on the unit 1 Stop the unit Refer to Starting and Stopping 2 Make sure all moving parts have stopped 3 Allow the unit to cool 4 Disconnect the spark plug wire Secure the un...
Page 5: ...STOP CONTROL ON START RUN ON OFF STOP CONTROL OFF or STOP PRIMER BULB Push primer bulb fully and slowly 10 times THROWN OBJECTS CAN CAUSE SEVERE INJURY WARNING Small objects can be propelled at high speed causing injury CHOKE CONTROL 1 FULL choke position 2 PARTIAL choke position 3 RUN choke position Min 50 ft 15 m KEEP BYSTANDERS AWAY WARNING Keep all bystanders especially children and pets at le...
Page 6: ...optional attachments may be used with this unit SPECIFICATIONS All specifications are based on the latest product information available at the time of printing We reserve the right to make changes at any time without notice Engine Type Air Cooled 4 Cycle Displacement 25 cc 1 52 cu in Spark Plug Gap 0 025 in 0 635 mm Spark Plug Champion RDZ4H or equivalent plug Lubrication SAE 30 Oil Crankcase Oil ...
Page 7: ...ents Installing the Attachment 1 Remove the hanger cap from the attachment Keep the hanger cap for use when storing the attachment If present remove the gray spacer from the coupler 2 Set the unit on a flat level surface 3 Turn the knob counterclockwise to loosen the coupler Fig 3 4 Align the release button with the guide recess Fig 5 5 Push the attachment straight into the coupler Fig 4 until the...
Page 8: ...amp are held together Do not tighten the screws completely 6 Hold the unit in the operating position Fig 17 Move the handle up or down the upper shaft housing to a comfortable location Make sure the handle is positioned between the two arrows Fig 7 7 Tighten the screws until the handle is secure Adjusting the Handle If the handle requires adjustment 1 Use a large flat head screwdriver or a T 25 To...
Page 9: ...nd onto the left shoulder 2 Start the unit Refer to Starting and Stopping 3 Snap the clip onto the shoulder strap loop Fig 10 4 Adjust the shoulder strap to fit the operator Fig 12 Pull the buckle up to loosen the shoulder strap Pull the strap down to tighten the shoulder strap WARNING To avoid serious personal injury always use the shoulder strap when operating the unit as a brushcutter Fig 9 Str...
Page 10: ...ral state and local regulations Using Blended Fuels If using a blended fuel Always use fresh unleaded gasoline Use a fuel additive Using Fuel Additives Use a fuel additive to inhibit corrosion and minimize gum deposits Add 0 8 oz 23 ml of fuel additive per gallon of fuel according to the instructions on the container NEVER add fuel additives directly to the unit s fuel tank CAUTION DO NOT USE E85 ...
Page 11: ...on 1 Fig 15 3 Crouch in the starting position Fig 16 4 Press and hold the throttle lockout Fig 14 Squeeze and hold the throttle control Fig 14 NOTE Continue to SQUEEZE and HOLD the throttle lockout and the throttle control for ALL further steps 5 Pull the starter rope with a controlled and steady motion 5 times Fig 16 6 Move the choke lever to Position 2 Fig 15 7 Pull the starter rope with a contr...
Page 12: ... bump knob on bare ground or hard soil Attempting to release line in tall grass may stall the engine NOTE Do not rest the cutting head on the ground while the unit is running Each time the bump knob is tapped about 1 5 inches 38 mm of trimming line is released NOTE Always keep the trimming line fully extended Line release becomes more difficult when the cutting line gets shorter A blade in the cut...
Page 13: ...ig 21 Maintaining the Trimming Line Hard surfaces such as sidewalks can cause the trimming line to wear down quickly or break Frequently check and adjust the trimming line length Refer to Adjusting the Trimming Line Length Always keep the trimming line fully extended DO NOT force the unit Make shallow cuts in as many passes as are necessary to achieve the desired depth Cut at a slow even pace Fig ...
Page 14: ...tion WARNING To avoid serious injury to the operator or others do not use the blade as an edger WARNING Blade thrust can occur when the spinning blade contacts an object that it does not immediately cut Blade thrust can be violent enough to cause the unit and or operator to be propelled in any direction and possibly lose control of the unit Blade thrust can occur without warning if the blade snags...
Page 15: ...g condition and gap Refer to Maintaining the Spark Plug REPLACING THE TRIMMING LINE BUMP HEAD Only use the trimming line described in the Specifications section Other types of trimming line may cause the unit to overheat or fail NOTE Always use the correct line length when installing trimming line The line may not release properly if the line is too long NOTE The cutting head will remain attached ...
Page 16: ...DO NOT separate the bump knob from the inner reel Fig 26 f Remove any old trimming line and or obstructions g Use a clean cloth to clean the inner reel cutting head base and spool cover Fig 26 h Insert the bump knob and inner reel into the spool cover Fig 26 i Align the tabs on the spool cover with the tab slots on the cutting head base Fig 26 Push the spool cover onto the cutting head base until ...
Page 17: ...de Fig 30 6 Screw the nut onto the output shaft Fig 30 7 Tighten the nut counterclockwise with a wrench Fig 31 If using a torque wrench torque to 325 335 in lb 27 28 ft lb 37 38 N m If using a closed end or socket wrench turn the nut until the blade retainer is snug against the blade Make sure the blade is installed correctly then rotate the nut an additional 1 4 to 1 2 turn counterclockwise 8 Rem...
Page 18: ...e bottom thread of the oil fill hole Fig 34 If the oil level is too low add a small amount of oil to the oil fill hole until the oil is at the correct level If the oil level is too high tip the unit and drain the excess oil into an appropriate container Fig 35 6 Wipe up any oil that may have spilled 7 Make sure the O ring is in place on the oil fill plug Fig 33 8 Reinstall the oil fill plug WARNIN...
Page 19: ...the Oil Level Fig 35 MAINTAINING THE AIR FILTER Failure to maintain the air filter can result in poor performance or can cause permanent damage to the engine Engine failure due to improper air filter maintenance is not covered by the product warranty Cleaning the Air Filter 1 Open the air filter cover press in the lock tab and swing the air filter cover to the left Fig 36 2 Remove the air filter F...
Page 20: ...rews from the engine cover with a flat head screwdriver or T 25 Torx screwdriver Fig 39 Remove the engine cover 3 Grasp the spark plug boot firmly and pull it from the spark plug 4 Clean around the spark plug Remove the spark plug from the cylinder head with a 5 8 inch socket turning counterclockwise 5 Inspect the spark plug If the spark plug is cracked fouled or dirty replace it with replacement ...
Page 21: ...nto an approved container Reinstall the fuel cap 2 Start the engine and allow it to run until it stalls This ensures that all fuel has been drained from the carburetor 3 Allow the engine to cool Remove the spark plug and put 5 drops of any high quality motor oil into the cylinder Pull the starter rope slowly to distribute the oil Reinstall the spark plug 4 Thoroughly clean the unit and inspect it ...
Page 22: ...fuel is old over 30 days Drain the fuel tank and add fresh fuel The spark plug is fouled Replace the spark plug The fuel is old over 30 days Drain the fuel tank and add fresh fuel The cutting head is bound with grass Stop the engine and clean the cutting head The air filter is dirty Clean or replace the air filter PROBLEM SOLUTION The air filter is dirty Clean or replace the air filter The fuel is...
Page 23: ... its possessions and territories except those sold through Troy Bilt s authorized channels of export distribution Troy Bilt reserves the right to change or improve the design of any Troy Bilt Product without assuming any obligation to modify any product previously manufactured No implied warranty including any implied warranty of merchantability or fitness for a particular purpose applies after th...
Page 24: ...24 NOTES ...
Page 25: ...97 00 10 20 Manual del Operador TB425 XP Desmalezadora Desbrozadora de 4 tiempos IMPORTANTE Lea este manual por completo antes de utilizar este producto Siga todas las instrucciones GUARDE ESTAS INSTRUCCIONES ...
Page 26: ...rminados motores de combustión interna que se operan en zonas cubiertas por malezas de bosque y o hierbas cuenten con un amortiguador de chispas que se deberá mantener en condiciones de uso adecuadas o que el motor se diseñe equipe y mantenga para prevenir incendios Corrobore con las autoridades estatales o locales cuáles son las normativas correspondientes a dichas exigencias El incumplimiento de...
Page 27: ...lgada alhajas pantalones cortos sandalias ni ande descalzo Sujétese el cabello a nivel de los hombros El cabezal la cuchilla de corte debe permanecer fijo a cuando el motor funciona al ralentí Si no funciona consulte Ajuste de la velocidad de ralentí Ajuste la manija para que brinde el mejor agarre si corresponde Compruebe que el cabezal la cuchilla de corte no esté en contacto con nada antes de p...
Page 28: ...a cuchilla girando por inercia puede causar lesiones graves Mantenga el control de la unidad hasta que todas las piezas móviles se hayan detenido No afile la cuchilla Si la afila es posible que la punta de la cuchilla se rompa mientras está en uso Podrían producirse lesiones personales graves Si la cuchilla está desafilada reemplácela No utilice la unidad si la cuchilla está doblada rajada o desaf...
Page 29: ...BADOR Presione por completo el bulbo del cebador lentamente 10 veces CONTROL DEL ESTRANGULADOR 1 Posición FULL máximo del estrangulador 2 Posición PARTIAL parcial del estrangulador 3 Posición RUN funcionamiento del estrangulador LOS OBJETOS ARROJADOS PUEDEN PROVOCAR LESIONES GRAVES ADVERTENCIA Es posible que se arrojen objetos pequeños por el aire a alta velocidad lo cual puede provocar lesiones M...
Page 30: ... combustible 14 onzas fluidas 414 ml Peso aproximado de la unidad sin combustible 14 15 libras 6 4 6 8 kg Mecanismo de recorte Cabezal de impacto Diámetro del hilo de recorte 0 095 pulgadas 2 41 mm Diámetro de la senda de corte desmalezadora 17 pulgadas 43 2 cm Diámetro de la senda de corte desbrozadora 8 pulgadas 20 3 cm HERRAMIENTAS NECESARIAS PARA EL ENSAMBLAJE Destornillador mediano de cabeza ...
Page 31: ...CCIÓN DEL ACCESORIO El acoplador permite el uso de varios accesorios opcionales Instalación del accesorio 1 Quite la tapa de suspensión del accesorio Guarde la tapa de suspensión para utilizarla al almacenar el accesorio De estar presente extraiga el espaciador gris del acoplador 2 Coloque la unidad en una superficie plana y nivelada 3 Gire la perilla en el sentido contrario a las agujas del reloj...
Page 32: ... estén bien unidas No ajuste los tornillos completamente 6 Mantenga la unidad en la posición de funcionamiento Fig 17 Mueva la manija hacia arriba o abajo del alojamiento del eje superior hasta que esté en una posición cómoda Asegúrese de que la manija esté colocada entre las dos flechas Fig 7 7 Ajuste los tornillos hasta que la manija quede segura Ajuste de la manija Si la manija requiere ajustes...
Page 33: ...e Fig 10 4 Ajuste la correa de hombro para adecuarla al operador Fig 12 Tire de la hebilla hacia arriba para aflojar la correa Tire de la correa hacia abajo para ajustarla ADVERTENCIA Para evitar lesiones personales graves use siempre la correa de hombro cuando haga funcionar la unidad como desbrozadora Fig 9 Correa Hebilla Sujetador Fig 10 Sujetador Ojal central Ojal inferior Correa de hombro pre...
Page 34: ... de alcohol absorben el agua Con tan solo un 1 de agua en el combustible es posible que el combustible y el aceite se separen formando ácidos cuando se almacenan SIEMPRE debe usar combustible nuevo con menos de 30 días de antigüedad NOTA Deseche el combustible usado de acuerdo con las normativas federales estatales y locales Uso de combustibles mezclados Si utiliza un combustible mezclado Utilice ...
Page 35: ... la Posición 1 Fig 15 3 Agacharse en la posición de arranque Fig 16 4 Oprima y mantenga apretado el bloqueo del acelerador Fig 14 Apriete y mantenga oprimido el control del acelerador Fig 14 NOTA Continúe APRETANDO y MANTENGA APRETADO el bloqueo del acelerador y el control del acelerador para TODOS los pasos subsiguientes 5 Tire de la cuerda de arranque con un movimiento firme y controlado 5 veces...
Page 36: ...ando opera la unidad a alta velocidad golpee ligeramente la perilla percusiva contra el suelo Fig 18 Para obtener mejores resultados golpee la perilla percusiva sobre terreno limpio o suelo duro Intentar soltar línea en césped alto podría ahogar el motor NOTA No apoye el cabezal de corte en el piso cuando la unidad esté funcionando Cada vez que se golpea la cabezal de impacto se suelta alrededor d...
Page 37: ...del orificio de rebordes de 90 Fig 21 4 Gire la perilla en el sentido de las agujas del reloj para apretar el acoplador Fig 21 Fig 20 ADVERTENCIA Solamente coloque a presión el botón de liberación dentro del orificio de rebordes de 90 cuando esté rebordeando con el accesorio de recorte Si se utiliza este orificio de rebordes de 90 con otros accesorios se podrían producir lesiones personales o daño...
Page 38: ...e ser lo suficientemente violento para ocasionar que la unidad y o el operador sean lanzados en cualquier dirección y que posiblemente se pierda el control de la unidad El empuje de la cuchilla puede producirse sin aviso si la cuchilla se desbasta se atasca o se dobla Esto es más probable que en áreas en las que es difícil ver el material que se está cortando ADVERTENCIA La cuchilla seguirá girand...
Page 39: ...icio que controle la holgura del balancín Controle el estado y la separación de la bujía de encendido Consulte Mantenimiento de la bujía de encendido REEMPLAZO DEL HILO DE RECORTE CABEZAL DE IMPACTO Use únicamente el hilo de recorte que se describe en la sección Especificaciones Otros tipos de hilo de recorte pueden causar el recalentamiento o la falla de la unidad NOTA Utilice siempre la longitud...
Page 40: ...e impacto del carrete interior Fig 26 f Extraiga el hilo de recorte viejo y o las obstrucciones g Utilice una tela limpia para limpiar el carrete interior la base de cabezal de corte y la cubierta de la bobina Fig 26 h Inserte la perilla de impacto y el carrete interior en la cubierta de la bobina Fig 26 i Alinee las lengüetas de la cubierta de la bobina con las ranuras de la base del cabezal de c...
Page 41: ...la superficie plana contra la cuchilla Fig 30 6 Atornille la tuerca sobre el eje de salida Fig 30 7 Ajuste la tuerca en sentido contrario a las agujas del reloj con una llave de tuercas Fig 31 Si se usa una llave de par apriete hasta 325 335 in lb 27 28 ft lb 37 38 N m Si usa una llave de cubo o cerrada gire la tuerca hasta que la retención de la cuchilla quede ajustada contra la cuchilla Asegúres...
Page 42: ...interior del orificio de llenado de aceite use una linterna si es necesario El nivel de aceite sólo debe tocar la rosca inferior del orificio de llenado de aceite Fig 34 Si el nivel de aceite es demasiado bajo agregue una pequeña cantidad de aceite en el orificio de llenado de aceite hasta que el aceite esté en el nivel correcto Si el nivel de aceite es demasiado alto incline la unidad y drene el ...
Page 43: ...cha y oprímala para cerrarla hasta que la lengüeta de fijación calza a presión en su lugar Fig 36 Fig 37 Filtro de aire Fig 36 Tapa del filtro de aire Placa posterior Lengüetas Ranuras Lengüeta de fijación CAMBIO DE ACEITE Cambie el aceite mientras el motor aún está caliente El aceite fluirá libremente y arrastrará más impurezas 1 Limpie la zona que rodea el tapón de llenado de aceite a fin de evi...
Page 44: ...2 Extraiga los tres 3 tornillos de la tapa del motor con un destornillador de cabeza plana o un destornillador T 25 Torx Fig 39 Extraiga la tapa del motor 3 Sujete con firmeza la funda de la bujía y tire para sacarla de la bujía 4 Limpie alrededor de la bujía Retire la bujía de la tapa del cilindro con una llave de cubo de 5 8 pulgadas girando en sentido contrario a las agujas del reloj 5 Inspecci...
Page 45: ...va a colocar la tapa del combustible 2 Arranque el motor y déjelo correr hasta que se detenga Esto asegura que todo el combustible se haya drenado del carburador 3 Deje que el motor se enfríe Retire la bujía y ponga 5 gotas de un aceite para motor de alta calidad dentro del cilindro Jale la cuerda de arranque para distribuir el aceite Coloque nuevamente la bujía 4 Limpie minuciosamente la unidad e...
Page 46: ...más de 30 días Drene el depósito de combustible y agregue combustible nuevo La bujía está averiada Vuelva a colocar la bujía El combustible está viejo más de 30 días Drene el depósito de combustible y agregue combustible nuevo El cabezal de corte tiene césped atascado Pare el motor y limpie el cabezal de corte El filtro de aire está sucio Limpie o reemplace el filtro de aire PROBLEMA SOLUCIÓN El f...
Page 47: ...es y territorios excepto para aquellos vendidos a través de los canales autorizados de distribución de exportaciones de Troy Bilt Troy Bilt se reserva el derecho a cambiar o mejorar el diseño de cualquier Producto Troy Bilt sin asumir ningún tipo de obligación de modificar ningún producto fabricado previamente No se otorgan garantías implícitas incluidas las garantías implícitas de comerciabilidad...
Page 48: ......