6-11
Troubleshooting > Troubleshooting
Troubleshooting
Solving Malfunctions
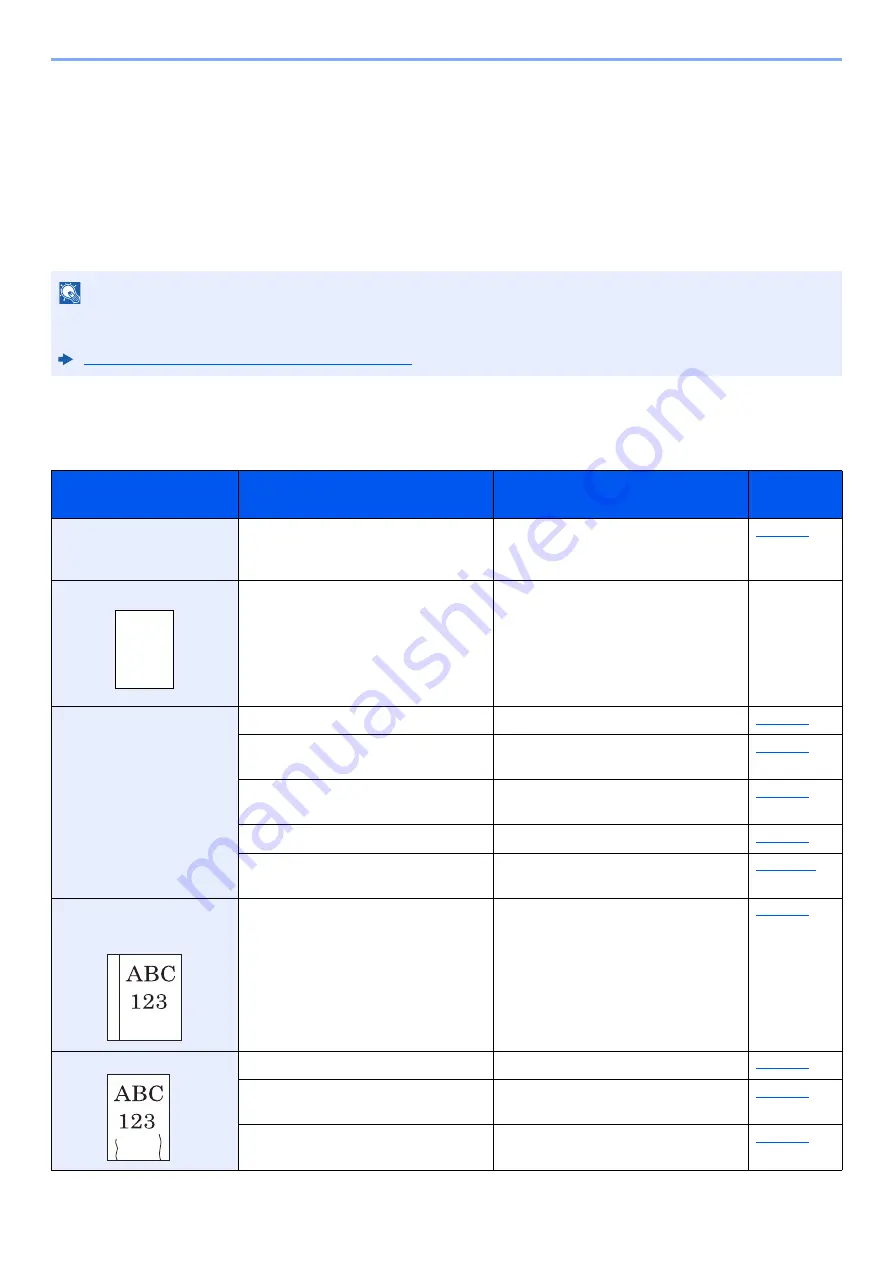
The table below provides general guidelines for problem solving.
If a problem occurs with your machine, look into the checkpoints and perform procedures indicated on the following
pages. If the problem persists, contact your Service Representative.
Machine Operation Trouble
When the following machine operation troubles occur, implement appropriate procedures.
NOTE
When contacting us, the serial number will be necessary.
To check the serial number, refer to the following:
Checking the Equipment's Serial Number (page i)
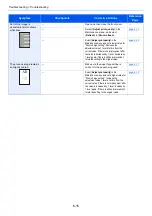
Symptom
Checkpoints
Corrective Actions
Reference
Page
The screen does not
respond when the power
switch is turned on.
Check the power cord.
Connect both ends of the power cord
securely.
Blank sheets are ejected.
—
Check that the settings of the
application software.
—
Paper often jams.
Is the paper loaded correctly?
Load the paper correctly.
—
Turn the orientation 180 degrees around
in which the paper is positioned.
Is the paper of the supported type? Is it
in good condition?
Remove the paper, turn it over, and
reload it.
Is the paper curled, folded or wrinkled?
Replace the paper with new paper.
Are there any loose scraps or jammed
paper in the machine?
Remove any jammed paper.
2 or more sheets are
overlaps when ejected.
(multi feed)
—
Load the paper correctly.
Printouts are wrinkled.
Is the paper loaded correctly?
Load the paper correctly.
—
Turn the orientation 180 degrees around
in which the paper is positioned.
Is the paper damp?
Replace the paper with new paper.
Summary of Contents for P-3522DW
Page 1: ...Operation Guide P 3522DW ...
Page 128: ...6 27 Troubleshooting Indicator pattern when an error occurs Example F 5 2 6 ...
Page 132: ...6 31 Troubleshooting Clearing Paper Jams 4 Open the front cover 5 Close the front cover ...
Page 134: ...6 33 Troubleshooting Clearing Paper Jams 4 Open the front cover 5 Close the front cover ...
Page 136: ...6 35 Troubleshooting Clearing Paper Jams 4 Open the front cover 5 Close the front cover ...
Page 140: ...6 39 Troubleshooting Clearing Paper Jams 12Close the front cover ...
Page 145: ...6 44 Troubleshooting Clearing Paper Jams 14Close the front cover ...
Page 149: ...7 4 Appendix Optional Equipment 4 Replace the covers ...
Page 168: ......

