ASSEMBLY AND MOUNTING INSTRUCTION
For31911
Please read the Assembly lnstruction sheet carefully before proceeding.Carefully unpack and
identify all parts prior to building the unit. Each part is identified on the drawingfor reference.
DO NOT DISCARD THE ORIGINAL PACKAGING. If after careful inspection and you must returnthe item
for any reason. Please repack the unit using the original carton and inserts.
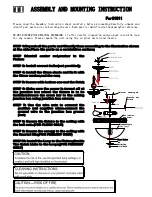
STEP 1:Unpack all the parts and Classify them according to the illustration shown
at the side.Place the parts on a scratchfree surface;
Fi ni al Knob
Bottom Cap
Nut
Glass Washer
Gl ass Shade
Threaded Ni ppl e
Fixture
Pan j uncti on
box screw
Juncti on box
screws
Nut
Cap
Uni versal mounti ng bar
STEP 2:install center rod,washer to the
Fixture
STEP 3: Install correct bulbs(not provided);
STEP 4: Install the Glass shade and fix it with
the Glass washer,and the nus;
STEP 5: Secure with bottom cao and the finial;
STEP 6: Make sure the power is turned off at
the junction box where the fixture is to be
installed.Secure the cross bar to the ceiling
juncton box using junction box screws;
STEP 7: Use the wire nuts to connect the
positive and negative wires.connect the
ground wire to the junction box ground
port;
STEP 8: Secure the fixture to the ceiling with
the ball nuts.(FOR FLUSH ONLY)
STEP 9: Secure the canopy to the ceiling with
the Knurled RingFOR PENDANT ONLY)
STEP10: Install the Loop to the Fixture;Buckle
The Quick Links to the Loops;(FOR PENDANT
ONLY)

