background image

AUX-IN

*   Per informazioni integrative e aggiornamenti di questo   

prodotto vedi: www.trevi.it

*   For additional information and updates of this product   

see: www.trevi.it

FM RADIO

CMP 580 USB

Guida d’uso / User Guide

DIGITAL BOOMBOX CON USB
DIGITAL BOOMBOX WITH USB
DIGITAL BOOMBOX AVEC USB
DIGITAL BOOMBOX MIT USB
DIGITAL BOOMBOX CON USB

ita

eng

fra

deu
esp

USB

Summary of Contents for CMP 580 USB

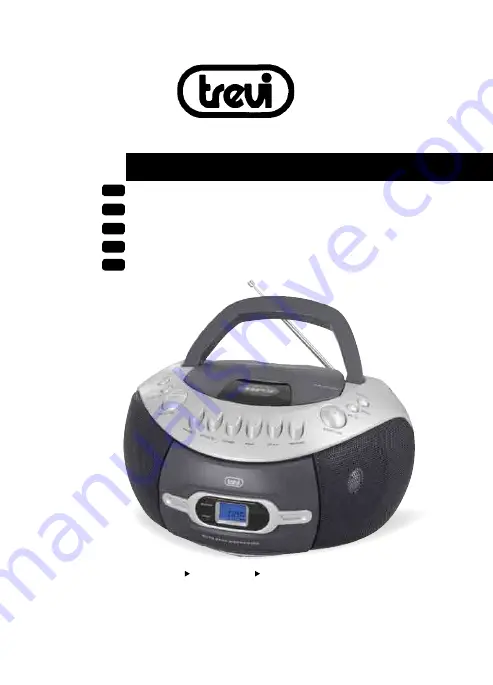
Page 1: ...i www trevi it For additional information and updates of this product see www trevi it FM RADIO CMP 580 USB Guida d uso User Guide DIGITAL BOOMBOX CON USB DIGITAL BOOMBOX WITH USB DIGITAL BOOMBOX AVEC USB DIGITAL BOOMBOX MIT USB DIGITAL BOOMBOX CON USB ita eng fra deu esp USB ...

Page 2: ...eniente sarà opportuno consultare il più vicino Centro Assistenza autorizzato TREVI persegue una politica di continua ricerca e sviluppo Pertanto i prodotti possono presentare caratteristiche diverse da quelle descritte CONTENUTO DELLA CONFEZIONE Unità riproduttore Manuale Cavo alimentazione di rete VOLTAGGIO PERICOLOSO Questo simbolo riportato sul retro dell apparecchio ed in questo manuale segna...

Page 3: ...TANDBY 9 Salta Ricerca Avanti 10 Salta Ricerca INDIETRO 11 SPORTELLO CD 12 MANICO PIEGHEVOLE 13 PORTA USB 14 SPEAKER 15 DISPLAY LCD 16 VANO CASSETTE 17 INDICATORE DI ALIMENTAZIONE 18 INDICATORE FM STEREO 19 DIAL SCALE 20 CONTROLLO TUNING 21 SELETTORE BANDE 22 VANO BATTERIE 23 JACK AUX IN 24 PRESA ALIMETAZIONE 25 SELETTORE FUNZIONI 26 VOLUME 27 ANTENNA TELESCOPICA ITALIANO ...

Page 4: ...are o diminuire il volume SELEZIONE SORGENTE Premere il tasto funzione per selezionare CD MP3 USB AUX o RADIO FUNZIONAMENTO RADIO 1 Spostare l interruttore di funzione posizione RADIO l indicatore POWER si illuminerà 2 Far scorrere l interruttore BAND per selezionare la banda d onda desiderata AM FM stereo 3 Sintonizzarsi sulla stazione desiderata ruotando la manopola di sintonia 4 Ruotare il volu...

Page 5: ... la traccia visualizzata sul display 4 Per cancellare la riproduzione continua della singola traccia premere più volte il tasto PROG P MODE fino alla scomparsa dell icona RIPETIZIONE ININTERROTTA DELL INTERO DISCO In modalità di riproduzione 1 Premere due volte il tasto PROG P MODE 2 L icona della funzione apparirà sul display 3 Il lettore CD riprodurrà ininterrottamente l intero disco 4 Per cance...

Page 6: ...ivo nella porta USB 3 Se il CD audio è nel vano tenere premuto il tasto STOP USB per selezionare la funzione USB 4 Se l USB è leggibile il display mostrerà USB e il numero totale di tracce dopo alcuni secondi 5 Premere il tasto PLAY PAUSE STANDBY per avviare la riproduzione 6 Premere il tasto STOP USB di smettere di giocare Il display visualizza il numero totale dei brani 7 Si può procedere ripeti...

Page 7: ...SETTE 1 Posizionare il selettore sulla posizione TAPE 2 Inserireuncassettanelvanoconillatochedesiderateascoltarerivoltoversol esterno 3 Regolare a vostro piacimento il volume 4 Premere il tasto PLAY per iniziare la riproduzione 5 Premere il tasto PAUSE per fermare momentaneamente la riproduzione premerlo nuovamente per riprenderla 6 Per far avanzare velocemente il nastro premete il tasto F FWD 7 P...

Page 8: ... the outlet and take it to the nearest authorized service center TREVI Always check that the power cables are installed correctly CARE AND MAINTENANCE For cleaning we recommend the use of a soft slightly damp cloth Avoid solvents or abrasives IMPORTANT The good construction of this machine guarantees the perfect functioning for a long time However should any problem arise you should consult your n...

Page 9: ...tteries carefully as indicated in battery compartment 3 Close the BATTERY COMPARTMENT DOOR Remove batteries if they are flat or not being used for a long period of time Batteries contain chemical substances so they should be disposed of properly BASIC FUNCTION SWITCHING ON THE UNIT Set the FUNCTION switch to CD MP3 USB AUX or RADIO NOTE In CD MP3 USB AUX mode when the unit is not providing the mai...

Page 10: ... DOOR OPEN CLOSE to Open the CD door 3 Place an audio CD MP3 disc into the tray with the label side facing up 4 Close the CD door The total number of tracks will appear on the display after several seconds 5 To remove the CD MP3 disc press the CD DOOR OPEN CLOSE to open CD com partment lid grasp the CD MP3 disc by its edges and carefully take it out Note To ensure good system performance wait unti...

Page 11: ...and then the CD SKIP FORWARD button six times immediately To Select A Desired Folder for MP3 disc only if the MP3 disc contains more than one folder Press and hold the FOLD 10 or FOLD 10 button more than 1 second to skip next previous folder Until the desired folder number appears on the LCD display then release the button PROGRAM TRACKS Programming tracks of disc are possible when playback is sto...

Page 12: ...til the STOP button is pressed 2 Tocancelrepeatplayback pressthePROG P MODEbuttonuntilREPEATdisappears on the display RANDOM PLAY PressthePROG P MODEbuttoninplaymodetillthe RDM showssteadyonthedisplay the random play will start from next track automatically or press CD skip forward button until all tracks are played over and then stop Press the PROG P MODE button once to cancel USB OPERATION USB P...

Page 13: ...elector to the TAPE position 2 Insert a cassette into the compartment with the side you want to play facing outward 3 Adjust the volume to your liking 4 Press the PLAY button to start playback 5 Press the PAUSE button to pause playback press again to resume 6 To fast forward the tape press the F FWD 7 To rewind the tape press the R REW 8 Press the STOP EJECT to finally stop playback press it again...

Page 14: ...nement parfait pour une longue période Si toutefois quelques inconvénients devaient se présenter adressez vous au Centre d Assistance agréé le plus proche TREVI poursuit une politique de recherche et de développement continus C est pourquoi ses produits peuvent présenter des caractéristiques différentes par rapport à celles qui sont décrites AVERTISSEMENT SUR LE LASER Cet appareil est pourvu d un ...

Page 15: ... LCD 16 CASSETTE PORTE 17 INDICATEUR DE PUISSANCE 18 FM STEREO indicateur 19 DIAL SCALE 20 tuning de contrôle 21 BAND SELECTOR 22 DES PILES 23 Prise AUX IN 24 AC PRISE 25 FONCTION CONTRÔLE 26 VOLUME 27 FM antenne télescopique FRANÇAISE ALIMENTATION PILES Ouvrez le logement des piles et introduisez 6 piles format C UM 2 en respectant attentivement les polarités indiquées Remplacez immédiatement les...

Page 16: ...volume et en arrière pour augmenter et diminuer le volume AUX IN OPERATION Une Réglez le commutateur de fonction sur CD MP3 USB AUX 2 Insérez la fiche de la ligne AUX dans la prise AUX IN 3 5mm sur le lecteur la musique de l appareil serait amplifié et exporté à partir des haut parleurs 3 Réglez le volume de l unité principale au niveau désiré 4 Appuyez sur PLAY de la source audio externe par exem...

Page 17: ...t sur l écran après quelques secondes 5 Pour retirer le disque CD MP3 appuyez sur le CD PORTE OPEN CLOSE pour ouvrir le couvercle du compartiment CD saisir le disque CD MP3 par les bords et soigneusement enlever Remarque Pour assurer la bonne performance du système attendez que le plateau du disque lu complètement le disque avant de poursuivre Si aucun disque n est inséré dans le compartiment ou l...

Page 18: ...itesse jusqu à ce point désiré passage puis relâchez le bouton La lecture commence à nouveau à partir de ce point Pour sélectionner une chanson dont le nombre de voie dépasse 10 Pour sélectionner un morceau titre dont le nombre dépasse 10 appuyez sur le 10 ou FOLD 10 bouton PLI à chaque fois pour aller en avant arrière 10 titres puis appuyez sur le AVANT ARRIERE bouton CD SKIP pour sélectionner la...

Page 19: ... de CD le programme sera effacé REPEAT Pour répéter une piste unique 1 Appuyez une fois en mode de lecture sur la touche P MODE PROG REPEAT clignote sur l écran La piste en cours est répétée jusqu à ce que le bouton STOP 2 Pour annuler la lecture répétée appuyez sur la touche PROG Touche P MODE jusqu à ce que REPEAT disparaît de l afficheur Pour répéter toutes les pistes 1 Appuyez sur la touche PR...

Page 20: ...le bouton PLAY PAUSE STANDBY pour démarrer la lecture 6 Appuyez sur le bouton STOP USB pour arrêter la lecture L écran affiche le nombre total de pistes 7 Vous pouvez poursuivre la lecture répétée de repeat 1 repeat folder repeat all lecture programmée lecture aléatoire sauter haut et en bas opération que le même décrit dans ci dessus UTILISATION DU CD MP3 ATTENTION Ne pas utiliser de câble de ral...

Page 21: ... sélecteur sur CD MP3 USB et démarrer la piste souhaitée ou à la RADIO et de régler à la station souhaitée 2 Insérez dans le logement la cassette à utiliser pour l enregistrement 3 Pour lancer l enregistrement appuyez sur la touche REC 4 Appuyez sur la touche PAUSE pour arrêter momentanément l enregistrement et appuyez la de nouveau pour recommencer l enregistrement 5 Appuyez sur la touche STOP EJ...

Page 22: ... Betrieb Sollten dennoch Betriebsstörungen auftreten wenden Sie sich bitte an die nächstgelegene autorisierte Kundendienststelle TREVIverfolgt eine Politik ständiger Forschung und Weiterentwicklung Die Produkte können daher andere als die beschriebenen DEUTSCH ACHTUNG DiesesSymbol dasaufder RückseitedesGerätesund auf diesem Handbuch abgebildet ist weist den Benutzer auf wich tige Anweisungen zum s...

Page 23: ...y 9 SKIP SEARCH FORWARD BUTTON 10 SKIP SEARCH Rückwärtstaste 11 CD DOOR OPEN CLOSE 12 Klappgriff 13 USB PORT 14 SPRECHER 15 LCD DISPLAY 16 CASSETTE TÜR 17 POWER ANZEIGE 18 FM STEREO indictor 19 DIAL SCALE 20 Tuning Regler 21 BAND SELECTOR 22 BATTERIEFACH 23 AUX IN Buchse 24 AC Buchse 25 Funktionsschalter 26 VOLUME KONTROLLE 27 FM Teleskopantenne DEUTSCH ...

Page 24: ...t automatisch in den Standby Modus zu schalten Um das Gerät wieder einzuschalten drücken Sie die STANDBY Taste oder das Gerät umstecken ESD Hinweise Das Produkt zurücksetzt oder nicht um den Betrieb der Steuerung zurückgesetzt durch elektrostatische Entladung nur aus und wieder einschalten Um die Lautstärke einzustellen Drehen Sie den Lautstärkeregler hin und her zu erhöhen und die Lautstärke AUX ...

Page 25: ...Dieser Anlage können alle Digital Audio CD MP3 Wiedergabe WMA finalisierte Digital Audio CD Recordable CD R Discs finalisierte Digital Audio CD Rewritable CD RW und CD DA Format Digital Audio CD CD R CD RW Discs Einlegen einer Disc 1 Drücken Sie die Taste FUNCTION um den CD Modus 2 Drücken Sie die CD DOOR OPEN CLOSE um die CD Lade zu öffnen 3 Legen Sie eine Audio CD MP3 Disc in das Fach mit der be...

Page 26: ... Titels PASSAGE Um einen gewünschten Titel zu wählen Drücken Sie die CD SKIP SEARCH Vorwärts Rückwärts Taste wiederholt im Stop Modus oder während der Wiedergabe bis der gewünschte Titel auf dem Display erscheint Drücken Sie die PLAY PAUSE Taste um die Wiedergabe zu starten Um nach einem bestimmten Passage während der Wiedergabe zu suchen Track Scanning bei hoher Geschwindigkeit Drücken und halten...

Page 27: ...Anzeige leuchtet auf 2 Drücken Sie die CD SKIP SEARCH FORWARD Taste um den ersten gewünschten Titel programmiert werden soll 3 Drücken Sie die Taste PROG P MODE Taste zur Bestätigung Die Anzeige wechselt auf P02 zu zeigen 4 Wiederholen Sie die Schritte 2 und 3 um andere gewünschte Titel zu speichern bis alle Titel programmiert sind 5 Drücken Sie die PLAY PAUSE USB Taste um die Wiedergabe ab dem er...

Page 28: ...t wird 2 Um die wiederholte Wiedergabe abzubrechen drücken Sie die Taste PROG P MODE Taste bis REPEAT verschwindet auf dem Display RANDOM PLAY Drücken Sie die Taste PROG P MODE Taste im Wiedergabemodus bis das RDM zeigt stetig auf dem Display wird die Zufallswiedergabe vom nächsten Titel automatisch starten oder drücken Sie CD überspringen Vorwärts Taste bis alle Spuren über gespielt und dann aufh...

Page 29: ...e Seite die wiedergegeben werden soll muss nach außen gerichtet sein 3 Die Lautstärke mit dem Regler VOLUME einstellen 4 Die Taste PLAY drücken um die Wiedergabe zu starten 5 Die Taste PAUSE drücken um die Wiedergabe kurz zu unterbrechen Bei erneutem Druck wird die Wiedergabe fortgesetzt 6 Für den Schnellvorlauf des Bandes die Taste F FWD drücken 7 Für den Schnellrücklauf des Bandes die Taste RWD ...

Page 30: ...CMP 580 USB 30 TECHNISCHE EIGENSCHAFTEN Versorgung ac 220 230V 50Hz 6 Batterien C UM 2 Verbrauch Standby 0 5W Bluetooth V2 1 EDR AUX IN Buchse Jack 3 5 mm Abmessungen 240x210x115mm DEUTSCH ...

Page 31: ...tiza su perfecto funcionamiento durante mu cho tiempo Si se presentase algún inconveniente es oportuno consultar al Centro de Asistencia autorizado más cercano TREVI cultiva una política de investigación y desarrollo continuos Por consiguiente los productos pueden presentar características distintas a las descritas ESPAÑOL ADVERTENCIAS RELATIVAS AL LASER Este aparato consta de un sistema de lectur...

Page 32: ...ÓN DE AVANCE 10 SKIP SEARCH hacia atrás botón 11 CD PUERTA ABIERTA CLOSE 12 Mango plegable 13 PUERTO USB 14 PONENTES 15 PANTALLA LCD 16 PUERTA DE CASSETTE 17 INDICADOR DE ENCENDIDO 18 FM STEREO INDICADOR DE 19 DIAL SCALE 20 Control de Sintonía 21 SELECTOR DE BANDA 22 COMPARTIMENTO DE LA BATERÍA 23 AUX IN JACK 24 Zócalo de la CA 25 SELECTOR FUNCIONES CONTROL DE 26 VOLUME 27 FM ANTENA TELESCOPICA ES...

Page 33: ...d ESD insinúa El producto quizás del reinicio o se reinicia la operación de control debido a lasdescargaselectrostáticas simplementedesconectaryvolveraconectardenuevo Para ajustar el volumen Gireelcontroldevolumenhaciaatrásyhaciaadelanteparaaumentarydisminuirelvolumen OPERACIÓN AUX IN Esta unidad ha brindado especial jack AUX IN a través de esta toma otras fuentes de audio pueden conectarse a esta...

Page 34: ... del CD 3 Coloque un disco CD MP3 de audio en la bandeja con la etiqueta hacia arriba 4 Cierre la puerta del CD El número total de pistas aparecerá en la pantalla después de varios segundos 5 Para extraer el disco CD MP3 presione el CD PUERTA OPEN CLOSE para abrir la tapa del compartimiento de CD sujete el disco por sus bordes CD MP3 y con mucho cuidado se lo quita Nota Para asegurar un buen rendi...

Page 35: ...10 pistas a continuación pulse el botón SALTAR CD ADELANTE ATRÁS para seleccionar la pista deseada Por ejemplo para seleccionar la pista 17a presione FOLD botón 10 y luego el botón SALTAR CD ADELANTE seis veces inmediatamente Para seleccionar la carpeta que desee para el disco MP3 solamente si el disco MP3 contiene más de una carpeta Presione y mantenga presionado el FOLD 10 o FOLD 10 botón durant...

Page 36: ...se el botón PROG Botón P MODE hasta que REPEAT desaparece de la pantalla Para repetir actual Directorio sólo para MP3 1 Presione el botón PROG P MODE dos veces en el modo de juego REPETIR CARPETA muestra constante en la pantalla el directorio actual se reproducirá repetidamente hasta que se pulse el botón STOP 2 Para cancelar la reproducción repetida pulse el botón PROG Botón P MODE hasta que REPE...

Page 37: ...tor a la posición TAPE 2 Introduzca una casete en el compartimiento con la parte que desea escuchar hacia el exterior 3 Regule el volumen a su gusto con el control VOLUME 4 Pulse el botón PLAY para iniciar la reproducción 5 Pulse el botón PAUSE para detener momentáneamente la reproducción vuelva a pulsarla para reestablecerla 6 Para que la cinta avance rápidamente pulse el botón F FWD 7 Para que l...

Page 38: ... le rendre au revendeur quand il achètera un nouvel appareil équivalent La collecte séparée du produit et les opérations successives de traitement recyclage et élimination favorisent la production d appareils composés par des matériaux recyclés ainsi que permettent d éviter des effets négatifs sur l environnement et sur la santé des personnes suite à une gestion impropre du déchet Toute éliminatio...

Page 39: ...THS OUTE ANTALLAKTIKA TMHMATA GIA OPO IADHPOTE EPISKEUH H SUNTHRHSH APEUQUNQEITE SE ENA APO TA EXOUSIODOTHMENA KENTRA ANTIPROSWPEIAS TREVI KINDUNOS HLEKTROPLHXIAS MHN EKQETETE SE BROCH KAI UGRASIA ATENÇÃO PERIGO DE CHOQUES ELÉTRICOS NÃO EXPOR A CHUVA E UMIDADE ATENÇÃO NÃOABRIROAPARELHO NOINTERIORDOMESMONÃOEXISTEMCOMANDOSOUPEÇAS DESUBSTITUIÇÃOQUEPOSSAMSERMANIPULADOSPELOUSUÁRIO EMCASODEEVENTUALOPERA...

Page 40: ... TREVI spa Strada Consolare Rimini San Marino 62 47924 Rimini Italia UK PLUG ONLY WIRES CONNECTIONSTO A UKTHREE PIN PLUG The wires in this mains lead are coloured in accordance with the following wiring codes Blue Neutral Brown Live The wires in this mains lead must be connected to the terminals in the plug as follows Blue wire N or Black Brown wire L or Red Neither wire is to be connected to the ...

Reviews: