


© Copyright 2019 TRENDnet. All Rights Reserved.
57
TRENDnet User’s Guide
TWG-431BR
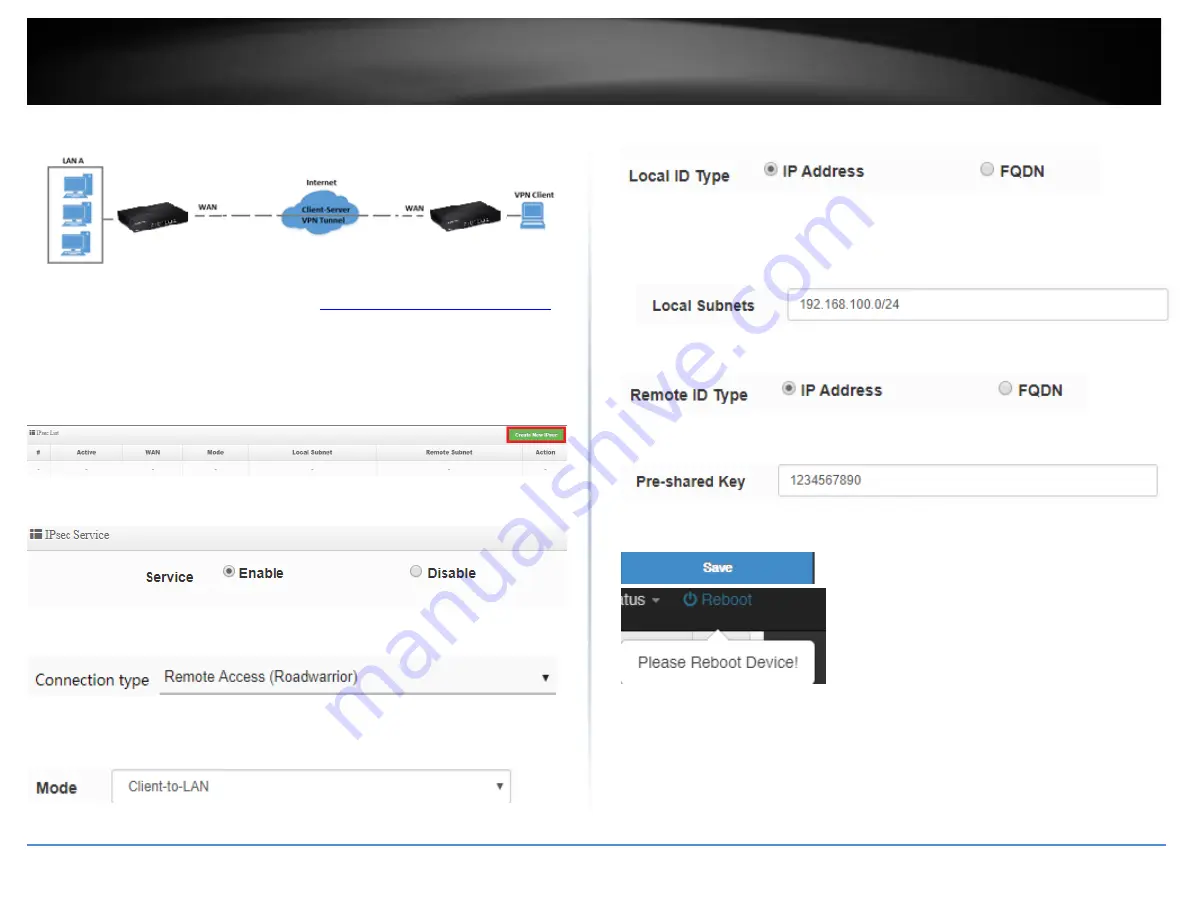
Setting up IPsec server VPN (PSK)
1. Log into your router management page (see “
Access your router management page
on page 7).
2. Click on
System
and click
IPsec Server Setup
.
3. Under IPsec List, click
Create New IPsec
.
4. For the Service, select
Enable
.
4. Click the Connection type drop-down list and select
Remote Access (Roadwarrior)
.
5. Click the Mode drop-down list and select
Client-to-LAN
.
6. For the
Local ID Type
, select
IP Address.
7. In the
Local Subnets
field, enter the local LAN IP subnet.
(e.g. 192.168.100.0/24).
You can add additional local subnets if needed.
(e.g. 192.168.10.0/24,192.168.120.0/24)
8. For the
Remote ID Type
, select
IP Address.
9. Enter the
Pre-Shared Key
(PSK) for the IPsec VPN tunnel.
(e.g. 1234567890)
10. Click
Save
at the bottom. Then click
Reboot
at the top right
to commit the changes.
Note:
For the VPN client computer, you will require a third party IPsec VPN software to
be installed configured matching the IPsec VPN settings on your router. Please refer to
your third party IPsec VPN User’s Guide/Manual for configuring the VPN settings.
Summary of Contents for TWG-431BR
Page 1: ......
Page 8: ...Copyright 2019 TRENDnet All Rights Reserved TRENDnet User s Guide TWG 431BR 5 Applications...
Page 93: ......