8
ACC-SVN150F-EN
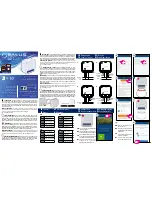
Figure 8. Install control assembly
See Detail B
Detail B
Detail B
IIm
mp
po
orrtta
an
ntt:: Use the wiring diagram provided to
perform following steps.
8. Attach the wires hanging from the heater to the
corresponding contactors.
N
No
otte
e:: The heater opening on the left carries power
wires from the far heater and will be sealed
off for the 18kW model since there is 1 row of
element in the front.
9. Connect the low voltage plug to the mating plug in
the unit control box.
10. Uncoil the power wire harness in the cardboard
sleeve provided with the kit. Route and secure the
leads, one end to the unit cooling fuse in the heater
control panel and the other end to the terminal
block in the unit control box.
N
No
otte
e:: The wires need to be routed through holes
provided in the outdoor section partition
panel.
Figure 9. Connect heater control panel
Contactors
Cooling Fuse
Terminal Block
11. Attach the post and the power conduit entry panel
back on to the unit. Remove the plate covering the
conduit entry opening.
N
No
otte
e:: There are a number of conduit plates
provided. Choose the one with a hole of the
correct size for the conduit you intend to use.
12. Apply foam tape around the perimeter of the
conduit plate to provide a water tight seal, then
connect conduit to the terminal block in the electric
heater control panel. Ground unit at grounding lug
provided on electric heater control panel assembly.
13. Attach the hinged access door assembly. Position
door with outer tab flush against the post. Fasten
the door support to the power conduit entry panel
on the bottom and the gusset plate on the top rear
side of the support. See figure below.


