tradetested GS505-V1 Owner'S Manual And Assembly Instructions Download Page 1

GS505-V1

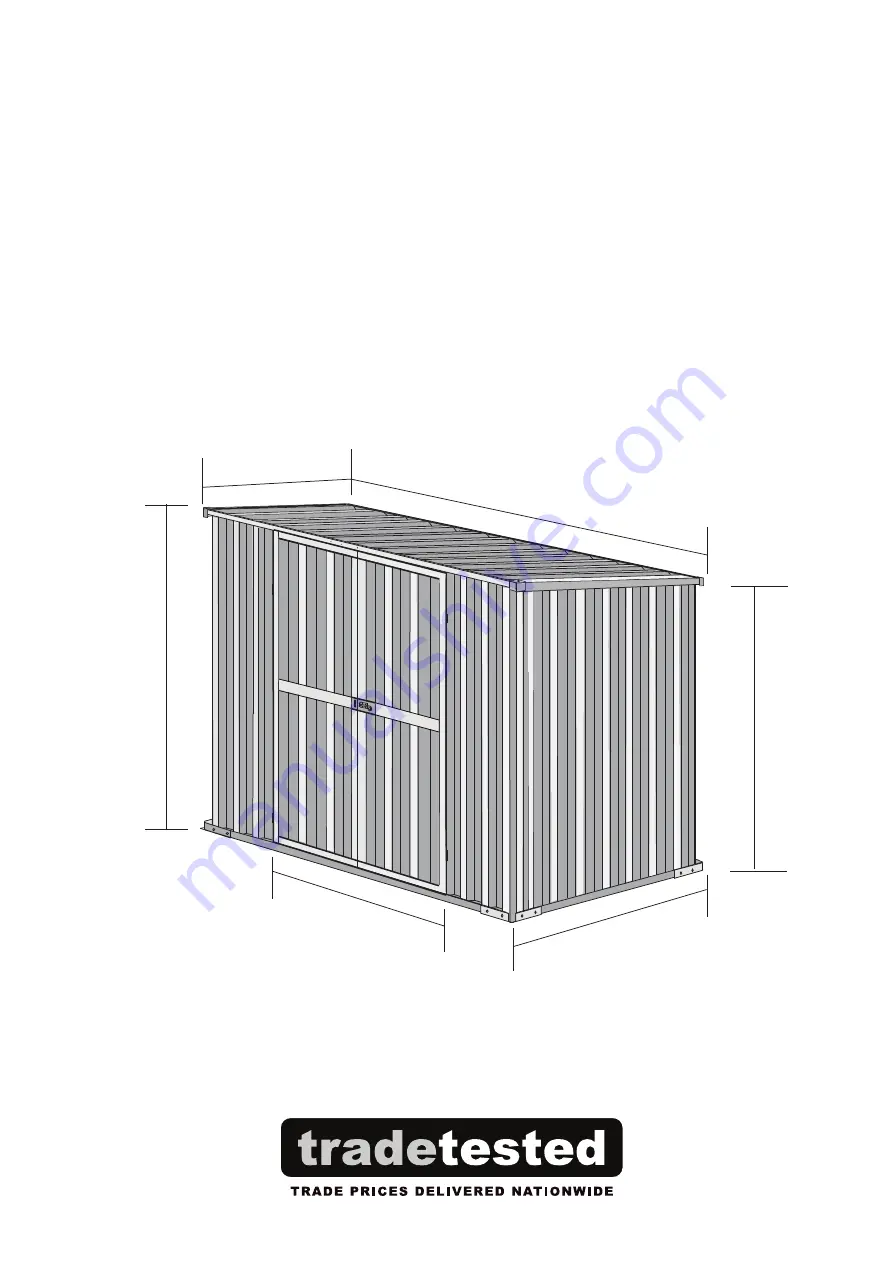
Overall Size: 2310 x 1750 x 2020mm

Shed Size: 2310 x 1550 x 2000mm

Door Size: 1480 x 1950mm

Floor Size: 2270 x 1510mm

GARDEN SHED OWNER’S MANUAL

AND ASSEMBLY INSTRUCTIONS

AND ASSEMBLY INSTRUCTIONS

GARDEN SHED OWNER’S MANUAL

2020

1750

2310

1800

1550

1480

Summary of Contents for GS505-V1

Page 1: ...1750 x 2020mm Shed Size 2310 x 1550 x 2000mm Door Size 1480 x 1950mm Floor Size 2270 x 1510mm GARDEN SHED OWNER S MANUAL AND ASSEMBLY INSTRUCTIONS AND ASSEMBLY INSTRUCTIONS GARDEN SHED OWNER S MANUAL...

Page 2: ...into position Remember to leave plenty of room for the door to fully open An electric drill driver A Phillips screwdriver Gardening or work gloves Sealant or caulking gum optional Step ladder Tape mea...

Page 3: ...loor kits designed to match your shed Alternatively you can build your own using H4 treated bearers and timber floorboards Build on a compacted and levelled base layer Plastic sheeting placed under th...

Page 4: ...is to place a small block of wood underneath the corrugation as you drill providing support for the panel until the screw is all the way in Make sure the block is not directly underneath the screw How...

Page 5: ...ASSEMBLY INSTRUCTIONS iii...

Page 6: ...ips Head Screws 20 21 22 23 24 25 26 Z119 27 28 E195 x 410 E195 x 350 U074 U195 D193 H074 DOOR PART QTY PART 29 30 31 32 2 2 4 4 2 2 2 SIZE mm 410 x 1950 350 x 1950 740 1950 1930 740 1190 ITEM 36 37 3...

Page 7: ...panels should overlap by one corrugation i U155 x2 b Lay the wall panels out with the large rib overlapping the small Large Rib Small Rib Assemble the rear wall panels All pre drilled holes should li...

Page 8: ...0x1 R190195x1 R195200x1 L200195x1 L195190x1 L190185x1 L185180x1 Left Right STEP 3 a c 3 i Joint outside Joint inside Do not add screws to the top and bottom holes at each end of the panel These need t...

Page 9: ...wall panel All pre drilled holes should line up with the peaks of the steel sheet If this varies squeeze together or stretch out the panels to make sure they line up Do not add screws to the top and b...

Page 10: ...Do not add screws to the top and bottom holes at each end of the panel These need to be left undone Leave the left and right door frames MR200 ML200 un fastened at this stage This will help with any a...

Page 11: ...owever when the roof is secured in place it is completely rigid Assemble the roof panels P175x4 U155x2 b c All panels should overlap by one corrugation 6 STEP 5 a i Tek Screw U079 x2 U155 U155 U079 U0...

Page 12: ...x2 U195 x 4 U074x4 Rivet D193x2 Square tube Out side of door E195 x 350 E195 x 410 D193 Square tube insert D193 square tube into U195 frame screw rivets E195 x 350 x1 E195 x 410 x1 In side of door Ou...

Page 13: ...of the door frame and make a mark on the frame at the end of the hinge Now move the hinge down until it is level with mark drill holes for your rivets and attach Use the drill bit to drill pilot hole...

Page 14: ...9 rivets with washer galvanized handle door center strip door top strip door bottom strip door bar door inside door outside handle hasp hinges inside bolt for double door double door hasp on door...

Page 15: ...weather Afterwards tack the sheets together down the length of each corner Corner Anchor x8 STEP 7 i To form a flush corner connection make sure the end corrugations overlap as shown above When addin...

Page 16: ...mend you drill the roof screws though the sheet at the base of the corrugation Once you have your roof in position go inside and drill up through the corner anchors of the shed This will ensure you wi...

Page 17: ...tion later if required to get a good fit The screws can be changed for rivets when the door position is finalised 12 Rivet Drill pilot holes to accommodate the pad bolt keeper and then fix with rivets...

Page 18: ...operly aligned when closed then if needed adjust door frame jamb hinges accordingly To create or reduce space adjust the door frames which have been left unfastened as per Step 3 C by sliding them bac...

Page 19: ...oof can damage the structure making it unsafe to enter DOORS Keep doors closed and locked to prevent wind damage FASTENERS Use all washers supplied to protect the shed panels against weather Regularly...

Page 20: ...Still having trouble Just give us a call or send us an email Head over to tradetested co nz or tradetested com au for all of our contact details and opening hours We will be able to help...

Reviews: