


6
Virtuo Test Fixture Installation Guide
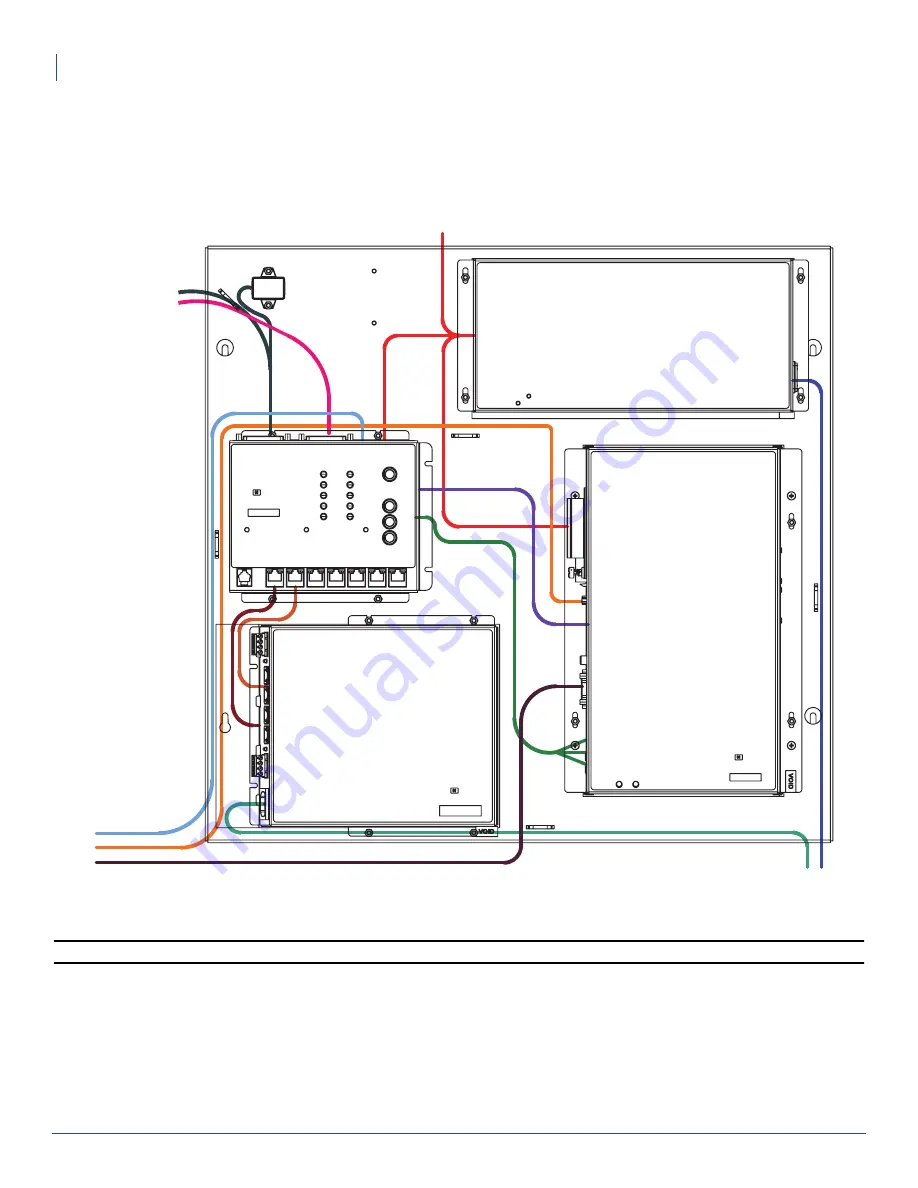
Cables and Connections
Cables and Connections
1. Connect the cables coming from the touchscreen to the appropriate connectors on the computer and PSU,
then connect all the other cables shown in the diagram below:
Note:
Refer to the full Virtuo connection diagram (also provided with your kit) if needed.
2. Use tie wraps (provided) to bundle cables together for a tidier test station and to make it easier to access the
various parts, connectors and switches.
Hard Drive
1. Insert a Virtuo hard drive into the drive bay on the left side of the computer, and fasten it using the thumbscrew
on the hard drive tray.
TO PWR BAR
NOT CONNECTED
TO MONITOR
NOT CONNECTED


