background image

Starting Hibernation Mode

To enter Hibernation Mode, click 

Start ->   (Power)

 and then select

Hibernate

.

To show Hibernate in Power menu, set up according to the following
steps:
1.

Click Start -> Windows System -> Control Panel -> System and 
Security -> Power Options
.

2.

Click Choose what the power button does or Choose what 
closing the lid does
.

3.

Click Change settings that are currently unavailable.

4.

Select the Hibernate check box from Shutdown settings.

5.

Click the Save changes button.

Automatic Hibernation Mode

The computer can be configured to enter Hibernation Mode automatically
when you press the power button or close the display panel.To define
these settings, do the following:
1.

Click 

Power Options

 and then click 

Choose what the power button 

does

 or 

Choose what closing the lid does

.

2.

Enable the desired Hibernation Mode settings for 

When I press the 

power button

 and 

When I close the lid

.

3.

Click the 

Save changes

 button.

Data save in Hibernation Mode

When you turn off the power in Hibernation Mode, the computer takes a
moment to save the current data in memory to the internal storage drive.
After you turn off the computer, and the content of memory has been saved
to the internal storage drive, turn off the power to any peripheral devices.

Do not turn the computer or devices back on immediately. Wait a moment
to let all capacitors fully discharge.

System Recovery

There is a hidden partition allocated on the internal storage drive for the
System Recovery Options in the event of a problem.
You can also create recovery media and restore the system.
The following items are described in this section:

Creating Recovery Media
Restoring the pre-installed software from your created Recovery
Media
Restoring the pre-installed software from the Recovery Partition

User's Manual

2-14

Summary of Contents for Satellite Radius X20W-D

Page 1: ...User s Manual PORTÉGÉ X20W D Satellite Radius X20W D X25W D Satellite Fusion X20W D X25W D Series ...

Page 2: ...st 2 1 Conventions 2 1 Using your computer for the first time 2 2 Getting to know Windows 2 8 Turning off the power 2 10 System Recovery 2 14 Chapter 3 The Grand Tour Front with the display closed 3 1 Left side 3 1 Right side 3 2 Back 3 3 Underside 3 4 Front with the display open 3 5 Magnets location 3 8 Internal Hardware Components 3 9 Power Condition Descriptions 3 10 Chapter 4 Operating Basics ...

Page 3: ...ures 5 3 TOSHIBA Password Utility 5 5 TOSHIBA System Settings 5 7 USB Charge 5 8 TOSHIBA Setup Utility 5 10 Chapter 6 Troubleshooting Problem solving process 6 1 Hardware and system checklist 6 4 TOSHIBA support 6 15 Chapter 7 Appendix Specifications 7 1 AC Power Cord and Connectors 7 2 Information for Wireless Devices 7 4 Information about Intel AMT 7 14 Legal Footnotes 7 16 Glossary 7 19 Index U...

Page 4: ... that stipulated above including conversion to digital format alteration transfer of copied material and distribution on a network without the permission of the copyright owner is a violation of copyright or author s rights and is subject to civil damages or criminal action Comply with copyright laws in making any reproduction from this manual Disclaimer This manual has been validated and reviewed...

Page 5: ...e protection against harmful interference in a residential installation This equipment generates uses and can radiate radio frequency energy and if not installed and used in accordance with the instructions may cause harmful interference to radio communications However there is no guarantee that interference will not occur in a particular installation If this equipment does cause harmful interfere...

Page 6: ...ems Inc 9740 Irvine Boulevard Irvine California 92618 1697 Telephone 949 583 3000 This information is only applicable for the countries regions where it is required California Prop 65 Warning This product contains chemicals including lead known to the State of California to cause cancer and birth defects or other reproductive harm Wash hands after handling For the state of California only Export A...

Page 7: ...not produced by TOSHIBA are connected or implemented In this case the persons who have connected implemented those options cables have to provide assurance that the system PC plus options cables still fulfils the required standards To avoid in general EMC problems the following guidance should be noted Only CE marked options should be connected implemented Only best shielded cables should be conne...

Page 8: ...paratus does not exceed the Class B limits for radio noise emissions from digital apparatus as set out in the Radio Interference Regulation of the Canadian Department of Communications Note that Canadian Department of Communications DOC regulations provide that changes or modifications not expressly approved by TOSHIBA could void your authority to operate this equipment This Class B digital appara...

Page 9: ...ential for harmful interference to co channel Mobile Satellite systems High power radars are allocated as primary users of the 5 25 GHz to 5 35 GHz and 5 65 GHz to 5 85 GHz bands These radar stations can cause interference with and or damage this device Les dispositifs fonctionnant dans la bande 5150 5250 MHz sont réservés uniquement pour une utilisation à l intérieur afin de réduire les risques d...

Page 10: ...ed and disposed of separately from household waste Integrated batteries and accumulators can be disposed of with the product They will be separated at the recycling centres The black bar indicates that the product was placed on the market after August 13 2005 By participating in the separate collection of products and batteries you will help to assure the proper disposal of products and batteries ...

Page 11: ...ly friendly disposal ensuring that the terminal contacts are covered by non conductive tape For more detailed information about the collection and recycling programmes available in your country please visit our website www toshiba eu recycling or contact your local council office or the retail outlet where you purchased the product These symbols might not stick depending on the country and region ...

Page 12: ...ne getirmektedir The number of possible pixel failures of your display is defined according to ISO 9241 307 standards If the number of pixel failures is less than this standard they will not be counted as defect or failure Battery is a consumption product since the battery time depends on the usage of your computer If the battery can not be charged at all then it is a defect or failure The changes...

Page 13: ... style Open Source licenses In case of any license issues related to OpenSSL please contact openssl core openssl org OpenSSL License Copyright c 1998 2011 The OpenSSL Project All rights reserved Redistribution and use in source and binary forms with or without modification are permitted provided that the following conditions are met 1 Redistributions of source code must retain the above copyright ...

Page 14: ...NEGLIGENCE OR OTHERWISE ARISING IN ANY WAY OUT OF THE USE OF THIS SOFTWARE EVEN IF ADVISED OF THE POSSIBILITY OF SUCH DAMAGE This product includes cryptographic software written by Eric Young eay cryptsoft com This product includes software written by Tim Hudson tjh cryptsoft com Original SSLeay License Copyright C 1995 1998 Eric Young eay cryptsoft com All rights reserved This package is an SSL i...

Page 15: ...thereof from the apps directory application code you must include an acknowledgement This product includes software written by Tim Hudson tjh cryptsoft com THIS SOFTWARE IS PROVIDED BY ERIC YOUNG AS IS AND ANY EXPRESS OR IMPLIED WARRANTIES INCLUDING BUT NOT LIMITED TO THE IMPLIED WARRANTIES OF MERCHANTABILITY AND FITNESS FOR A PARTICULAR PURPOSE ARE DISCLAIMED IN NO EVENT SHALL THE AUTHOR OR CONTR...

Page 16: ... You can use this software for whatever you want in parts or full form without having to pay us royalty free usage You may not pretend that you wrote this software If you use it or only parts of it in a program you must acknowledge somewhere in your documentation that you have used the FreeType code credits We specifically permit and encourage the inclusion of this software with or without modific...

Page 17: ...HT HOLDERS BE LIABLE FOR ANY DAMAGES CAUSED BY THE USE OR THE INABILITY TO USE OF THE FREETYPE PROJECT 2 Redistribution This license grants a worldwide royalty free perpetual and irrevocable right and license to use execute perform compile display copy create derivative works of distribute and sublicense the FreeType Project in both source and object code forms and derivative works thereof for any...

Page 18: ...s license or another one contracted with the authors grants you the right to use distribute and modify it Therefore by using distributing or modifying the FreeType Project you indicate that you understand and accept all the terms of this license 4 Contacts There are two mailing lists related to FreeType freetype nongnu org Discusses general use and applications of FreeType as well as future and wa...

Page 19: ...uter from Sleep Mode by pressing the power button Your ENERGY STAR certified computer should be set by default to enter a low power sleep mode after a period of inactivity Simply touching the mouse or keyboard wakes the computer in seconds These sleep features can save you up to 23 per year 200 kWh per year in electricity and prevent up to 300 pounds of greenhouse gas emissions annually To learn h...

Page 20: ...e system failure computer or AC adaptor damage or a fire possibly resulting in serious injury Creating a computer friendly environment Place the computer on a flat surface that is large enough for the computer and any other items you are using such as a printer Leave enough space around the computer and other equipment to provide adequate ventilation Otherwise they might overheat To keep your comp...

Page 21: ...o any form of strong impact as this can damage the computer s components or otherwise cause it to malfunction Cleaning the computer To help ensure long trouble free operation keep the computer free of dust and dirt and use care with all liquids around it Be careful not to spill liquids into the computer If the computer does get wet turn the power off immediately and let the computer dry completely...

Page 22: ...puter and or the card resulting in computer failure Always use a suitable carry case when transporting the computer When carrying your computer be sure to hold it securely so that it does not fall or hit anything Do not carry your computer by holding any of its protruding elements Mobile phones Be aware that the use of mobile phones can interfere with the audio system The operation of the computer...

Page 23: ...use of equipment or failure to follow instructions might cause data loss equipment damage or might result in minor or moderate injury Please read A note is a hint or advice that helps you make best use of your equipment User s Manual 1 20 ...

Page 24: ...n provided with some models One replacement pen tip prepared for Stylus Pen and provided with some models One AAAA battery provided with some models for operating check USB C to HDMI Adapter USB C to HDMI USB Multiport Adapter USB C to VGA Adapter provided with some models and varies depending on the model you purchased AC adapter and power cord 2 pin plug or 3 pin plug Cleaning cloth provided wit...

Page 25: ...ng the recommendations in it you can reduce your chance of developing a painful or disabling injury to your hand arms shoulders or neck This section provides basic information to start using your computer It covers the following topics Opening the display Connecting the AC adaptor Turning on the power Initial setup Getting to know Windows Use a virus check program and make sure that it is updated ...

Page 26: ...l Do not close the computer with pens or any other objects left in between the display panel and the keyboard When opening or closing the display panel place one hand on the palm rest to hold the computer in place and use the other hand to slowly open or close the display panel Do not use excessive force when opening or closing the display panel Do not press or push with excess force on the displa...

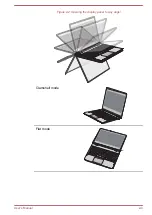
Page 27: ...Figure 2 2 Opening the display panel to any angel Clamshell mode Flat mode User s Manual 2 4 ...

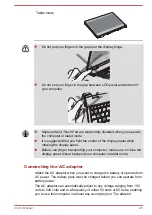
Page 28: ...ore carrying or transporting your computer make sure to close the display panel Never transport your computer in tablet mode Connecting the AC adaptor Attach the AC adaptor when you want to charge the battery or operate from AC power The battery pack must be charged before you can operate from battery power The AC adaptor can automatically adjust to any voltage ranging from 100 volts to 240 volts ...

Page 29: ... safety rules and regulations in the region the computer is bought and should not be used outside this region For use in other regions buy power cords that conform to safety rules and regulations in the particular region Do not use a 3 pin to 2 pin conversion plug When you connect the AC adaptor to the computer always follow the steps in the exact order as described in this User s Manual Connectin...

Page 30: ...lt 3 USB Type C port on your computer The DC IN Battery indicator glows You can also establish connection through the USB Type C adapter provided with some models Refer to the USB Type C Adapters section for more information Figure 2 5 Connecting the DC output plug to the computer 1 2 1 Thunderbolt 3 USB Type C port 2 DC output plug Turning on the power This section describes how to turn on the po...

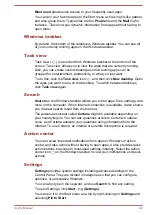
Page 31: ...erating system properly follow the on screen instructions on each screen When it is displayed be sure to read the license terms and license agreement carefully Getting to know Windows For detailed information on what is new and how to operate Windows refer to Get Started in the Start menu Start menu The Start menu is the launching pad for everything you can do in the Windows operating system provi...

Page 32: ...es settings and more on the computer When Internet connection is available it also shows you the best search result from the Internet The personal assistant called Cortana might be available depending on your country region You can ask questions or talk to Cortana in natural voice and Cortana answers your questions using information from the Internet To use Cortana an internal or external micropho...

Page 33: ...s Windows offers a number of sign in options including Password PIN Fingerprint Face and Picture password authentication to prevent from unauthorized access If you have multiple sign in methods set for a user account you can select an option on the Windows login screen by clicking sign in options It is highly recommended to use Windows Hello Face recognition indoors Operating outdoors might cause ...

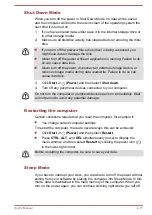
Page 34: ...4 Turn off any peripheral devices connected to your computer Do not turn the computer or peripheral devices back on immediately Wait a short period to avoid any potential damage Restarting the computer Certain conditions require that you reset the computer for example if You change certain computer settings To restart the computer there are several ways this can be achieved Click Start Power and t...

Page 35: ... and Security Power Options To restore the operation of the computer from Sleep Mode press and hold the power button or any key on the keyboard for a short amount of time Note that keyboard keys can only be used if the Wake up on Keyboard option is enabled within the TOSHIBA System Settings If the computer enters Sleep Mode while a network application is active the application might not be restore...

Page 36: ...it is turned on the previous state is restored Note that the Hibernation Mode feature does not save the status of any peripheral devices connected to the computer Save your data While entering Hibernation Mode the computer saves the contents of memory to the internal storage drive However for safety sake it is best to save your data manually Data will be lost if you disconnect the AC adaptor befor...

Page 37: ...the desired Hibernation Mode settings for When I press the power button and When I close the lid 3 Click the Save changes button Data save in Hibernation Mode When you turn off the power in Hibernation Mode the computer takes a moment to save the current data in memory to the internal storage drive After you turn off the computer and the content of memory has been saved to the internal storage dri...

Page 38: ...able virus detection programs including any software that checks files automatically in the background Do not use utilities including those intended to enhance internal storage drive access speed They might cause unstable operation and damage data Do not shut down log off or Sleep Hibernate while writing or rewriting the media Set the computer on a level surface and avoid places subjected to vibra...

Page 39: ...stem If your computer is pre installed with Recovery Media Creator make sure that you create recovery media by using Recovery Media Creator Restoring the pre installed software from your created Recovery Media If the pre installed files are damaged you are able to use the Recovery Media you have created to restore the computer to the state it was in when you originally received it To perform this ...

Page 40: ...om which you should follow the on screen instructions If you have previously chosen to remove the recovery partition without creating Recovery Media the Recovery Media cannot be created However if you have already created a Recovery Media you can use it to restore the recovery partition If you have not created Recovery Media contact TOSHIBA support for assistance Restoring the pre installed softwa...

Page 41: ...u reinstall the Windows operating system delete the registered fingerprints Otherwise same fingerprints cannot be registered after the reinstallation 1 Click Start Power and then select Restart 2 Hold down 0 zero key and then release this key just after the computer is power on 3 Select Troubleshoot TOSHIBA Maintenance Utility TOSHIBA Recovery Wizard 4 Follow the on screen instructions to finish t...

Page 42: ...urface Front with the display closed The following figure shows the front of the computer with the display panel in the closed position Figure 3 1 Front of the computer with display panel closed Left side The following figure shows the left side of the computer Figure 3 2 The left side of the computer 1 2 3 1 Thunderbolt 3 USB Type C port 3 Headphone Microphone jack 2 DC IN Battery indicator Thund...

Page 43: ...e Hardware and Eject Media icon on the Windows Taskbar and then select the USB device that you want to remove Keep foreign metal objects such as screws staples and paper clips out of the Thunderbolt 3 USB Type C port Foreign metal objects can create a short circuit which can cause damage and fire possibly resulting in serious injury DC IN Battery indicator The DC IN Battery indicator shows the con...

Page 44: ...n has Sleep and Charge function Note that it is not possible to confirm the operation of all functions of all USB devices that are available Some functions associated with a specific device might not operate properly Before removing a USB device from the USB port of your computer click the Safely Remove Hardware and Eject Media icon on the Windows Taskbar and then select the USB device that you wa...

Page 45: ...derside The following figure shows the underside of the computer Ensure that the display is closed before the computer is turned over to avoid causing any damage Figure 3 5 The underside of the computer 1 2 2 1 Cooling vents 2 Stereo speakers Cooling vents The cooling vents help the processor to avoid overheating Do not block the cooling vents Keep foreign metal objects such as screws staples and ...

Page 46: ...nt of the computer with the display panel open 6 7 1 2 4 5 3 8 9 11 8 10 12 13 13 1 Infrared LED 8 Display hinges 2 Face recognition sensor 9 Keyboard 3 Infrared LED 10 Fingerprint Sensor 4 Web Camera LED 11 Touch Pad 5 Web Camera 12 Touch Pad control buttons 6 Microphones 13 Wireless communication antennas not shown 7 Display screen Provided with some models Product appearance depends on the mode...

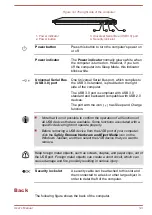
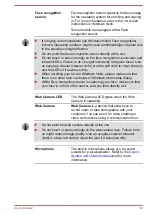
Page 47: ...hen enrolling your face to Windows Hello please make sure that there is no other face in preview of Windows Hello setup dialog While Face recognition sensor is capturing your face make sure that your face is in front of the sensor and you look directly at it Web Camera LED The Web Camera LED glows when the Web Camera is operating Web Camera Web Camera is a device that allows you to record video or...

Page 48: ...ction for details Fingerprint Sensor This sensor enables you to enroll and sign in with a fingerprint in Windows Hello For more information refer to the on screen instructions in Windows Hello Some models are equipped with a Fingerprint Sensor Touch Pad The Touch Pad located in the palm rest is used to control the movement of the mouse pointer To use the Touch Pad simply touch and move your finger...

Page 49: ...read the following information before using the computer Figure 3 7 Magnets location The computer contains magnets that might interfere with pacemakers defibrillators or other medical devices If you wear a pacemaker keep separation between your medical device and the computer If you suspect that the computer is interfering with your medical device discontinue use and consult your physician for inf...

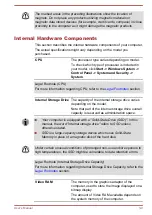
Page 50: ... Drive The capacity of the internal storage drive varies depending on the model Note that part of the internal storage drive overall capacity is reserved as administration space Your computer is equipped with a Solid State Drive SSD In this manual the word internal storage drive refers to SSD unless otherwise stated SSD is a large capacity storage device which uses Solid State Memory in place of a...

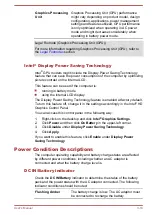
Page 51: ...y feature is enabled at factory default To turn this feature off change it in the settings accordingly in the Intel HD Graphics Control Panel You can access this control panel in the following way 1 Right click on the desktop and click Intel Graphics Settings 2 Click Power and then click On Battery in the upper left corner 3 Click Disable under Display Power Saving Technology 4 Click Apply If you ...

Page 52: ...ile it is being charged the charge stops and the DC IN Battery indicator goes out When the temperature of the battery pack falls to a normal range charging will resume This process occurs regardless of whether the computer s power is on or off Power indicator Check the Power indicator to determine the power status of the computer The following indicator conditions should be noted White Indicates t...

Page 53: ...move the AC adaptor from the computer when using it held in your forearm Do not use the computer while walking or driving a car Do not drop the computer or apply excessive impact to it Do not leave the computer in a car or similar environment where it is exposed to direct sunlight Do not block the cooling vents when using the computer held in your forearm Changing the screen orientation When opera...

Page 54: ...to satisfy RF exposure compliance In the Portrait mode some drivers utilities might not perform install and uninstall operation If it occurs switch to the Landscape mode to proceed Using the Touch Screen You can use your finger to manipulate icons buttons menu items the on screen keyboard and other items on the touch screen Tap Simply tap your finger once on the touch screen to activate an item su...

Page 55: ...excess force on the touch screen Do not apply excess force when cleaning the touch screen Never touch the screen with a sharp object such as a ball point pen which might scratch or damage the surface Do not use a protecting sheet for the touch screen as it might decrease its sensitivity to gestures Do not touch the screen with gloves wet hands or the tip of your fingernails as it might decrease th...

Page 56: ... pausing when you first touch it Swipe from the top edge shows the desktop Swipe from the bottom edge views all your open apps in task view Swipe from the left or right edge switches between your open apps Slide your fingers slowly across the Touch Pad to flip through them all Do not put items on the Touch Pad surface to prevent abnormal action Some of the Touch Pad operations described in this se...

Page 57: ... sketches in applications that support eraser function By default the lower button functions as eraser Pen tip You can use pen tip to operate same like as by your finger You can choose to enable disable the Side buttons function in Pen Options To access it click Start Windows System Control panel Hardware and Sound Pen and Touch Pen Options Observe the following precautions on the handling of the ...

Page 58: ... to clean the Stylus Pen Do not use volatile liquids such as alcohol thinner or petroleum benzine to clean the Stylus Pen Do not apply excessive force to the Stylus Pen tip as a bent or deformed pen tip can cause a malfunction Keep the small parts of the Stylus Pen such as the pen tip or the knob of the Side buttons away from infants and small children to prevent the accidental ingestion by them D...

Page 59: ... the screen and hold until a white circle appears Lift the Stylus pen to open a pop up menu or execute a specific action Drag Touch the Stylus Pen on the screen Without lifting the Stylus Pen drag it across the screen to select text or objects Drag and drop Touch the Stylus Pen on the screen to select an object Without lifting the Stylus Pen drag it across the screen Lift the Stylus Pen to drop th...

Page 60: ...set from a TOSHIBA authorized dealer Always use the refills delivered with the Stylus Pen Use of an incompatible refill could cause a malfunction or characteristic deterioration A short and worn pen tip is difficult to pull out Replace the pen tip with a refill before it becomes too short to remove You can buy replacement pen sets from your TOSHIBA authorized dealer The Keyboard The number of keys...

Page 61: ...keyboard Function keys let you enable or disable certain features of the computer The functions can be performed by pressing the associated function keys Key Combination Function FN F1 Enters Lock computer mode To restore your desktop you need to log on again FN F2 Switches between the power plans FN F3 Switches the system to Sleep Mode FN F4 Switches the system to Hibernation Mode FN F5 Changes t...

Page 62: ...ack volume of the computer FN Space Changes the display resolution FN S Allows you to search your computer the web or within an app FN Z Toggles the mode of the keyboard backlight between Timer On and Off To set up the brightness click Start TOSHIBA System Settings Click Keyboard tab and select a level under Keyboard Backlight Brightness Control To set up the timer launch the BIOS setup utility se...

Page 63: ... enrollment you might need to touch and lift your finger on the sensor repeatedly until setup is complete Follow the on screen instructions to finish the setup By enrolling the ID and password onto the fingerprint authentication feature it is no longer necessary to input the password from the keyboard Fingerprint feature enables you to Sign in to Windows Unlock the password protected screen saver ...

Page 64: ...ty is a common cause of sensor failures especially when the weather is dry Clean the sensor with a lint free cloth Do not use detergent or any other chemicals to clean the sensor Avoid the following finger conditions for enrollment or recognition as they might result in fingerprint enrollment errors or a drop in the fingerprint recognition success rate Soaked or swollen finger for example as might...

Page 65: ...on and the real time clock and calendar will stop working You can change the Real Time Clock settings in the TOSHIBA Setup Utility Refer to Real Time Clock for further information Care and use of the battery pack This section provides the important safety precautions in order to handle your battery pack properly Refer to the enclosed Instruction Manual for Safety and Comfort for detailed precautio...

Page 66: ... idle whether you make heavy use of external devices powered by the computer or if the computer s internal storage drive is being accessed frequently by an application The battery might not be charged depending on how the computer is being used and the charge of battery decreases and battery might not be fully charged sometimes If AC adapter is connected via USB Type C adapter battery charging tim...

Page 67: ...ased on this together with the current power consumption Be aware that the actual remaining operating time might differ slightly from the calculated time With repeated discharges and recharges the battery capacity will gradually decrease In view of this it is noted that an often used older battery will not operate for as long as a new battery even when both are fully charged Maximizing battery ope...

Page 68: ...ive minutes If you find that the battery pack has at least five minutes of operating time continue operating until the battery pack is fully discharged However if the DC IN Battery indicator flashes or there is some other warning to indicate a low battery condition go to Step 4 4 Connect the AC adaptor to the Thunderbolt 3 USB Type C port of the computer and to a wall outlet that is supplying powe...

Page 69: ...t supported If AC adapter is connected via USB Type C adapter battery charging time might become longer Do not connect other USB Type C adapter to USB Type C port of USB Type C adapter USB C to HDMI Adapter This adapter provides USB Type C port Power Delivery Charging and HDMI out port 1 2 1 HDMI out port 2 USB Type C port Power Delivery Charging The output resolution of HDMI out port on this adap...

Page 70: ...ng on this adapter is used for connecting AC adaptor only USB data transmission is not supported by this port USB C to VGA Adapter This adapter provides USB Type C port Power Delivery Charging and RGB monitor port 2 1 1 RGB monitor port 2 USB Type C port Power Delivery Charging The output resolution of RGB monitor port on this adapter is up to 1920x1200 60Hz The USB Type C port Power Delivery Char...

Page 71: ... HDMI High Definition Multimedia Interface out port digitally transfers both video and audio data without reducing the quality HDMI compatible external display devices including televisions can be connected via the HDMI out port As the port operation of all external monitors have not been confirmed some display devices might not function properly To connect an HDMI compatible display device do the...

Page 72: ... view video on the HDMI display device be sure to configure the following settings otherwise you might find that nothing is displayed Be sure to select the display device or audio device before starting to play video Do not change the display device or audio device while playing video Do not change the display device under the following conditions While data is being read or written While communic...

Page 73: ...Thunderbolt 3 USB Type C port 3 RGB monitor port 2 USB Type C adapter 4 RGB cable USB Type C adapter appearance varies depend on the model you purchased When displaying desktop on an external RGB monitor desktop is sometimes displayed on the center of the monitor with black bars around desktop with small size At that time read the manual of the monitor and set the display mode which is supporting ...

Page 74: ...oval or theft The computer has a security lock slot into which you can attach one end of the security cable while the other end attaches to a desk or similar object The methods used for attaching security cables differ from product to product Refer to the instructions for the product you are using for more information If a big security lock is used computer chassis will be lifted up your finger mi...

Page 75: ...r headphones move the Speakers slider To adjust the volume level of an application that you are using move the slider for the corresponding application Microphone Level To change the microphone recording level do the following 1 Right click on the speaker icon on the Windows Taskbar and select Recording devices from the sub menu 2 Select Microphone and click Properties 3 On the Levels tab move the...

Page 76: ...lick Start DTS Inc DTS Studio Sound U S patents apply to this product See http patents dts com Manufactured under license from DTS Licensing Limited Realtek HD Audio Manager You can confirm and change the audio configuration using the Realtek HD Audio Manager To launch the Realtek HD Audio Manager Click Start Windows System Control Panel Hardware and Sound Realtek HD Audio Manager When you first l...

Page 77: ...the circle button in the right side of the Realtek HD Audio Manager main screen 3 Select one from the device list for the device you plugged into Video mode Video mode settings are configured via the Screen Resolution dialog To open the Screen Resolution dialog click Start Windows System Control Panel Appearance and Personalization Display Change display settings Advanced display settings If you a...

Page 78: ... a password before Windows boots up and Single Sign On function that allows you to sign on using a fingerprint for both Pre Boot Authentication and Windows operating system under PBA Setting in Password utility Please note that Pre Boot Authentication and Single Sign On function will be disabled if TOSHIBA Password Utility is uninstalled To access this utility click Start TOSHIBA Password Utility ...

Page 79: ...the battery operating time is comparatively short in this mode Depending on the usage situation the life cycle of the battery might not be extended properly To access this utility click Start TOSHIBA eco Utility For details on TOSHIBA eco utility see the help file TOSHIBA Service Station This application allows your computer to automatically search for TOSHIBA software updates or other alerts from...

Page 80: ... you want to use the computer after erasing your hard disk drive s You might not have all the software listed in this section depending on the model you purchased Special features The following features are either unique to TOSHIBA computers or are advanced features which make the computer more convenient to use Access each function using the following procedures 1 To access the Power Options clic...

Page 81: ...ter off when the display panel is closed and turns it back on when the display panel is opened This can be specified in the Power Options Low battery automatic Hibernation Mode 1 When battery power is exhausted to the point that computer operation cannot be continued the system automatically enters Hibernation Mode and shuts itself down This can be specified in the Power Options Sleep Mode If you ...

Page 82: ...controlled through the Power Options When the processor s temperature falls within normal range the fan and the processor operation returns to its standard speed If the processor s temperature reaches an unacceptably high level with either setting the computer automatically shuts down to prevent any damage In this instance all unsaved data in memory will be lost TOSHIBA Password Utility The TOSHIB...

Page 83: ...stered password Before you can change a password you must first enter the current password correctly Owner String text box You can use this box to associate text with the password After you enter text click Apply or OK When the computer is started this text is displayed together with the prompt asking you to enter a password Supervisor Password If you set a Supervisor Password some functions might...

Page 84: ...umber of tabs to allow specific functions of the computer to be configured In addition there are also three buttons OK Cancel and Apply OK Accepts your changes and closes the TOSHIBA System Settings window Cancel Closes the window without accepting your changes Apply Accepts all your changes without closing the TOSHIBA System Settings window Some options shown in gray are possible to confirm their...

Page 85: ...ompatible port even when the computer is turned OFF Power OFF includes Sleep Mode Hibernation Mode or shutdown state To set USB Sleep and Charge feature click Start TOSHIBA System Settings Sleep Utilites Move the slider to enable or disable the Sleep and Charge function The Sleep and Charge function might not work with certain external devices even if they are compliant with the USB specification ...

Page 86: ...s Do not allow USB ports to come into contact with metal products for example when carrying the computer in your bag Your PC has multiple charging modes so that many different USB devices can be supported for Sleep and Charge function Auto Mode Default is suitable for a wide range of digital audio players While using Auto Mode your computer can supply USB bus power at maximum 2 0A to the compatibl...

Page 87: ...ered On The System ON CDP Charge Mode might not work with certain external devices even if they are compliant with the USB specifications In those cases use a USB port without USB Sleep and Charge function or disable System ON CDP Charge Mode It is recommended that AC adaptor be connected to the computer while supplying USB bus power DC5V 1 5A When your computer battery capacity is too low to cont...

Page 88: ...nd then release this key just after the computer is power on 4 Follow the on screen instructions to proceed To save the changes and exit the utility press the F10 key and proceed by selecting Yes or select Exit Exit Saving Changes Yes The computer restarts immediately User s Manual 5 11 ...

Page 89: ...n this chapter are meant only as a guide they are not definitive problem solving techniques In reality many problems can be solved simply but a few might require help from TOSHIBA Support If you find you need to consult others be prepared to describe the problem in as much detail as possible Preliminary checklist You should always consider the simplest solution first The items detailed in this che...

Page 90: ...racters Make a screenshot of the current display and if possible look up the messages in the documentation included with the computer software or operating system Check that all connecting cables are correctly and firmly attached as loose cables can cause erroneous or intermittent signals Do any indicators light if so which ones what color are they and do they stay on or blink Write down what you ...

Page 91: ...15 seconds before turning on the power again by pressing the power button Your program stops responding If you are working with a program that suddenly freezes all operations chances are the program has stopped responding You can exit the failed program without shutting down the operating system or closing other programs To close a program that has stopped responding 1 Press CTRL ALT and DEL simul...

Page 92: ...ting System instead of desired advanced options do the following 1 Click Start Power and then select Restart 2 Hold down the corresponding key and then release this key just after the computer is power on 3 Follow the on screen instructions to proceed Hardware and system checklist This section discusses problems caused by your computer s hardware or attached peripherals Basic problems might occur ...

Page 93: ...ons section for further information Problem Procedure AC adaptor does not power the computer Check the connections to make sure that the power cord adaptor is firmly connected to the computer and a working power outlet Check the condition of the cord and terminals If the cord is frayed or damaged it should be replaced while if the terminals are soiled they should be cleaned with a clean cotton clo...

Page 94: ...attery might not charge to its full potential In these instances you should fully discharge the battery and then attempt to charge it again Check the Power saver option under Choose or customize a power plan in the Power Options Real Time Clock Problem Procedure The BIOS setting and system date time are lost The lasting time of the Real Time Clock RTC has run out You must set the date and time in ...

Page 95: ... dealer Keyboard Keyboard problems can be caused by the setup and configuration of the computer Refer to the The Keyboard section for further information Problem Procedure Output to screen is garbled Refer to your software documentation to ensure that it is not remapping the keyboard in any way remapping involves changing or reassigning the function of each key If you are still unable to use the k...

Page 96: ...e Boot Priority Options setting within the TOSHIBA System Settings Slow performance The files on the internal storage drive might be fragmented In this instance you should run the disk defragmentation utility to check the condition of your files and the internal storage drive Refer to the operating system s documentation or online Help File for further information on operating and using the Defrag...

Page 97: ...the speed setting within the Mouse Control utility 1 To access this utility click Start Windows System Control Panel Hardware and Sound Mouse 2 Within the Mouse Properties window click the Pointer Options tab 3 Set the mouse pointer speed as required and click OK The reaction of Touch Pad is either too sensitive or not sensitive enough Adjust the touch sensitivity To access it click Start Windows ...

Page 98: ...slow In this instance you should initially try changing the speed setting within the Mouse Control utility 1 To access this utility click Start Windows System Control Panel Hardware and Sound Mouse 2 Within the Mouse Properties window click the Pointer Options tab 3 Set the mouse pointer speed as required and click OK The mouse pointer moves erratically The elements of the mouse responsible for de...

Page 99: ...that 7 To save the changes and exit the utility press the F10 key and proceed by selecting Yes or select Exit Exit Saving Changes Yes The computer restarts immediately USB device In addition to the information in this section also refer to the documentation supplied with your USB device Problem Procedure USB device does not work Remove the USB device from the computer and then reconnect it to a fr...

Page 100: ...ing methods Turn OFF the computer while external devices are connected Connect external devices after turning OFF of the computer If this function cannot be still used change the setting to disable the function and stop using this function The battery depletes quickly even when I turned OFF the power of the computer If Sleep and Charge function is enabled the computer s battery discharges during h...

Page 101: ...or decrease volume Check the software volume settings Check to see if Mute is turned to Off Check to make sure that the headphone connection is secure Check within the Windows Device Manager application to ensure that the sound device is enabled and that the device is properly working Annoying sound is heard In this instance you might be experiencing feedback from either the internal microphone or...

Page 102: ...do not disconnect the external monitor while the computer is in Sleep or Hibernation Mode Remember to turn off the computer before disconnecting the external monitor When the display panel and an external monitor are set to clone mode and they are turned off by the timer the display panel or the external monitor might not display when turned on again If this occurs press the function key to reset ...

Page 103: ...in the computer The built in Bluetooth hardware cannot operate simultaneously with another Bluetooth controller If you are still unable to resolve the problem contact TOSHIBA Support Face recognition sensor Problem Procedure Cannot sign in to Windows by Face recognition Sign in to Windows by PIN etc TOSHIBA support If you require any additional help using your computer or if you are having problem...

Page 104: ... and consider calling the software company s technical support department for assistance Consult the reseller or dealer from where you purchased your computer and or software they are your best resource for current information and support TOSHIBA technical support If you are still unable to solve the problem and suspect that it is hardware related refer to the information listed in the accompanyin...

Page 105: ...15 4 h millimeters not including parts that extend beyond the main body Environmental Requirements Conditions Ambient temperature Relative humidity Operating 5 C 41 F to 35 C 95 F 20 to 80 noncondensing Non operating 20 C 4 F to 60 C 140 F 10 to 90 noncondensing Wet bulb temperature 29 C maximum Conditions Altitude from sea level Operating 60 to 3 000 meters Non operating 60 to 10 000 meters maxim...

Page 106: ...l Data Signal I O 13 HSYNC Horizontal Sync Signal O 14 VSYNC Vertical Sync Signal O 15 SCL Serial Clock Signal O I O I Input to computer I O O Output from computer AC Power Cord and Connectors The AC input plug of the power cord must be compatible with the various international AC power outlets and the cord must meet the standards for the country region in which it is used All cords must meet the ...

Page 107: ...3VVH2 F and for three conductors power cord must be VDE type H05VV F For the United States and Canada two pin plug configuration must be a 2 15P 250 V or 1 15P 125 V and three pin plug configuration must be 6 15P 250 V or 5 15P 125 V as designated in the U S National Electrical code handbook and the Canadian Electrical Code Part II The following illustrations show the plug shapes for the U S A and...

Page 108: ...t Group Logo certification with Bluetooth wireless technology as defined by the Bluetooth Special interest Group This Bluetooth product is not compatible with devices using Bluetooth Version 1 0B specifications The wireless devices have not completed verification of connection and operation with all devices which are using the Wireless LAN or Bluetooth radio technology Bluetooth and Wireless LAN d...

Page 109: ...entified as harmful If you are uncertain of the policy that applies on the use of wireless devices in a specific organization or environment for example airports you are encouraged to ask for authorization to use the wireless device prior to turning on the equipment Wireless LAN Technology The wireless communication function of the computer supports some wireless communication devices Only some mo...

Page 110: ...perating System Microsoft Windows Networking Media Access Protocol CSMA CA Collision Avoidance with Acknowledgment ACK Radio Characteristics Radio Characteristics of Wireless LAN module might vary according to Country region where the product was purchased Type of product Wireless communication is often subject to local radio regulations Although Wireless LAN wireless networking products have been...

Page 111: ... Bluetooth functions of the computer and an external Bluetooth adaptor simultaneously For reference Bluetooth wireless technology has the following features Security Two advanced security mechanisms ensure a high level of security Authentication prevents access to critical data and makes it impossible to falsify the origin of a message Encryption prevents eavesdropping and maintains link privacy W...

Page 112: ... own premises For public use a general authorization is required Luxembourg Implemented General authorization required for network and service supply Norway Implemented This subsection does not apply for the geographical area within a radius of 20 km from the centre of Ny Alesund Russian Federation Only for indoor applications Restrictions for Use of 5150 5350MHz Frequencies in Europe Italy For pr...

Page 113: ...e used outside own premises Luxembourg Implemented General authorization required for network and service supply Russian Federation Limited e i r p 100mW Permitted to use only for indoor applications closed industrial and warehouse areas and on board aircraft 1 Permitted to use for local networks of aircraft crew service communications on board aircraft in area of the airport and at all stages of ...

Page 114: ...mobiles utilisant les mêmes canaux Les utilisateurs devraient aussi être avisés que les utilisateurs de radars de haute puissance sont désignés utilisateurs principaux c à d qu ils ont la priorité pour les bandes 5 25 5 35GHz et 5 65 5 85GHz et que ces radars pourraient causer du brouillage et ou des dommages aux dispositifs LAN EL The term IC before the equipment certification number only signifi...

Page 115: ... radio frequency devices Article 14 The low power radio frequency devices shall not influence aircraft security and interfere legal communications If found the user shall cease operating immediately until no interference is achieved The said legal communications means radio communications is operated in compliance with the Telecommunications Act The low power radio frequency devices must be suscep...

Page 116: ...act an authorized TOSHIBA service provider if you have problems with interference caused by this product to Other Radio Stations 2 Indication for Wireless LAN The indication shown below appears on this equipment 1 2 3 4 5 1 2 4 This equipment uses a frequency of 2 4 GHz 2 DS This equipment uses DS SS modulation 3 OF This equipment uses OFDM modulation 4 4 The interference range of this equipment i...

Page 117: ... radio equipment 8265NGW DSP Research Inc Approval Number D160055003 The following restrictions apply Do not disassemble or modify the device Do not install the embedded wireless module into other device Radio approvals for wireless devices This equipment is approved to the radio standard by the countries regions in the following table If you use this equipment in the countries regions which are n...

Page 118: ...ents it is strongly recommended that you turn off the AMT function before connecting to a network If the AMT function is NOT turned off there is a danger that the management of AMT function will be abused by other parties which possibly lead to the leak of sensitive and or proprietary information data loss HDD SSD erasure or file overwritten First you must do the following in the BIOS setup utilit...

Page 119: ...on the US keyboard layout The following table shows examples of the special characters in US keyboard layout Special character you want to input Corresponding number key SHIFT key a number key 1 2 3 4 5 6 7 8 9 0 3 Select Intel R AMT Configuration and press the Enter key 4 Select Manageability Features Selection and press the Enter key 5 Select Disabled and press the Enter key 6 Press the Y key an...

Page 120: ...ngeable in BIOS setup utility Consult with your system administrator about details AMT function cannot be operated using a USB LAN adaptor The useable system memory for models equipped with the AMT function is 16 64 MB less than that of models not equipped with the AMT function The amount of the difference depends on the amount of memory installed Notes for system administrators Intel AMT is enabl...

Page 121: ... from specifications due to design configuration Under some conditions your computer product might automatically shut down This is a normal protective feature designed to reduce the risk of lost data or damage to the product when used outside recommended conditions To avoid risk of lost data always make back up copies of data by periodically storing it on an external storage medium For optimum per...

Page 122: ...ore shows less storage capacity Available storage capacity will also be less if the product includes one or more pre installed operating systems such as Microsoft Operating System and or pre installed software applications or media content Actual formatted capacity might vary LCD Over a period of time and depending on the usage of the computer the brightness of the LCD screen will deteriorate This...

Page 123: ...ate naming is included for reference Abbreviations AC Alternating Current AMT Intel Active Management Technology ASCII American Standard Code for Information Interchange BIOS Basic Input output System BD ROM Blu ray Disc Read only Memory bps bits per second CD Compact Disc CD ROM Compact Disc Read only Memory CD RW Compact Disc rewritable CMOS Complementary Metal oxide Semiconductor CPU Central Pr...

Page 124: ...ute of Electrical and Electronics Engineers I O Input Output IRQ interrupt request ISP Internet Service Provider KB kilobyte LAN Local Area Network LCD Liquid Crystal Display LED Light Emitting Diode MB megabyte MBps megabytes per second MMC MultiMediaCard OCR Optical Character Recognition Reader PC Personal Computer PCI Peripheral Component Interconnect PCMCIA Personal Computer Memory Card Intern...

Page 125: ... Digital Extended Capacity SDRAM Synchronous Dynamic Random Access Memory SSD Solid State Drive TFT Thin film Transistor URL Uniform Resource Locator USB Universal Serial Bus WAN Wide Area Network WQHD Wide Quad High Definition www World Wide Web User s Manual 7 21 ...

Page 126: ...ion list 2 1 Dual Pointing Device Touch Pad 6 8 E Equipment checklist 2 1 External monitor problems 6 14 G Graphics Processing Unit 3 10 H Hard disk drive automatic power off 5 3 K Keyboard function keys 4 9 Function keys F1 F12 4 9 problems 6 7 Windows special keys 4 11 M Moving the computer 1 18 P Password power on 5 4 Starting the computer by password 5 6 Supervisor 5 6 user 5 5 Power Hibernati...

Page 127: ...rheating power down 6 5 Power 6 4 Real Time Clock 6 6 Sound system 6 13 TOSHIBA support 6 15 Touch Pad 6 8 USB device 6 11 USB mouse 6 9 R Recovery hard disk drive 2 17 Recovery Media 2 16 S Security lock 4 22 Sleep Mode setting 2 11 System automatic 5 4 Sound system problems 6 13 T Touch Screen 4 2 U USB device problems 6 11 V Video mode 4 25 Video RAM 3 9 W Web Camera 3 6 Wireless communication ...

Page 128: ...Instruction Manual for Safety and Comfort ...

Page 129: ...oftware among the most advanced data storage technologies available As with any new technology you must read and follow all set up and usage instructions in the applicable user guides and or manuals enclosed or provided electronically If you fail to do so this product may not function properly and you may lose data or suffer other damage TOSHIBA ITS AFFILIATES AND SUPPLIERS DO NOT WARRANT THAT OPE...

Page 130: ...ES INCURRED DIRECTLY OR INDIRECTLY FROM ANY TECHNICAL OR TYPOGRAPHICAL ERRORS OR OMISSIONS CONTAINED HEREIN IN NO EVENT SHALL TOSHIBA BE LIABLE FOR ANY INCIDENTAL CONSEQUENTIAL SPECIAL OR EXEMPLARY DAMAGES WHETHER BASED ON TORT CONTRACT OR OTHERWISE ARISING OUT OF OR IN CONNECTION WITH THIS MANUAL OR ANY INFORMATION CONTAINED HEREIN OR THE USE THEREOF Trademarks Wi Fi is a registered trademark of ...

Page 131: ...served to avoid hazards that could cause bodily injury and or property damage User Instructions which should be observed to maximize the use and enjoyment of your product The Safety Instructions contained in this Manual have been categorized according to the seriousness of the potential hazards through the use of Signal Words Signal Words Meaning Indicates an imminently hazardous situation which i...

Page 132: ...ttery terminals in contact with another conductive object This could cause serious injury or a fire and could also damage the battery pack and product Always wrap the battery pack in plastic or place it in a plastic bag whenever transporting it to avoid exposing the terminals to another conductive object which could result in serious injury Always cover the metal terminals with insulating tape whe...

Page 133: ...sulting in death or serious injury Subjecting a battery pack to heat could also cause caustic liquid to leak It can also cause failure malfunction or loss of stored data Use of correct battery pack Always use the battery pack supplied as an accessory or an equivalent battery pack specified in the User s Manual Other battery packs have different voltage and terminal polarities Use of non conforming...

Page 134: ...limited to the loss of data Disposal of used battery packs Always dispose of used battery packs in compliance with all applicable laws and regulations Put insulating tape such as cellophane tape on the electrode during transportation to avoid a possible short circuit fire or electric shock Failure to do so could possibly result in serious injury Never leave the dry cell battery in the product for ...

Page 135: ...o the connector section which could cause a product failure or fire possibly resulting in serious injury Handling the AC adaptor and Battery Charger power cables cords or plugs When handling the power cable cord follow these precautions Never tamper with the power cable cord or plug Never splice or alter a power cable cord Never bend or twist a power cable cord Never pull on a power cable cord to ...

Page 136: ...ossibly resulting in serious injury Only use TOSHIBA AC adaptor and TOSHIBA Battery Charger Always use the TOSHIBA AC adaptor that was provided with your product and the TOSHIBA Battery Charger that may have been provided with your product or use AC adaptors and battery chargers specified by TOSHIBA to avoid any risk of fire or other damage to your product Use of an incompatible AC adaptor or Batt...

Page 137: ...u are carrying your product you could be injured or the battery pack could be damaged Do not use an impaired or exhausted battery pack Never continue to use a battery pack after its recharging capability has become impaired or after the warning message indicating that the battery pack power is exhausted has been displayed Continued use of an exhausted or impaired battery pack could result in the l...

Page 138: ...ical electric device Radio waves may affect pacemaker or medical device operation possibly resulting in serious injury Follow the instruction of your medical device when using any Wi Fi or Bluetooth or Wireless WAN functionality Turn off the power to your product in medical facilities or near electronic medical equipment Always turn off the power to your product when visiting medical facilities su...

Page 139: ...diately Such interference could cause equipment malfunction Do not use the product near a microwave oven Do not use your product in the places near a microwave oven where a magnetic field generates and places where static electricity or radio interference generates Ensuring Wireless Network Security A wireless LAN can greatly enhance the flexibility of your LAN configuration and operations You can...

Page 140: ...m only to ordinary analog phone lines Never connect the built in modem to a digital line ISDN Never connect the built in modem to the digital connector on a public telephone or to a digital private branch exchange PBX Never connect the built in modem to a key telephone system for residences or offices Connection to any communication line other than an analog phone line could cause a product system...

Page 141: ...on Failure to completely shut down your product in this way could allow the operating system to reactivate and run pre programmed tasks or preserve unsaved data which could interfere with aviation or other systems possibly causing serious injury Provide adequate ventilation Always make sure your product and AC adaptor have adequate ventilation and are protected from overheating when the power is t...

Page 142: ...mage and fire possibly resulting in serious injury If a metal object should accidentally enter your product immediately 1 Turn off your product 2 Disconnect the AC adaptor from the power plug socket and product 3 Remove the battery pack for models with the removable battery pack 4 Disconnect all cables from connectors if any Do not turn on the power again until you have taken your product to an au...

Page 143: ...s injury Never touch the LCD if it is damaged or broken as the liquid contained within the display may leak possibly resulting in serious injury Contact an authorized Toshiba service provider immediately for replacement of the damaged LCD and dispose of any damaged LCD in compliance with local laws and or regulations Never touch a cracked or damaged display screen as it could result in possible in...

Page 144: ...r lap Disposal of this product Discard this product in accordance with applicable laws and regulations For further information contact your local government Never place your product in locations with excess heat Never place your product where it will be exposed to excess heat such as in direct sunlight an unventilated vehicle or near a heater This may result in a system failure malfunction loss of...

Page 145: ...our product base and AC adaptor s surface increase in temperature during normal use Always place your product or AC adaptor on a flat and hard surface that is resistant to heat damage Never operate your product during a thunderstorm Never operate your product on AC power during a thunderstorm If you see lightning or hear thunder never touch your product cables and peripherals An electric surge cau...

Page 146: ... off when not in use Never leave the power to your product on continuously for more than 24 hours Turn the power off when this product is not in use Product installation environment Always provide sufficient space around your product to ensure adequate ventilation Never cover or block the air vents Use your product at temperatures and humidity levels within the recommended environmental ranges The...

Page 147: ...Main Unit 20 Always provide sufficient space for operating a mouse and other peripheral devices See Provide adequate ventilation section in this Instruction Manual for Safety and Comfort ...

Page 148: ... not alter or disassemble your product Never open any cover on your product or remove screws or in any way attempt to alter or disassemble your product Never try to connect a peripheral device except as instructed in the manual Doing so could damage your product or cause serious injury including electric shock and burns Setting sound volume Do not set the volume too high when using headphones Cont...

Page 149: ...t Do not use cracked deformed or repaired CDs DVDs and Blu ray discs Never use a cracked deformed or repaired CD DVD Blu ray Disc Fragments from a damaged CD DVD Blu ray Disc could cause injury Closing the optical drive Always keep fingers away from the sides of the tray when closing the tray of an optical drive CD DVD Blu ray Disc drive CD RW drive Multi drive or any other optical drive to avoid ...

Page 150: ...or use may cause a system failure Check the specified areas carefully before using it Do not turn off power while application software is running Never turn off the power while an application is running Doing so could cause loss of data Do not turn power off or remove external storage device while it is writing or reading media Never turn off the power disconnect an external storage device or remo...

Page 151: ...se the CD DVD Blu ray discs to extreme heat or cold Never place a heavy object on a CD DVD Blu ray Disc Never write on or otherwise mar the read surface of a CD DVD Blu ray Disc Always use AC power when writing to the optical drive When writing to media using an optical drive always connect the AC adaptor to a power plug socket or power source to ensure maximum performance If data is written power...

Page 152: ...ove delete only the initial part of the data used for file management This makes the file invisible to the operating system but the data can still be read by specialized utilities If you dispose of your product please delete all the data on its Hard Disk Drive Solid State Drive Doing so prevents unauthorized use of such data To ensure your data is not used for unauthorized purposes you can Physica...

Page 153: ...device should be close to your elbow level The keyboard should be flat so that your wrists are straight when typing However if the product is on a worksurface that is above your elbow height you may need to slope the product to keep your wrists straight Work with relaxed shoulders When typing keep your wrists straight and try not to rest your wrists on the product Support your arms on your forearm...

Page 154: ...d monitor The keyboard and mouse or trackball should be close to your elbow level The mouse should be next to the keyboard to avoid a reach If you have to reach the arm should be supported in the forearm area by the desk surface or the chair arm supports Alternative keyboards such as the split curved keyboard may improve shoulder and arm comfort Select a mouse that is comfortable for you to use Do...

Page 155: ...gh gripping force It is helpful to change the type of pointing device that you use on a regular basis to avoid working in just one hand posture Change they way you work so that you are not stuck in the same posture for long periods of time Some people find it comfortable to occasionally stand while using the product To do this properly the product needs to be on an elevated surface Make sure you f...

Page 156: ...ilation section in this Instruction Manual for Safety and Comfort Carrying your product for a long time may lead to shoulder and arm fatigue If you carry your product with other items consider using an ergonomically designed computer case Follow the advice from your company health and safety staff Contact them if you need assistance making adjustment to your workstation or adjusting the lighting A...

Page 157: ... hands and wrists aligned in a comfortable straight posture Are your arms supported in the forearm area not at the wrist Do you hold the mouse or trackball with a loose relaxed hand Do you use a light touch when typing or using the mouse Do you clean your mouse or trackball regularly Is the top of your monitor close to eye level Is the monitor about an arm length away Have you eliminated the glare...

Reviews: