4 Replacement Procedures
Fehler! Verwenden Sie die Registerkarte 'Start', um
標題
2 dem Text
zuzuweisen, der hier angezeigt werden soll. Fehler! Verwenden Sie die Registerkarte 'Start', um
標題
2 dem
Text zuzuweisen, der hier angezeigt werden soll.
3.
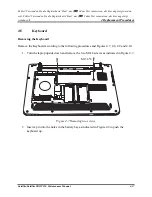
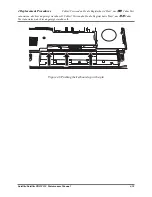
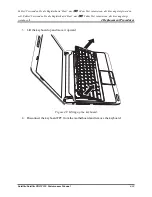
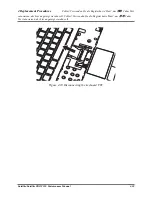
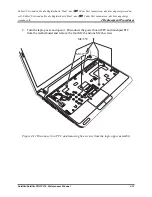
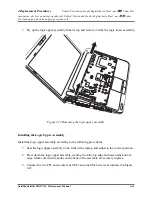
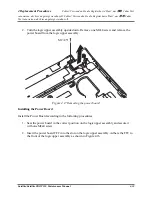
Pry up the logic upper assembly from its top and remove it from the logic lower assembly.
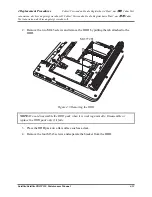
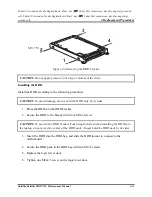
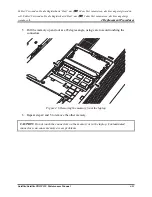
Figure 4.13 Removing the logic upper assembly
Installing the Logic Upper Assembly
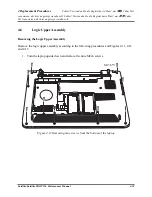
Install the logic upper assembly according to the following procedures.
7.
Seat the logic upper assembly to the front of the laptop, and adjust to the correct position.
8.
Press down the logic upper assembly, starting from the top edge and toward the bottom
edge. Make sure that the hooks on the back of the assembly are securely in place.
9.
Connect the two FFC and secure four M2x3 and one M2x6 screws as indicated in Figure
4.12.
Satellite/Satellite PRO T230 Maintenance Manual
4-24
Summary of Contents for Satellite PRO T230
Page 14: ...Chapter 1 Hardware Overview ...
Page 17: ......
Page 32: ...Chapter 2 Troubleshooting Procedures ...
Page 33: ......
Page 85: ...Chapter 3 Tests and Diagnostic ...
Page 111: ...3 Tests and Diagnostics Satellite Satellite PRO T230 Series Maintenance Manual 27 ...
Page 117: ...3 Tests and Diagnostics Satellite Satellite PRO T230 Series Maintenance Manual 33 ...
Page 127: ...3 Tests and Diagnostics Satellite Satellite PRO T230 Series Maintenance Manual 43 ...
Page 133: ...Chapter 4 Replacement Procedures ...
Page 215: ...Satellite Satellite PRO T230 T230D Maintenance Manual B 3 ...
Page 257: ...Figure LA keyboard Satellite Satellite PRO T230 T230D Maintenance Manual E 17 ...


