background image

P9 ASD Quick Start Guide

31

Volts per Hertz Setting

 (F015)

This function establishes the relationship between the output frequency and the output voltage of the 
ASD.

Settings:

Constant Torque

Voltage Decrease Curve

Automatic Torque Boost

Sensorless Vector Control (Speed)

Sensorless Vector Control (Speed/Torque Switching)

V/f 5-Point Curve (Go to 

F190

 to Configure the V/f 5-Point Settings)

PM Drive (Permanent Magnet)

PG Feedback Vector Control (Speed)

PG Feedback Vector Control (Speed/Torque Switching)

Motor Current Rating

 (F406)

This parameter allows the user to input the full load amperage (FLA) of the motor. This value is found on 
the name-plate of the motor and is used by the ASD to determine the 

Thermal Overload


Protection


setting for the motor.

Motor RPM

 (F407)

This parameter is used to input the (name-plated) rated speed of the motor.

Command Source

 (F003)

This selection allows the user to establish the source of the 

Run

 commands. Run commands are 

Run

Stop

Jog

, etc.

Settings:

Use Terminal Block

Use EOI Keypad

Use RS485

Use Communication Option Board

Phone: 800.894.0412 - Fax: 888.723.4773 - Web: www .ctiautomation.net - Email: [email protected]

Summary of Contents for P9 ASD

Page 1: ...P9 ASD Quick Start Guide TOSHIBA P9 ASD Quick Start Guide DN 64055 005 October 2014 Phone 800 894 0412 Fax 888 723 4773 Web www ctiautomation net Email info ctiautomation net ...

Page 2: ...DN 64055 005 October 2014 P9 ASD Quick Start Guide Phone 800 894 0412 Fax 888 723 4773 Web www ctiautomation net Email info ctiautomation net ...

Page 3: ...s while maintaining the same degree of high performance and reliability output across the entire load range without any user intervention The VLP and Time Based Alternation algorithms coupled with Toshiba International Corporation s Vector Control Algorithm provides setup ease enhanced reliability and precise control under the most demanding conditions All while enabling the motors of the system t...

Page 4: ...ole warranty of Toshiba International Corporation and any statements contained herein do not create new warranties or modify the existing warranty Any electrical or mechanical modifications to this equipment without prior written consent of Toshiba International Corporation may void all warranties and may void the UL CSA listing or other safety certifications Unauthorized modifications may also re...

Page 5: ...sed throughout the guide Read the guide completely before installing operating performing maintenance or disposing of this equipment This guide and the accompanying drawings should be considered a permanent part of the equipment and should be readily available for reference and review Dimensions shown in the guide are in metric and or the English equivalent Because of our commitment to continuous ...

Page 6: ...HIBA INTERNATIONAL CORPORATION P9 Adjustable Speed Drive Please complete the Warranty Card supplied with the P9 ASD and return it to Toshiba International Corporation by prepaid mail This will activate the 12 month warranty from the date of installation but shall not exceed 18 months from the shipping date Complete the following information and retain for your records Model Number ________________...

Page 7: ... Precautions 7 Personnel Protection 7 System Setup Requirements 8 Operational and Maintenance Precautions 9 Installation and Connections 10 Installation Notes 10 Mounting the ASD 11 Connecting the ASD 12 Lead Length Specifications 16 I O and Control 17 Electronic Operator Interface 24 EOI Operation 24 Battery Backup 24 Real Time Clock Setting 25 EOI Remote Mounting 25 EOI Features 26 System Operat...

Page 8: ... 69 User Notification Codes 70 Alarms 71 Trips Faults 74 Enclosure and Conduit Plate Dimensions 80 Enclosure Dimensions 80 Conduit Plate Dimensions 85 Current Voltage Specifications 88 Cable Terminal Torque Specifications 90 Short Circuit Protection Recommendations 92 Phone 800 894 0412 Fax 888 723 4773 Web www ctiautomation net Email info ctiautomation net ...

Page 9: ...l indicates that an imminently hazardous situation exists that if not avoided or if instructions are not followed precisely will result in serious injury to personnel or loss of life The word WARNING preceded by the safety alert symbol indicates that a potentially hazardous situation exists that if not avoided or if instructions are not followed precisely could result in serious injury to personne...

Page 10: ...inently hazardous situation that may result in serious injury severe property and equipment damage or loss of life if safe procedures or methods are not followed as outlined in this guide Qualified Personnel Installation operation and maintenance shall be performed by Qualified Personnel Only A Qualified Person is one that has the skills and knowledge relating to the construction installation oper...

Page 11: ...ired after moving equipment Contact your TIC Sales Representative to report discrepancies or for assistance if required Handling and Storage Use proper lifting techniques when moving the ASD including properly sizing up the load getting assistance and using a forklift if required Store in a well ventilated location and preferably in the original packaging if the equipment will not be used upon rec...

Page 12: ...stallation in areas where vibration heat humidity dust fibers metal particles explosive corrosive mists or gases or sources of electrical noise are present The installation location shall not be exposed to direct sunlight Allow proper clearance spaces for installation Do not obstruct the ventilation openings Refer to the section titled Installation and Connections on pg 10 for further information ...

Page 13: ...unded 3 phase power source or within a high resistance grounding system the Grounding Capacitance must be set to Small or Out typeform specific as shown on pg 15 If set to High a system malfunction component failure or fire may result Grounding Capacitor Switching The ASD is equipped with noise reduction capacitors which are used to reduce the EMI leakage via the 3 phase power input circuit and fo...

Page 14: ...uence and the desired direction of motor rotation in the Bypass mode if applicable Protection Ensure that primary protection exists for the input wiring to the equipment This protection must be able to interrupt the available fault current from the power line The equipment may or may not be equipped with an input disconnect option All cable entry openings must be sealed to reduce the risk of entry...

Page 15: ...tem integration information if required Personnel Protection Installation operation and maintenance shall be performed by Qualified Personnel ONLY A thorough understanding of the ASD will be required before the installation operation or maintenance of the ASD Rotating machinery and live conductors can be hazardous and shall not come into contact with personnel Personnel should be protected from al...

Page 16: ...onnel i e E Off Auto Restart settings System Interlocks etc The programming setup and system configuration of the ASD may allow it to start the motor unexpectedly A familiarity with the Auto Restart F301 Sleep Timer F383 and the Start Stop F385 settings are a requirement to use this product The setup procedures included within this guide may require a Reset before performing the procedure Applicat...

Page 17: ... attaching or closing the front cover and DO NOT remove or open the front cover of the ASD when the power is on DO NOT attempt to disassemble modify or repair the ASD Call your TIC Sales Representative for repair information DO NOT place any objects inside of the ASD If the ASD should emit smoke or an unusual odor or sound turn off the power immediately The heat sink and other components may becom...

Page 18: ...actor MC is used between the output of the ASD and the motor it should be interlocked such that the ST CC connection is disconnected before the output contactor is opened DO NOT open and then close a secondary magnetic contactor between the ASD and the motor unless the ASD is off and the motor is not rotating Note Re application of power via a secondary contact while the ASD is on or while the mot...

Page 19: ...t If installing the ASD in a cabinet ensure that there is adequate ventilation DO NOT operate the ASD with the enclosure door open The ambient operating temperature rating of the P9 ASD is 14 to 104 F 10 to 40 C When installing adjacent ASDs horizontally TIC recommends at least 5 cm of space between adjacent units However horizontally mounted ASDs may be installed side by side with no space in bet...

Page 20: ...or the DBR connection if using a braking resistor PC is the negative terminal of the DC bus R L1 S L2 and T L3 are the 3 phase input supply terminals for the ASD U T1 V T2 and W T3 are the output terminals of the ASD that connect to the motor The location of the Charge Indicator LED for the smaller typeform ASD is provided in Figure 2 The Charge Indicator LED is located on the front door of the en...

Page 21: ...er to the NEC Article 310 adjustment factors Note National and local codes should be referenced when running more than three conductors in the same conduit Install a molded case circuit breaker MCCB or fuse between the 3 phase power source and the ASD in accordance with the fault current setting of the ASD and the NEC Article 430 The ASD is designed and tested to comply with UL Standard 508C Modif...

Page 22: ...ing an ungrounded 3 phase power source or within a high resistance grounding system the Grounding Capacitance must be set to Small or Out typeform specific as shown on pg 15 If set to High or In a system malfunction component failure or fire may result The Grounding Capacitor plays a role in minimizing the effects of leakage current through the ASD system and through ground paths to other systems ...

Page 23: ...e default setting or Small by pushing or pulling the switch actuator respectively Figure 6 The Grounding Capacitor Bar is used on typeforms 230 volt 75 HP to 125 HP 460 volt 125 HP and the 150 HP The value may be set to Large or Small default setting by connecting or disconnecting the switching bar respectively Figure 7 The Grounding Capacitor Screw is used on typeforms 460 volt 200 HP and above T...

Page 24: ...um lead lengths for the listed motor voltages Note Contact the TIC Customer Support Center for application assistance when using lead lengths in excess of those listed or for filter selection assistance for a given application Exceeding the peak voltage rating or the allowable thermal rise time of the motor insulation will reduce the life expectancy of the motor When operating in the Vector Contro...

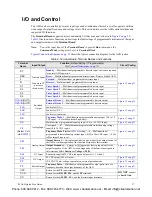
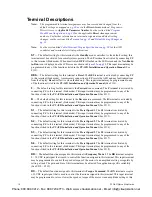
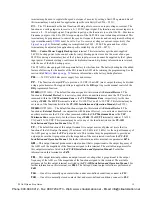
Page 25: ...ice 1 Multifunctional programmable discrete output Figure 16 on pg 21 O2A B OUT2 External Device 2 Multifunctional programmable discrete output FLA Fault relay N O Figure 19 on pg 21 FLB Fault relay N C FLC Fault relay common RR Analog Input Frequency Mode 1 Multifunction programmable analog input 0 0 to 10 VDC input 0 Hz to Maximum Frequency Figure 11 on pg 21 RX Multifunctional programmable anal...

Page 26: ...erminal Sink mode This input terminal may be programmed to any of the functions listed in the P9 ASD Installation and Operation Manual See F112 S1 The default setting for this terminal is the Preset Speed 1 The S1 terminal is activated by connecting CC to this terminal Sink mode This input terminal may be programmed to any of the functions listed in the P9 ASD Installation and Operation Manual See...

Page 27: ...he VLP level has remained within the VLP Maximum Zone or the VLP Minimum Zone respectively for the time setting of F480 The OUT1 terminal is rated at 2 A 120 VAC and 2 A 30 VDC This terminal may be set to any of the functions listed in the P9 ASD Installation and Operation Manual See F130 O2A B OUT2A B The default function assigned to this terminal is External Device 2 The function as External Dev...

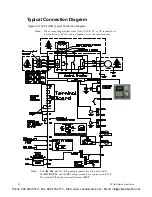
Page 28: ...d Cable Terminal Torque Specifications on pg 90 for information on the proper cable terminal sizes and torque specifications when making Terminal Board connections LC Note The relay is shown in the normal operating condition During a faulted condition the relay connection is FLC to FLA J101 TB1 TB2 TB3 J100 SW200 TB4 SW301 RES CC F R S1 S2 S3 S4 CC ST FP SU Ensure that the ground screw is securely...

Page 29: ...Input Figure 12 RX Input Figure 13 V I Isolated Input Figure 14 P24 Output Figure 15 PP Output Figure 16 OUT1 OUT2 Output Figure 17 FP Output Figure 18 AM FM Output Figure 19 Fault Relay shown not faulted Phone 800 894 0412 Fax 888 723 4773 Web www ctiautomation net Email info ctiautomation net ...

Page 30: ...erenced to CC The RR RX P24 and the PP analog terminals are referenced to CCA The isolated V I analog terminal references IICC Note When connecting multiple wires to the PA PB PC or PO terminals do not connect a solid wire and a stranded wire to the same terminal Phone 800 894 0412 Fax 888 723 4773 Web www ctiautomation net Email info ctiautomation net ...

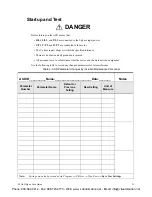
Page 31: ...tance from the motor and the motor driven equipment Use the following table to record any changed parameters for future reference Table 3 ASD Parameter Changes by Installer Maintenance Personnel ASD ID__________Name ______________________Date _______ Notes Parameter Number Parameter Name Default or Previous Setting New Setting Unit of Measure Note Settings may also be recorded via Program Utilitie...

Page 32: ...d Items Password and Lockout Information Alarm Information Main Monitor Items Prohibited Items and Save User Settings Information Parameter settings may be saved by the user Note User settings must be stored by the user to result in battery backup support Otherwise in the event of a power outage the user settings will not be retained Retained settings will be erased and or overwritten during a Typ...

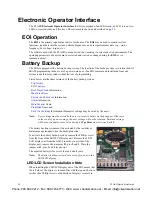
Page 33: ...tc Set the Real Time Clock from Program Utilities Real Time Clock Setup Scroll to select the field to be changed Press Enter to enter the Edit mode Turn the rotary encoder to change the value Once set press Escape to exit without accepting the change or press Enter to accept the change Continue to subsequent fields of the Real Time Clock Setup screen and repeat the procedure until done EOI Remote ...

Page 34: ...F003 F004 The F003 F004 selection may be made via Program Fundamental Standard Mode Selection Command Mode and Frequency Mode 1 respectively The availability of Hand mode control Command and Frequency control may be disabled via Program Utilities Prohibition Hand Auto Key Command Override and Hand Auto Key Frequency Override The availability of the Hand mode of operation may be reinstated by chang...

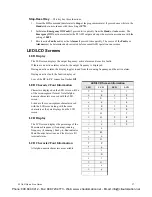
Page 35: ...the display toggles to and from the running frequency and the active alarm During an active fault the fault is displayed Loss of the ST to CC connection flashes Off LED Character Font Information Characters displayed on the LED screen will be of the seven segment format Not all alpha numeric characters are used with the LED screen Listed are the seven segment characters used with the LED screen al...

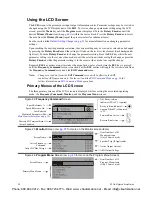
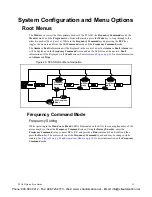
Page 36: ...ey is pressed until the Frequency Command screen is reached Further ESC entries will toggle the system to and from the Frequency Command screen and the EOI Command menu Note Changes carried out from the EOI Command screen will be effective for EOI controlled ASD operation only See the section titled EOI Command Mode on pg 36 for further information on EOI Command Mode operations Primary Menus of t...

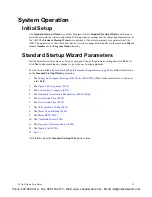
Page 37: ... click Next without making any changes to go to the next startup parameter See the section titled Standard Startup Wizard Parameter Requirements on pg 30 for further information on the Standard Startup Wizard parameters 1 The Voltage and Frequency Rating of the Motor F409 F014 Must make a selection to continue or select Exit 2 The Upper Limit Frequency F012 3 The Lower Limit Frequency F013 4 The A...

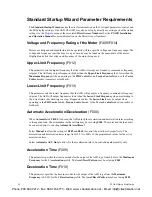
Page 38: ...mmand or frequency setpoint The ASD will output frequencies lower than the Lower Limit Frequency when accelerating to the lower limit or decelerating to a stop Frequencies below the Lower Limit may be output when operating in the PID Control mode Torque Control mode or the Vector Control modes sensorless or feedback Automatic Acceleration Deceleration F000 When Automatic ACC DEC is chosen the ASD ...

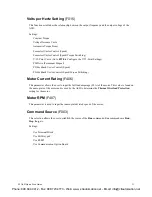
Page 39: ...rol Speed Torque Switching Motor Current Rating F406 This parameter allows the user to input the full load amperage FLA of the motor This value is found on the name plate of the motor and is used by the ASD to determine the Thermal Overload Protection setting for the motor Motor RPM F407 This parameter is used to input the name plated rated speed of the motor Command Source F003 This selection all...

Page 40: ...ming may be required Operation Hand Note See the section titled EOI Features on pg 26 for information on Auto operation To turn the motor on perform the following 1 Connect the CC terminal to the ST terminal 2 Press the Mode key until the Frequency Command screen is displayed 3 Press the Hand Auto key to enter the Hand mode green Hand LED illuminates 4 Turn the Rotary Encoder clockwise until the d...

Page 41: ...ows the user to quickly access the parameters that are different from the factory default settings or the post Reset settings Once the Changed From Default screen is displayed the system scrolls through all of the system parameters automatically and halts once reaching a changed parameter Once stopped at a changed parameter the Rotary Encoder may be clicked once clockwise to continue scrolling for...

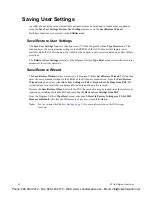
Page 42: ...Save Restore Wizard The Save Restore Wizard feature is accessed via Program Utilities Save Restore Wizard This function saves the user parameter settings to the SRAM of the EOI and is menu driven From the Save Restore Wizard dialog box select either Save User Settings to EOI or Restore User Settings from EOI The restore feature is not available or displayed for selection until a profile is saved B...

Page 43: ...rmation will be displayed via the Fault screen See Alarms and Trips on pg 69 for more information on Alarms and Trips Figure 26 P9 ASD Root Menu Navigation Frequency Command Mode Frequency Setting While operating in the Hand mode Hand LED is illuminated on the EOI the running frequency of the motor may be set from the Frequency Command screen Using the Rotary Encoder enter the Frequency Command va...

Page 44: ...of 4 V f profiles may be selected and run Each V f profile is comprised of 4 user settings Base Frequency Base Frequency Voltage Manual Torque Boost and Electronic Thermal Protection Expanded descriptions of these parameters may be found in the P9 ASD Installation and Operation Manual Accel Decel Group One of 4 Accel Decel profiles may be selected and run Each of the Accel Decel profiles is compri...

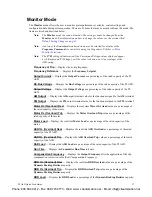
Page 45: ...AM output terminal value for the function assigned to the AM terminal FM Output Displays the FM output terminal value for the function assigned to the FM terminal Motor OL Overload Real Displays the real time Motor Overload value as a percentage of the rated capacity of the motor Motor OL Overload Trip Displays the Motor Overload Trip value as a percentage of the rated capacity of the motor Motor ...

Page 46: ...he output torque The input signal type must be selected at SW301 on the Terminal Board The V input setting of SW301 is used for the 0 10 VDC analog input signal and the I input setting of SW301 is used for the 0 20 mA analog input signal Either may be used as a frequency or torque command source See parameter F201 for more information on the setup of this terminal RX Displays the RX input setting ...

Page 47: ...ode items may be selected from the Main Monitor Selections screen to be displayed on the Frequency Command screen while the P9 ASD is running Note VLP Average and Work Hours may also be selected as Main Monitor items but are not displayed at the Monitor screen The selected items along with their real time values are displayed on the Frequency Command screen while running Not all Monitor Mode items...

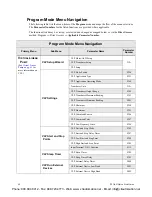
Page 48: ...VLP Setup VLP Settings VLP Mode Switch F390 VLP Application Type F391 VLP Application Operating Mode F380 Transducer Units N A VLP Transducer Output Range F392 VLP Transducer Maximum Reading F393 VLP Transducer Minimum Reading F403 VLP Minimum F394 VLP Maximum F395 VLP Command Source F396 VLP Command Value F397 VLP Low Frequency Limit F398 VLP Start and Stop Points VLP Start and Stop Mode F385 VLP...

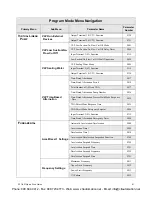
Page 49: ...er F434 Time Based Alternation Process Hold Mode Response Time F438 TBA Direct Mode Response Time F439 TBA Direct Mode Emergency Setpoint F456 Input Terminal 5 S1 Function F115 Time Based Alternation Emergency Timer F404 FUNDAMENTAL Fundamental Accel Decel 1 Settings Automatic Acceleration Deceleration F000 Acceleration Time 1 F009 Deceleration Time 1 F010 Acceleration Deceleration Suspended Funct...

Page 50: ...acteristic F682 FM Bias Adjustment F683 FM Voltage Current Output Switching F681 AM Output Terminal Function F670 AM Output Terminal Adjustment F671 AM Output Gradient Characteristic F685 AM Bias Adjustment F686 MON 1 Terminal Meter Selection F672 MON 1 Terminal Meter Adjustment F673 MON 1 Output Gradient Characteristic F689 MON 1 Bias Adjustment F690 MON 1 Voltage Current Output Switching F688 MO...

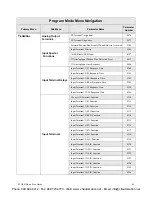
Page 51: ...Time F145 Input Terminals Always ON Terminal Function F110 Input Terminal 1 F Function F111 Input Terminal 2 R Function F112 Input Terminal 3 ST Function F113 Input Terminal 4 RES Function F114 Input Terminal 5 S1 Function F115 Input Terminal 6 S2 Function F116 Input Terminal 7 S3 Function F117 Input Terminal 8 S4 Function F118 Input Terminal 9 LI1 Function F119 Input Terminal 10 LI2 Function F120...

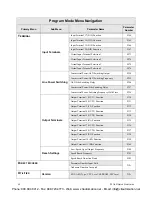
Page 52: ...1 OUT1 Function F130 Output Terminal 2 OUT2 Function F131 Output Terminal 3 FL Function F132 Output Terminal 4 OUT3 Function F133 Output Terminal 5 OUT4 Function F134 Output Terminal 6 R1 Function F135 Output Terminal 7 OUT5 Function F136 Output Terminal 8 OUT6 Function F137 Output Terminal 9 R2 Function F138 Output Terminal 10 R3 Function F168 Output Terminal 11 R4 Function F169 Reach Settings Lo...

Page 53: ... Over Torque Alarm Threshold Dynamic Braking Resistor DBR Overload Alarm Cumulative Run Timer Alarm DeviceNet Profibus CC Link Alarm RS485 Communication Main Power Under Voltage Alarm Stop After Instantaneous Power Off Alarm Stop After Lower Limit Continuous Time Light Load Alarm Heavy Load Alarm N A Maintenance Timer Alarm Over Torque Alarm Soft Stall Alarm VLP Low Suction No Flow Cut Off Alarm T...

Page 54: ...orque Current Excitation Current PID Feedback Motor Overload Ratio ASD Overload Ratio Dynamic Braking Resistor DBR Overload Ratio Trip History read only Motor Load N A ASD Load Dynamic Braking Resistor DBR Load Input Power Output Power Changed From Default Display Changed Parameters N A Display Parameters Automatic Function Selection F040 Current Voltage Display Units F701 Program Mode Menu Naviga...

Page 55: ...rmal Speed Settings Abnormal Speed Detection Time F622 Over Speed Detection Frequency Upper Band F623 Over Speed Detection Frequency Lower Band F624 Base Frequency Voltage Supply Voltage Correction F307 DC Injection Braking DC Injection Braking Start Frequency F250 DC Injection Braking Current F251 DC Injection Braking Time F252 Forward Reverse DC Injection Braking Priority F253 Motor Shaft Statio...

Page 56: ...ver Torque Detection Time F618 Over Torque Detection Hysteresis F619 Phase Loss ASD Output Phase Loss Detection F605 ASD Input Phase Loss Detection F608 Retry Restart Auto Restart Selection F301 Number of Times to Retry F303 Ridethrough Time F310 Random Mode F312 Stall Over Voltage Limit Operation F305 Stall Prevention Factor 1 F416 Power Running Stall Continuous Trip Detection Time F452 Stall Pre...

Page 57: ... Settings Jog Frequency F260 Jog Stop Pattern F261 EOI Operation Jog Mode F262 UP DOWN Frequency Functions UP DOWN Up Response Time F264 UP DOWN Up Frequency Step F265 UP DOWN Down Response Time F266 UP DOWN Down Frequency Step F267 Initial UP DOWN Frequency F268 Initial UP DOWN Frequency Rewriting F269 V I Settings Option V I Terminal Voltage Current Selection AI2 Option Board Input F109 Preset S...

Page 58: ...ut Point 1 Setting F216 RX Input Point 1 Frequency F217 RX Input Point 2 Setting F218 RX Input Point 2 Frequency F219 RX2 Option AI1 Input Point 1 Setting F222 RX2 Option AI1 Input Point 1 Frequency F223 RX2 Option AI1 Input Point 2 Setting F224 RX2 Option AI1 Input Point 2 Frequency F225 BIN Input Point 1 Setting F228 BIN Input Point 1 Frequency F229 BIN Input Point 2 Setting F230 BIN Input Point...

Page 59: ...eceleration Pattern 3 F512 Acceleration Time 4 F514 Deceleration Time 4 F515 Acceleration Deceleration Pattern 4 F516 Acc Dec Special Acceleration Deceleration Pattern 1 4 F504 Acceleration Deceleration Switching Frequency 1 F505 S Pattern Acceleration Lower Limit Adjustment F506 S Pattern Acceleration Upper Limit Adjustment F507 S Pattern Deceleration Lower Limit Adjustment F508 S Pattern Deceler...

Page 60: ...s 0 Hz Dead Band Signal F244 0 Hz Command Output F255 Exciting Strengthening Coefficient F415 Annual Average Ambient Temperature F634 Rush Current Suppression Relay Activation Time F635 PTC 1 Thermal Selection F637 PTC 2 Thermal Selection F638 Jump Frequencies Jump Frequency 1 F270 Jump Frequency 1 Bandwidth F271 Jump Frequency 2 F272 Jump Frequency 2 Bandwidth F273 Jump Frequency 3 F274 Jump Freq...

Page 61: ...n Level F177 Motor Set 4 Motor Set 4 Base Frequency F178 Motor Set 4 Base Frequency Voltage F179 Motor Set 4 Manual Torque Boost F180 Motor Set 4 Overload Protection Level F181 PM Motor PM Motor Constant 1 D Axis Inductance F498 PM Motor Constant 2 Q Axis Inductance F499 Step Out Detection Current Level For PM Motors F640 Step Out Detection Current Time For PM Motors F641 Vector Motor Model Autotu...

Page 62: ... Rate F206 RR Input Point 1 Rate F214 RR Input Point 2 Rate F215 RX Input Point 1 Rate F220 RX Input Point 2 Rate F221 RX2 Option AI1 Input Point 1 Rate F226 RX2 Option AI1 Input Point 2 Rate F227 Torque Control Braking Mode F341 Torque Bias Input F342 Panel Torque Bias F343 Panel Torque Gain F344 Release Time F345 Creeping Frequency F346 Creeping Time F347 Braking Time Learning Function F348 Torq...

Page 63: ...K Drooping Control Drooping Gain F320 Speed at 0 Drooping Gain F321 Speed at F320 Drooping Gain F322 Drooping Insensitive Torque F323 Drooping Output Filter F324 Feedback Settings PID Control Switching F359 PID Feedback Signal F360 PID Feedback Delay Filter F361 PID Feedback Proportional Gain F362 PID Feedback Integral Gain F363 PID Deviation Upper Limit F364 PID Deviation Lower Limit F365 PID Fee...

Page 64: ...463 Second Speed Loop Stabilization Coefficient F464 Load Moment of Inertia 2 F465 MY FUNCTION My Function My Function Selection My Function Operating Mode F977 My Function Unit 1 Input Function Target 1 F900 Input Function Command 1 F901 Input Function Target 2 F902 Input Function Command 2 F903 Input Function Target 3 F904 Output Function Assigned F905 My Function Unit 2 Input Function Target 1 ...

Page 65: ...ommand 1 F942 Input Function Target 2 F943 Input Function Command 2 F944 Input Function Target 3 F945 Output Function Assigned F946 My Function Unit 6 Input Function Target 1 F947 Input Function Command 1 F948 Input Function Target 2 F949 Input Function Command 2 F950 Input Function Target 3 F951 Output Function Assigned F952 My Function Unit 7 Input Function Target 1 F953 Input Function Command 1...

Page 66: ...My Function Count Data 2 F934 My Function Analog Analog Input Function Target 11 F959 Analog Function Assigned Object 11 F961 Analog Input Function Target 21 F962 Analog Function Assigned Object 21 F964 My Function Monitor Monitor Output Function 11 2000 3099 FD00 FE99 F965 Monitor Output Function Command 11 F966 Monitor Output Function 21 2000 3099 FD00 FE99 F967 Monitor Output Function Command 2...

Page 67: ...ng 1 F830 Communication Option DeviceNet Profibus Setting 2 F831 Communication Option DeviceNet Profibus Setting 3 F832 Communication Option DeviceNet Profibus Setting 4 F833 Communication Option DeviceNet Profibus Setting 5 F834 Communication Option DeviceNet Profibus Setting 6 F835 Communication Option DeviceNet Profibus Setting 7 F836 Communication Option DeviceNet Profibus Setting 8 F841 Commu...

Page 68: ...d Data 4 F878 Block Read Data 5 F879 Free Notes F880 Network Option Reset Setting F899 Ethernet Settings IP N A Sub Net Gateway DHCP Mode MAC ID PATTERN RUN Pattern Run Operation Mode Preset Speed Operation Mode F560 Preset Speed 1 F561 Direction Acceleration Deceleration Group V f Group Torque Limit Group Preset Speed 2 F562 Direction Acceleration Deceleration Group V f Group Torque Limit Group P...

Page 69: ...ration Group V f Group Torque Limit Group Preset Speed 6 F566 Direction Acceleration Deceleration Group V f Group Torque Limit Group Preset Speed 7 F567 Direction Acceleration Deceleration Group V f Group Torque Limit Group Preset Speed 8 F568 Direction Acceleration Deceleration Group V f Group Torque Limit Group Program Mode Menu Navigation Primary Menu Sub Menu Parameter Name Parameter Number Ph...

Page 70: ...ation Group V f Group Torque Limit Group Preset Speed 12 F572 Direction Acceleration Deceleration Group V f Group Torque Limit Group Preset Speed 13 F573 Direction Acceleration Deceleration Group V f Group Torque Limit Group Preset Speed 14 F574 Direction Acceleration Deceleration Group V f Group Torque Limit Group Program Mode Menu Navigation Primary Menu Sub Menu Parameter Name Parameter Number ...

Page 71: ...e F549 Speed 11 Operation Time F550 Speed 12 Operation Time F551 Speed 13 Operation Time F552 Speed 14 Operation Time F553 Speed 15 Operation Time F554 Pattern Run Pattern Operation F520 Pattern Operation Mode F521 Pattern 1 Repeat F522 Pattern 2 Repeat F531 Speeds Pattern Group 1 Selection 1 F523 Pattern Group 1 Selection 2 F524 Pattern Group 1 Selection 3 F525 Pattern Group 1 Selection 4 F526 Pa...

Page 72: ...n Group 2 Selection 7 F538 Pattern Group 2 Selection 8 F539 PASSWORD aND Lock Outs Password Lock Outs Enter Password Password is 0 zero for a new unit N A Change Password Enter New Password N A Lock Outs Reset From Trip N A Hand Auto Run Stop from EOI Frequency Change From EOI Monitor Screen Parameter Access Parameter Write Program Mode Menu Navigation Primary Menu Sub Menu Parameter Name Paramete...

Page 73: ...tion are also accessible via their associated direct access numbers for specific adjustments when required The VLP setup procedure and the VLP Setup Wizard setup screens are shown below Figure 27 Input the Electrical Specifications of the Motor Figure 28 Input the Specifications of the Transducer 1 From the nameplate of the motor enter the FLA 2 Select Pressure or Level 3 Select the command source...

Page 74: ...ximum Zone VLP Setup Wizard Back Use Encoder To Set VLP Minimum Transducer Value Next Exit 70 12 14 The VLP Minimum value setting is typically above the electrical stall of the motor above the minimum system pressure above the manual change plateau and well below the typical operating point of the system Click in the VLP Minimum field and using the Rotary Encoder slowly decrease the VLP Minimum va...

Page 75: ... settings Exit available at zero Hz 18 From the Frequency Command screen press ESC scroll to the VLP Control field and select Direct Mode if using no feedback if using feedback go to Step 21 on pg 68 19 While in the Hand mode and from the Frequency Command screen press Run 20 During operation adjust parameters F500 and F501 to stabilize VLP operation if unstable Press ESC Phone 800 894 0412 Fax 88...

Page 76: ...LP Control field and select Process Hold if using feedback if not using feedback go to Step 18 on pg 67 22 From the Frequency Command screen press Run 23 During operation adjust parameters F500 and F501 to stabilize VLP operation if unstable Press ESC Phone 800 894 0412 Fax 888 723 4773 Web www ctiautomation net Email info ctiautomation net ...

Page 77: ... Trip is incurred Fault and Trip are sometimes used interchangeably A Trip is a safety feature the result of a Fault that disables the P9 ASD system and removes the 3 phase power from the motor in the event that a subsystem of the ASD is malfunctioning or one or more of the variables listed below exceeds its normal range time and or magnitude Current Voltage Speed Temperature Torque or Load See Ta...

Page 78: ...n of activation only User notification events are not error conditions and only convey active system functions to the user Table 4 User Notification Codes LED Function Description Atn Autotune active Atn indicates that the Autotune function is active dbOn DC Braking This code conveys the DC Injection function being carried out The display shows db when braking and shows dbOn when the motor shaft s...

Page 79: ...ns error Improperly programmed ASD Improper communications settings Improperly connected cables CM2 Comm2 Error External communications error E Emergency Off Output signal from the ASD is terminated and a brake may be applied if so configured Stop Reset pressed twice at the EOI EOFF command received remotely ASD reset required MOFF Main Under Voltage Under voltage condition at the 3 phase AC input...

Page 80: ...ctor Control mode OLR Resistor Overload Excessive current at the Dynamic Braking Resistor Deceleration time is too short DBR configuration improperly set OP Over Voltage DC bus voltage exceeds specifications Note It is normal for the OP alarm to flash during decel when using the Automatic Acc Dec setting at F000 ASD attempting to start into a spinning motor after a momentary power loss Incoming co...

Page 81: ... close to each other Two speed reference frequency setpoints are too close to each other increase the difference UC Under Current With the Low Current Trip F610 parameter enabled the output current of the ASD is below the level defined at F611 and remains there for a time longer than the setting of F612 Output current too low LED Screen LCD Screen Description Possible Causes Troubleshooting Phone ...

Page 82: ...SD Sink Source configuration is incorrect E 11 Brake Sequence Response Error F630 is set to a non zero value Braking sequence discrete input and output terminals are not set up properly E 12 Encoder Signal Loss Error ASD is configured to receive a signal from a shaft mounted encoder and no signal is being received while running Disconnection at the Encoder circuit Motor is stopped and is generatin...

Page 83: ... fault at the motor Ground fault at the output of the ASD Current leakage to Earth Ground EPHI Input Phase Failure 3 phase input to the ASD is low or missing at the R S or T input terminals EPHO Output Phase Failure 3 phase output from the ASD is low or missing at the U V or W output terminals or at the input to the motor ERR2 RAM Fault Internal RAM malfunction Make a service call ERR3 ROM Fault I...

Page 84: ...N3 Autotune setting F400 is set to Auto Calculation and there is a problem with the Motor Constant readings ETYP Typeform Error Firmware information typeform loaded into the Gate Driver board is inconsistent with the device in which the firmware is being used The Gate Driver board has been replaced The Gate Driver board is defective None No Errors No active faults OC1 Over Current During Accelerat...

Page 85: ...ing at an elevated temperature ASD current exceeds 340 of the rated FLA on ASDs that are 100 HP or less during a fixed speed run or if during a fixed speed run the ASD overheats On ASDs that are greater than 100 HP it occurs when the ASD current exceeds 320 of the rated FLA on a fixed speed run OC3P Overheat During Run Cooling fan inoperative Ventilation openings are obstructed Internal thermistor...

Page 86: ...n time is too short DBR value is too high DBR required DBR setup required Stall protection is disabled 3 phase input voltage is out of specification Input reactance required OP3 Over Voltage During Run Load fluctuations 3 Phase input voltage out of specification DBR required DBR setup required OT Over Torque A torque requirement by the load in excess of the setting of F616 or F617 for a time longe...

Page 87: ...n first out The Trip field may be selected and scrolled through to view the recorded trip information for a given trip number The monitored parameters are listed in Table 7 as At trip Recorded Parameters parameter readings at the time that the trip occurred In the event of a power loss or if the keypad has been removed from the ASD the trip records and the real time clock information are retained ...

Page 88: ...sure Figure Number A Width in mm B Height in mm C Depth in mm Mounting Hole Dimensions in mm Conduit Plate D E R1 R2 2 2010 Figure 34 5 2 132 11 2 285 6 1 155 8 7 220 4 5 114 0 098 2 5 0 217 5 5 Figure 37 A 2015 2025 3 2035 6 1 155 12 4 315 6 6 168 9 8 249 5 4 138 2055 4 2080 6 9 175 15 0 381 11 1 283 6 2 158 0 236 6 0 Figure 37 B 2110 5B 2160 9 1 231 19 3 490 7 6 193 15 2 386 8 3 210 0 118 3 0 0 ...

Page 89: ...re 37 C 4220 5B 4270 9 1 231 19 3 490 15 2 386 8 3 210 Figure 37 D 4330 6 4400 Figure 35 11 1 283 25 9 658 13 2 335 25 0 635 8 0 203 0 188 4 8 0 375 9 5 Figure 37 E 7A 4500 30 8 782 14 3 363 29 7 754 Figure 37 F 4600 8 4750 14 3 363 36 1 917 15 3 389 35 3 897 Figure 38 H 410K 412K 9 415K Figure 36 14 6 371 51 7 1313 17 6 447 50 2 1275 9 2 234 0 344 8 7 0 670 17 Figure 38 I 10 420K 15 7 399 53 1 13...

Page 90: ...82 P9 ASD Quick Start Guide Figure 34 See Tables 8 and 9 for Actual Dimensions Phone 800 894 0412 Fax 888 723 4773 Web www ctiautomation net Email info ctiautomation net ...

Page 91: ...P9 ASD Quick Start Guide 83 Figure 35 See Tables 8 and 9 for Actual Dimensions Phone 800 894 0412 Fax 888 723 4773 Web www ctiautomation net Email info ctiautomation net ...

Page 92: ...84 P9 ASD Quick Start Guide Figure 36 See Tables 8 and 9 for Actual Dimensions Phone 800 894 0412 Fax 888 723 4773 Web www ctiautomation net Email info ctiautomation net ...

Page 93: ...ck Start Guide 85 Conduit Plate Dimensions Figure 37 See Tables 8 and 9 for the associated device Dimensions are in in cm Phone 800 894 0412 Fax 888 723 4773 Web www ctiautomation net Email info ctiautomation net ...

Page 94: ...86 P9 ASD Quick Start Guide Figure 38 See Tables 8 and 9 for the associated device Dimensions are in in cm Phone 800 894 0412 Fax 888 723 4773 Web www ctiautomation net Email info ctiautomation net ...

Page 95: ...P9 ASD Quick Start Guide 87 Figure 39 See Table 9 for the associated device Dimensions are in in cm Phone 800 894 0412 Fax 888 723 4773 Web www ctiautomation net Email info ctiautomation net ...

Page 96: ...75 3 2 A 3 84 A 200 240 VAC 10 Input Voltage Level Max 2015 1 0 4 2 A 5 04 A 2025 2 0 6 8 A 8 16 A 2035 3 0 9 6 A 11 5 A 2055 5 0 15 2 A 18 2 A 2080 7 5 22 0 A 26 0 A 2110 10 28 0 A 34 0 A 2160 15 42 0 A 50 0 A 2220 20 54 0 A 65 0 A 2270 25 68 0 A 82 0 A 2330 30 80 0 A 96 0 A 2400 40 104 A 125 A 2500 50 130 A 156 A 2600 60 154 A 185 A 2750 75 192 A 230 A 210K 100 248 A 298 A 212K 125 312 A 374 A P...

Page 97: ...4 08 A 4035 3 0 4 8 A 5 76 A 4055 5 0 7 6 A 9 00 A 4080 7 5 11 0 A 13 0 A 4110 10 14 0 A 17 0 A 4160 15 21 0 A 25 0 A 4220 20 27 0 A 32 0 A 4270 25 34 0 A 41 0 A 4330 30 40 0 A 48 0 A 4400 40 52 0 A 62 0 A 4500 50 65 0 A 78 0 A 4600 60 77 0 A 92 0 A 4750 75 96 0 A 115 A 410K 100 124 A 149 A 412K 125 156 A 187 A 415K 150 180 A 216 A 420K 200 240 A 288 A 425K 250 302 A 362 A 430K 300 361 A 433 A 435...

Page 98: ... only 75 C copper wire cable for motor and power connections For further installation information see the section titled Installation and Connections on pg 10 Note Indicates that the item is one of a set of two parallel cables Table 12 230 Volt P9 ASD Cable Terminal Torque Specifications Model Number VT130P9U MCP Rating Amps Wire Cable Size Lug Size Range Terminal Board Torque AWG or kcmil Input O...

Page 99: ... Input 3Ø Output Recommended Maximum 3Ø Input 3Ø Output In Lbs Nm 4015 15 14 10 14 to 8 20 3 core shield Torque to 5 3 0 6 11 5 1 3 4025 4035 4055 4080 20 12 4110 30 10 8 12 to 8 17 7 2 0 4160 8 4 10 to 4 21 2 4 4220 50 4270 75 4 3 8 to 3 4330 4400 100 2 12 to 1 0 4 to 1 0 50 5 7 53 6 0 4500 3 4600 125 2 4750 175 1 0 4 0 6 to 250 1 to 300 275 31 168 19 410K 200 2 0 412K 250 4 0 415K 300 1 0 4 0 6 ...

Page 100: ...L36125 2500 50 130 HLL36150 2600 60 154 JLL36200 2750 75 192 Contact TIC Customer Service 210K 100 248 212K 125 312 4015 1 0 2 1 HLL36015 4025 2 0 3 4 4035 3 0 4 8 4055 5 7 6 HLL36025 4080 7 5 11 0 4110 10 14 0 HLL36040 4160 15 21 0 HLL36070 4220 20 27 0 4270 25 34 0 HLL36090 4330 30 40 0 HLL36100 4400 40 52 0 4500 50 65 0 HLL36125 4600 60 77 0 HLL36150 4750 75 96 0 JLL36200 410K 100 124 JLL36225 ...

Page 101: ...M2 71 Command Source 31 Communication Adjustments 59 Communication Error 75 Communication Settings 59 Communications Setting Changes 33 Communications Settings 59 Compensation Frequency 37 Conduit Plate Dimensions 80 Connecting the ASD 12 Connection Diagram 22 Contrast 47 Control Power Under Voltage 78 CPU Fault 75 Current Voltage 88 Current Voltage Specifications 88 Customer Support 2 D dbOn 70 D...

Page 102: ...LA B and C Switching Relationship 20 Flash Memory Fault 76 FLB 19 FLC 17 19 20 FM 17 19 FM Output 37 Forward Reverse Disable 49 FP 17 19 FP Output 21 Frequency 49 Frequency at Trip 37 Frequency Command Mode 35 Frequency Command Screen 28 32 Frequency Control 52 Frequency Reference 37 Frequency Reference Source 32 Frequency Setting 35 Frequency Settings 41 Fundamental 41 G Gate Array Fault 75 Gener...

Page 103: ...ing the ASD 11 My Function 56 My Function Monitor 58 N NERR 76 O O1A B 17 O2A B 19 OC 71 OC1 76 OC1P 77 OC2 77 OC2P 77 OC3 77 OC3P 77 OCA1 77 OCA2 77 OCA3 77 OCL 77 OCR 77 OH 72 78 OH2 78 OJ 72 OL1 78 OL2 78 OLI 72 OLM 72 OLR 72 78 OP 72 OP1 78 OP2 78 OP3 78 Operation Hand 32 Operation Mode 60 Operation Panel Parameters 52 Operational and Maintenance Precautions 9 OT 72 78 OUT1 17 19 Out1 Out2 FL ...

Page 104: ...5 Retry Restart 48 ROM Fault 75 Root Menu Mapping 35 Root Menus 35 Rotary Encoder 26 RR 17 18 38 RR Input 21 Run Key 26 Run Time 37 RX 17 18 38 RX Input 21 RX2 38 S S L2 12 S1 17 18 S2 17 18 S3 17 18 S4 17 18 Saving User Settings 34 SEAL 78 Sealing Water Error 78 Setpoints 54 Short Circuit Protection 92 Sink 20 Sink Source Setting Error 74 75 Source 20 SOUT 78 Special 51 Special Parameters 52 Spec...

Page 105: ...er Current 77 Upper Limit Frequency 30 User Notification Codes 70 Using the LCD Screen 28 Utilities 44 V V f 5 Point Setting 52 V I 38 49 V I Input 21 V I Settings 49 V T2 12 Vector Motor Model 53 Version 44 Viewing Trip Information 79 VIRTUAL LINEAR PUMP 40 VLP Run External Devices 40 VLP Sealing Water 41 VLP Settings 40 VLP Setup Wizard 40 VLP Sleep Timer 40 VLP Start and Stop Points 40 Voltage ...

Reviews: