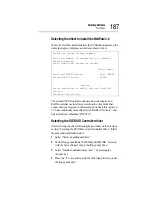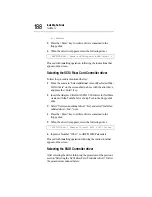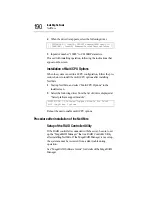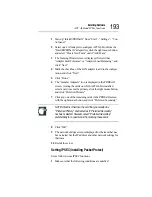
Installing Software
NetWare
178
6 Install the Service and Software (Power Console Plus) of the
RAID Controller (when the RAID Controller is additionally
connected) or MegaRAID Configuration Console (when IDE
RAID is used).
7 Install the Backplane Driver (when IDE RAID is used).
Use the floppy disk supplied with the RAID Controller for
installation.
See “MegaRAID Software Guide” for details of installation.
NetWare
Before installing the NetWare
If the Toshiba Server Setup Tool is used, it automatically carries
out setup of the system configuration and RAID (disk array) as
well as installation of the MS-DOS. In other words, the Toshiba
Server Setup Tool automatically prepares the installing environ-
ment for the NetWare.
On the other hand, an MS-DOS disk can be created by use of the
Toshiba Server Setup Tool so that the MS-DOS environment can
be set up manually without use of the DOS Installer of the Toshiba
Server Setup Tool.
Setup of the motherboard
Activate the BIOS Setup Utility and select “Other” for “Installed
O/S” appearing in the lower part of the “Advanced” menu.
Preparation of a floppy disk
To install NetWare, you need to first copy each driver to a floppy
disk, using the Toshiba Server Setup Tool.
Start the Toshiba Server Setup Tool, select “Utilities” and “Create
Floppy Disks,” and copy the following drivers to floppy disks:
DOS Disk
Adaptec Ultra160 NetWare Driver
Summary of Contents for Magnia Z300
Page 1: ...MAGNIA Z300 User sGuide ...
Page 4: ...1 2 ...
Page 8: ......
Page 14: ......
Page 22: ...xxii ...
Page 102: ...InstallingandRemovingHardware CPU module 80 Removing the PCI bracket ...
Page 130: ...InstallingandRemovingHardware Expansion cards 108 ...
Page 236: ...Troubleshooting Remedy When Windows NT 2000 is Unusable 214 ...
Page 237: ...Appendix A System Unit 216 External Hard Drive Unit Z1 218 External Device Bay Unit Z1 219 ...
Page 242: ...220 ...
Page 253: ...Appendix C Hardware setup information 232 Recovery Boot 233 ...
Page 257: ...235 Default Jumper Switch Settings PJ47 CMOS Clear PJ723 Recovery Boot ...
Page 258: ...236 ...
Page 259: ...Appendix D ...
Page 270: ...248 ...


