background image

1

1-6

About the Command WorkStation (Option)

Access levels

The three possible levels of access to Command WorkStation functions are 
Administrator, Operator, and Guest. To enable maximum password protection, 
Administrator and Operator passwords must be specified in Setup (see the 
Configuration Guide).

When both Administrator and Operator passwords have been specified, the access 
levels are as follows:

N

OTE

:

Access privileges alone do not confer control of print jobs. If the operator is 

going to manage all print jobs, the Administrator must route all user jobs to the Hold 
queue (that is, all jobs are spooled and held on the server). To accomplish this, only the 
Hold queue, and not the Direct connection or the Print queue, should be enabled in 
Setup. See the Configuration Guide for more information.

Logging out

There are two ways to log out from the server:

• From the Server menu, choose Log out.

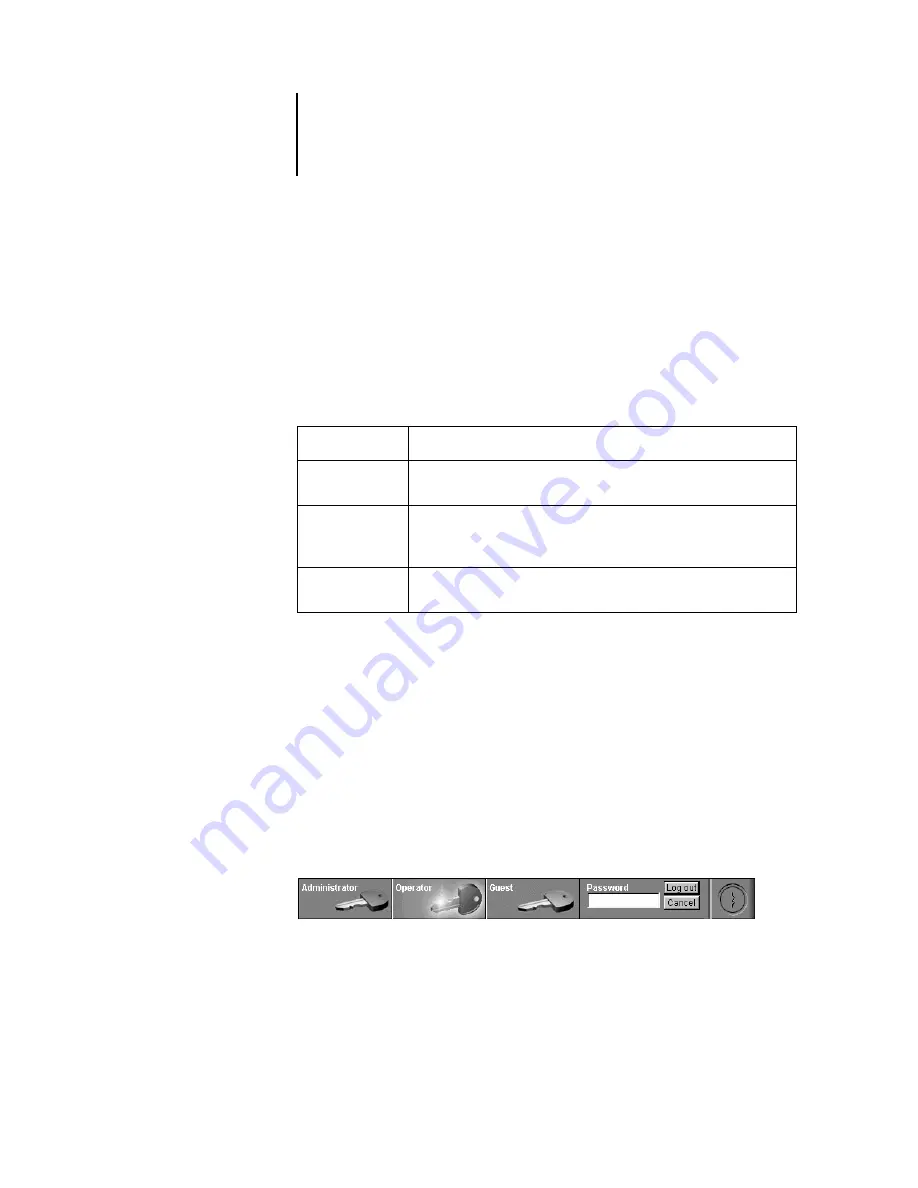
• Open the Log in/out slider (click the key icon just below the Fiery logo)

and click Log out.

Access level:

Privileges and password requirements:

Administrator

Has full access to all Command WorkStation and GA-1040 Control 
Panel functions; Administrator password required.

Operator

Has access to all Command WorkStation functions except Setup, 
clearing the server disk, clearing the Job Log, and font management; 
Operator password required. 

Guest

Can view job status, but cannot make changes to jobs or Setup, and can 
view the Queues window only; no password required.

Summary of Contents for e-studio 35

Page 1: ...DIGITAL PLAIN PAPER COPIER OPERATOR S MANUAL FOR PRINTER FUNCTION NETWORK PRINTER BOARD GA 1040 JOB MANAGEMENT GUIDE ...

Page 2: ......

Page 3: ...TOSHIBA GA 1040 JOB MANAGEMENT GUIDE ...

Page 4: ......

Page 5: ...egistered trademarks of International Typeface Corporation Ethernet is a registered trademark of Xerox Corporation NetWare and Novell are registered trademarks and Internetwork Packet Exchange IPX is a trademark of Novell Inc UNIX is a registered trademark of UNIX System Laboratories a wholly owned subsidiary of Novell Inc PANTONE is a registered trademark of Pantone Inc Matchprint is a trademark ...

Page 6: ...der Bestimmungen hängt davon ab dass geschirmte Ausführungen benützt werden Für die Beschaffung richtiger Ausführungen ist der Betreiber verantwortlich Software License Agreement Before using the Software please carefully read the following terms and conditions BY USING THIS SOFTWARE YOU SIGNIFY THAT YOU HAVE ACCEPTED THE TERMS OF THIS AGREEMENT If you cannot or do not accept these terms you may r...

Page 7: ...implied warranty so the above limitation may not apply to you For warranty service please contact your authorized service support center EXCEPT FOR THE ABOVE EXPRESS LIMITED WARRANTY ELECTRONICS FOR IMAGING MAKES AND YOU RECEIVE NO WARRANTIES OR CONDITIONS ON THE SOFTWARE OR CODED FONT PROGRAMS EXPRESS IMPLIED STATUTORY OR IN ANY OTHER PROVISION OF THIS AGREEMENT OR COMMUNICATION WITH YOU AND ELEC...

Page 8: ...sing with respect to the Software and Coded Font Programs If any provision of this Agreement is held invalid the remainder of this Agreement shall continue in full force and effect If you have any questions concerning this Agreement please write to Electronics For Imaging Inc Attn Licensing Dept or see Electronics For Imaging s web site at www efi com Electronics For Imaging 303 Velocity Way Foste...

Page 9: ... WorkStation 1 1 Starting up and logging in 1 4 Connecting to the server 1 4 Logging in 1 5 Logging out 1 6 The Command WorkStation interface 1 7 Window area Queues Archive FreeForm Job Log 1 8 Menu bar 1 9 Server selection tabs 1 12 Sliders 1 12 Job ticket information 1 14 Window selection tabs 1 14 Queues window 1 15 Status bars 1 16 Job icons 1 19 Spool area 1 19 RIP area 1 20 Print area 1 21 J...

Page 10: ...g and editing job properties 1 39 Chapter 2 Managing Print Jobs Communicating with users 2 1 What the user needs to know 2 1 How users communicate print requirements 2 2 Customizing the Command WorkStation window 2 3 Setting Command WorkStation Preferences 2 4 Printing server information pages 2 5 Workflow scenarios 2 6 Using the copier 2 8 Canceling jobs 2 9 Viewing and overriding print settings ...

Page 11: ...mmands 3 4 Viewing and editing jobs 3 6 Previewing jobs 3 6 Full screen previews 3 9 Editing and merging jobs 3 10 Editing or merging files 3 12 Duplex Alignment command 3 19 Duplex Alignment 3 19 Chapter 4 Using Imposition Main window 4 1 Job previews 4 3 Navigating in the main window 4 4 Switching between page view and layout view 4 5 Setting magnification levels 4 6 Viewing the sheets 4 7 Using...

Page 12: ... 5 15 DocBuilder Pro and Acrobat technology 5 15 File management 5 16 Saving imposed jobs 5 17 Chapter 6 Overview of TopAccess and WebTools WebTools and TopAccess 6 1 Access privileges 6 1 Using TopAccess 6 2 Print Jobs 6 4 Viewing Department Code jobs 6 6 Accessing WebTools 6 7 Chapter 7 Fiery WebSpooler Tracking and managing jobs with Fiery WebSpooler 7 1 About the Fiery WebSpooler window 7 3 Ma...

Page 13: ... Bleed B 1 2 Up Perfect B 2 2 Up Saddle B 4 3 Up Trifold Brochure B 6 4 Up Gate Fold B 8 4 Up Head to Head B 10 4 Up Z Fold B 12 Appendix C Troubleshooting Error messages C 1 Maintaining optimal system performance C 1 Troubleshooting C 2 Command WorkStation hangs C 2 Command WorkStation fails to connect to the GA 1040 C 2 Unexpected printing results C 3 Clearing the server C 4 Users are unable to ...

Page 14: ......

Page 15: ...umes the presence of an operator who controls and manages jobs sent by users from remote workstations About this manual This manual is organized as follows Chapters 1 and 2 describe the Command WorkStation interface The Command WorkStation application can be installed on networked Windows 95 98 Me Windows NT 4 0 and Windows 2000 computers and is used to view and manage virtually all aspects of GA ...

Page 16: ...ich can be used to view and manage GA 1040 job activity The interface and features of Fiery WebSpooler have identical counterparts in the Command WorkStation therefore this chapter refers you to Chapters 1 and 2 for details about many Fiery WebSpooler functions Appendix A provides an overview of the terms and concepts of Imposition including various folding binding and cutting methods Appendix B i...

Page 17: ...nt engine Job A file consisting of PostScript commands and comments that describe the graphics sampled images and text that should appear on each page of a document and the printer options that should be used in printing such as media type Spool Write to a disk Usually used in this manual to refer to a PostScript or PCL print job being saved to the GA 1040 hard disk in preparation for processing a...

Page 18: ... how they can be used to manage jobs This manual is intended for an operator or administrator or a user with the necessary access privileges who needs to monitor and manage job flow and troubleshoot problems that may arise Release Notes provide last minute product information and workarounds for some of the problems you may encounter GA 1040 job environments The GA 1040 supports several levels of ...

Page 19: ... of control The person who has access to Setup can control the printing and job management environment by choosing which queues are enabled and by electing to set passwords The Administrator can also manage the fonts on the server clear the server disk when necessary and set a common web link for all users who log in to the GA 1040 using their web browser Operator includes control of print jobs th...

Page 20: ......

Page 21: ...dows 95 98 Me Windows NT 4 0 or Windows 2000 computer with a network connection to the GA 1040 By default no passwords are set on the GA 1040 in this default state anyone can perform Setup and use all Command WorkStation functions Until an Administrator password is defined in GA 1040 Setup you can log in to the Command WorkStation as an Administrator without entering a password and you are given f...

Page 22: ...ay areas An operator who has complete job control sets the process in motion for each job The Spool RIP and Print areas of the Queues window represent the stages of printing a job Jobs come in at the top level Spool and drop down to the Print level unless they are held along the way Spooled jobs Jobs listed below the Spool status bar area are PostScript or PCL files stored on the GA 1040 disk Thes...

Page 23: ...interact with jobs in the window by selecting them and choosing from Job menu commands or right mouse menu commands or by double clicking them However if passwords have been set and you log in as Guest you can only view jobs you cannot change or route them This chapter and the next explain the Command WorkStation interface in detail Spool status bar RIP status bar Rasterized RIPped jobs Print stat...

Page 24: ...40 from the list of servers NOTE If the Command WorkStation has never been connected to a GA 1040 you are prompted to configure an entry for the server Click OK and see Getting Started for instructions on how to configure a new connection With the GA 1040 device name GA 1040 selected click OK If the device name is not displayed click the plus sign to expand the GA 1040 entry The Command WorkStatio...

Page 25: ...key enter the password and click Log in or press Enter For Guest access only click the Guest key and then click Log in No password is required for Guest access If you change your mind about logging in or do not have the password you need click Cancel When you have entered the appropriate password and logged in the Log in out slider retracts and the full Command WorkStation display appears The colo...

Page 26: ...erver To accomplish this only the Hold queue and not the Direct connection or the Print queue should be enabled in Setup See the Configuration Guide for more information Logging out There are two ways to log out from the server From the Server menu choose Log out Open the Log in out slider click the key icon just below the Fiery logo and click Log out Access level Privileges and password requireme...

Page 27: ...ion displays those numbered 5 through 7 appear only in the Queues window and element number 8 is common to the Queues Archive and FreeForm windows The Command WorkStation provides access to a great deal of information and many features that are accessed in various ways buttons menus double clicking and right mouse commands It is a powerful interface that allows for a great deal of 1 Server selecti...

Page 28: ... the Queues window shown below the Archive window the FreeForm window or the Job Log window only the Queues window is available if you logged in as Guest The Queues window is the default window it shows spooled processing and printing jobs in a display that changes dynamically For information on See Queues area Queues window on page 1 15 Archive area Archive window on page 1 25 FreeForm area FreeF...

Page 29: ...mmands see page 1 22 Delete Delete one or more selected jobs You cannot delete a selected job by pressing the delete key Duplicate Duplicate one or more selected PostScript or PCL data jobs in the Spool or Print areas see page 1 19 page 1 21 and page 1 22 Rename Rename a selected job Hold Hold the selected job s see page 1 17 RIP and Hold RIP and then hold the selected job s see page 1 17 Print Pr...

Page 30: ... PDF files unless you assign the job a new name or overwrite the existing job see page 3 10 Download Download files and fonts to the GA 1040 see page 2 13 You can also choose this command by right clicking the Spool status bar Archive Archive one or more selected jobs see page 1 25 and page 2 18 Import Retrieve one or more archived jobs from an external device see page 2 20 You can also choose thi...

Page 31: ... masters and the Job Log requires Administrator privileges see Other server management commands on page 2 23 Setup Start the Fiery Setup program requires Administrator privileges see Other server management commands on page 2 23 and the Configuration Guide Log out Log out of the server Window Filter Open the Filter dialog box for the active window see page 1 35 Export Save the information in the a...

Page 32: ...st or configure a new server entry see Connecting to the server on page 1 4 A limit of five GA 1040s can be connected to a single Command WorkStation You can access the Server selection tabs from all Command WorkStation windows Queues Archive FreeForm and Job Log Sliders Along the left side of the display are buttons you click to activate function sliders To retract any slider click the icon at th...

Page 33: ...ht of the bar Utilities shortcut slider This slider can be used to access Fiery Downloader This utility can also be accessed from the Job menu These utilities can also be accessed from the Job menu and Server menu respectively To retract the slider click the icon at the far right of the bar RAM and disk space slider The System information indicators show the current availability of RAM and hard di...

Page 34: ...all for special paper or other media You can choose not to display headers for options that are not used at your site or you can display all possible options and scroll to see the ones that are less important to you If you just want to experiment when you are finished you can choose Revert to Default Settings from the Window menu For instructions on customizing the display in the Queues Archive an...

Page 35: ...s an operator has intervened to change the order Rasterizing RIPping PostScript or PCL commands are interpreted in the GA 1040 to allow the copier to print the file the way its originator intended The result of this interpretation is a raster file associated with the original PostScript or PCL file In this raster file raster image data is associated with each dot that can be rendered by the print ...

Page 36: ...he RIP status bar you see a list of rasterized RIPped files beneath the Print status bar you see a list of jobs that have already been printed NOTE In the Spool status bar the filename and user information always appear as Unknown as shown below This information is not available until the job has finished spooling to the GA 1040 disk When a job is being processed provided animation is enabled see ...

Page 37: ... Print status bars up or down to change the proportion of the window devoted to each job area For example drag the RIP status bar down if you have a long list of spooled jobs that you want to see without scrolling Making space If your workflow includes holding many jobs and you don t want to view the held jobs all the time consider moving some of them to the Archive window You can move jobs back a...

Page 38: ...in a yellow row just beneath the Spool or RIP status bar Jobs that are held must be activated with a command in order to print Active jobs are shown in white with white icons new jobs are added above older jobs Spooled and held RIPped and held Print and hold RIP Print Printed PostScript PCL and raster data Deleted Spool Spooled for printing RIPped for printing Print A copy of the held job is print...

Page 39: ...printing Hold Raster icon PostScript PCL and raster data after printing ready for fast reprint PostScript or PCL data already rasterized and held Spool area icon What it indicates How long you see the job 1 Yellow printer icon Yellow job row PostScript or PCL data from a user on the network no destination is defined Until a destination is chosen 2 White printer icon White job row PostScript or PCL...

Page 40: ...printer icon icon 2 When they reach the head of the queue they are RIPped and printed without operator intervention Direct connection jobs Jobs printed to the Direct connection are not displayed in the Command WorkStation job lists They are displayed briefly in the status bars where they cannot be selected and are included in the Job Log RIP area The job icons in the RIP area are described below A...

Page 41: ...ion settings you must remove the raster data and reRIP the job Print area The job icons in the Print area are described below The Print area also referred to as the Printed queue contains jobs that have already been printed These jobs were assigned the Print destination white printer icon in the Spool or RIP areas without any Hold instructions therefore they all have white icons and rows NOTE A jo...

Page 42: ...aster job in the RIP area the raster data in the RIP area remains and can be used to reprint the job after the raster data has been cleared from the Printed queue Job commands Job commands are used to assign a selected job to a new destination or process These commands are available from the Job menu see page 1 9 Many are also available as right mouse commands described following the list of comma...

Page 43: ...he RIP area Held in RIP area indefinitely saved to disk Process Next Give top priority to this job RIP and then print it as soon as the processor is free before other waiting jobs Option is dimmed if there are no other waiting jobs n a NOTE This command is available only for jobs in the Spool area that are not currently held Remove Raster Remove the raster data from a job that has raster data indi...

Page 44: ... pages into a job in the Thumbnail A window In order to merge jobs they must be of the same data type for example PostScript jobs cannot be merged with raster jobs Unchanged Download Download files and fonts to the GA 1040 with Fiery Downloader see page 2 13 n a Archive Archive the selected held job s to the GA 1040 hard disk the GA 1040 internal ZIP drive the local Command WorkStation hard disk o...

Page 45: ...tion hard drive or on network drives For instructions on how to archive jobs see page 2 18 NOTE The Archive window is not available if you logged in as Guest PostScript and raster data jobs can be archived but jobs must first be held in the Spool or RIP areas of the Queues window before they can be archived When you archive a job the job is moved not copied to the archive destination the GA 1040 a...

Page 46: ... As with the Queues window you can select the headings for the display and use Job menu or right mouse commands you can also sort jobs To Do this Sort jobs in a category such as by Date Double click the Date Time heading A small arrow indicates whether jobs are sorted in ascending or descending order Double click again to sort in the reverse order Route a job to a destination in the Queues window ...

Page 47: ...lements must be RIPped with the Create Master print option set to a value from 1 to 100 that is a setting other than None Users can set this option to a value from 1 to 15 when they send a job but View only particular jobs Choose Filter from the Window menu and make entries in the Filter dialog box see page 1 35 Delete a job Select the job s and choose Delete from the Job menu or right mouse comma...

Page 48: ...ever users on the network can specify Create Master job setting values of 1 through 15 only due to limitations of the printer driver interface The Create Master job setting values can range from 1 to 100 but values from 16 to 100 can be assigned only with job overrides from the Properties dialog box When assigning new FreeForm Master numbers it is very important not to choose a number already in u...

Page 49: ...list the columns that you can add to the display The categories are the same as in the Queues window see page 1 14 but you can arrange them differently The column head arrangements you set in the FreeForm window are independent of those you set in other windows View a thumbnail of a FreeForm Master Right click the job and choose Thumbnail A or Thumbnail B from the menu that appears or left click t...

Page 50: ...s all jobs that have used that specific FreeForm Master as a master document Filtering jobs in the FreeForm window The FreeForm window displays a cumulative list of all FreeForm Masters If the window contains a large number of FreeForm Masters you may want to display only a specified subset of these jobs You can do this by filtering jobs in the FreeForm window The Filter command for the FreeForm w...

Page 51: ...of deleting existing master jobs or reassigning master numbers 1 through 15 in order to avoid any overwriting problems Since the operator is the only person who can assign numbers from 16 to 100 he or she can maintain a high level of control over the FreeForm Master numbers in use Tips for using FreeForm At sites where a small number of users print FreeForm jobs the operator may want to assign spe...

Page 52: ...Chooses the specified FreeForm Master number as the Use Master print option The job Variable1 ps will then print with the master data Master5 ps as specified by the user FreeForm restrictions When printing FreeForm jobs the following print option settings must match for both the FreeForm Master and the variable elements job Page Order Page Size Duplex The following settings for the variable elemen...

Page 53: ... also cleared by choosing Clear Server on the GA 1040 Control Panel see the Configuration Guide or by using the Clear command from the Command WorkStation see page 1 11 You can adjust the column widths in the Job Log display by clicking the column border in the heading and dragging left or right For more information see Chapter 2 When you open the Job Log you can choose to display all jobs in the ...

Page 54: ...ged in as Administrator you can clear the Job Log by choosing Clear Job Log from the Server menu The Job Log is cleared whenever an Administrator clears the server or installs new software In addition the Job Log can be cleared automatically after every 55 jobs Printing the Job Log To print the Job Log choose Print Pages from the File menu select Job Log click Print and click OK The Job Log is sen...

Page 55: ...icular job or a particular group of jobs You can display a specified subset of jobs by filtering jobs in the Queues Archive FreeForm and Job Log windows To open the Filter dialog box choose Filter from the Window menu In the Queues window you can filter jobs according to any or all of the following criteria Job title User name Date created or a date range Notes 1 or Notes 2 Instructions Device ...

Page 56: ...ur filtering criteria If you enter values in more than one field only jobs that meet all the criteria are displayed For example if you enter 10 in the Job Title field and UserName in the User field only those jobs whose titles somewhere contain 10 and whose User name somewhere contains UserName will be displayed To filter by date select Range in the Date created area and enter dates in the From an...

Page 57: ...lter template In this way you can filter jobs easily in one step and avoid the need to enter specific information each time you want to filter jobs TO CREATE A FILTER TEMPLATE 1 Open the Filter dialog box by choosing Filter from the Window menu 2 Enter specific job filter criteria in the appropriate fields 3 Click Save As ...

Page 58: ...he Templates pop up menu and click Delete Click OK to confirm that you want to delete the template Job properties When logged in as Operator or Administrator at the Command WorkStation you can use the Properties command to check and override the print option settings properties of most jobs NOTE You cannot override the print option settings of PCL jobs You can use this command to Check a user s jo...

Page 59: ...hroughput or efficiency To view the properties of one or more jobs select the job s and choose Properties from the Job menu or the right mouse menu For information on using the Properties dialog box to change job settings see Viewing and overriding print settings on page 2 9 NOTE Some print options that are available in the printer driver are not displayed in the Properties dialog box For informat...

Page 60: ......

Page 61: ...ions for their jobs What the user needs to know You or the network administrator should consider supplying some of the following information to your users The name of the copier on the network and the names of servers sharing the copier User s access status If jobs do not require operator intervention because they go to the Hold queue which connections are published Direct connection and or Print ...

Page 62: ... How users communicate print requirements Explain to remote users the information you check and what you need to know in order to print the jobs they send The Instructions field is suited for communication about the job requirements Notes fields appear in the Job Log so they are more suited for accounting billing and job cost information Users can provide you information with the print job for exa...

Page 63: ...ngs that are not already displayed 2 Choose the options you want to display and the sequence in which you prefer to view them Add delete or move a column by holding down the right mouse button on the name of the appropriate column heading release the button after choosing one of the menu options Add one of the listed columns to the display at your mouse position Move Left Move Right move the selec...

Page 64: ...rkStation Preferences Choose Preferences from the File menu to access the Preferences dialog box Menu Choose this To do this Preferences General Enable Animation Turn on or off animation of the status bars Enable Popup Help Turn on or off short captions that appear when you pause the mouse over window elements the captions identify the main parts of the Command WorkStation window Units Specify the...

Page 65: ...bles you to print the Configuration page Setting List Archive Log and Queues to any printer installed on your Windows computer Preferences Filter Helper Application Specify the path to a helper application from which to view data in the active window this application opens automatically when View in Helper App is chosen from the Window menu Template path Specify the path to where Filter template f...

Page 66: ... information on the fields in the Job Log and on printing it in other forms see Using the Job Log on page 2 21 4 Click Print 5 If you selected Server in step 2 specify the number of copies to print and click OK The page s are printed to the GA 1040 If you selected Local Printer in step 2 choose the desired printer in the Print dialog box specify the number of copies to print and click OK The page ...

Page 67: ...obs have priority What is the job for is it final output or a test print The first choice is whether to put the job in the print queue or hold it before processing it further If you do nothing the job remains in the Spool area and the file remains on the server disk Perhaps this is a routine job and does not call for special handling You right click the job and choose Print You notice the RIP stat...

Page 68: ...ping you right click Process Next Using the copier If you have a copier job that has priority over the spooled incoming print jobs you can temporarily close the GA 1040 connection to the copier and then reopen it when you have finished copying When there are no active printing jobs competing for the copier engine no white job lines in the Spool or RIP area you do not need to suspend printing to ma...

Page 69: ...n the Job Log NOTE Canceled jobs may be partially printed and may include incorrectly printed pages or pages that are completely blank Viewing and overriding print settings When logged in as Operator or Administrator at the Command WorkStation you can view override user job settings of and print any job in the Queues window and view job settings for jobs in the Archive and FreeForm windows Using t...

Page 70: ... override settings for all jobs listed in the Properties dialog box right click the name of the print option the row header at the left of the dialog box and choose the override setting from the pop up list The Properties dialog box displays all the job settings encoded by the PostScript or PCL printer driver that can be decoded by the GA 1040 If you as operator have not changed anything these are...

Page 71: ... specified by the user The Properties dialog box does display all the remaining user settings including user Instructions and Notes fields Instructions fields are intended to be viewed and annotated by the operator but their contents are associated with the job and are deleted when the job is deleted after printing Notes fields can be viewed but cannot be changed by the operator their contents are...

Page 72: ...variety of file types as well as fonts from the Command WorkStation to the GA 1040 These files and fonts can be located anywhere on the network or on an external device connected to the Command WorkStation computer You browse to locate the files and fonts select them and add them to a list of items to be downloaded You can also specify a limited number of print option settings for files that you d...

Page 73: ...can leave this at the default All Known Formats or choose All Files All Known Formats lists all files in supported formats All Files lists all files 3 In the Connection Type pop up menu choose the queue to which you will download the files The options available in this menu depend on the print connections currently enabled in Setup The potential choices are Direct Connection Hold Queue or Print Qu...

Page 74: ... multiple non sequential files If you change your mind about a file select the filename in the Files to be downloaded list and click Remove 6 To change the attributes of a file select it from the Files to be Downloaded list and click Options The Options dialog box for PostScript and EPS files is different from that for PDF files as explained below 7 Specify the following information in the dialog ...

Page 75: ...s you can print the file directly from the application in which you created it Page Range PDF files only Specify the page range you want to print 8 Click Download To cancel downloading click Cancel or press the Esc key Managing server fonts The GA 1040 includes a number of built in printer fonts You can download additional fonts to the GA 1040 using the Manage Fonts command see below or the Downlo...

Page 76: ...lect it in the font list and click Delete Shift click or Ctrl click to select multiple fonts NOTE The printer fonts included with the GA 1040 built in fonts are locked These fonts appear with a lock icon next to the name and cannot be deleted 4 To refresh the font list display click Update 5 To print the font list click Print Click to update the font list display Click to delete font s Locked font...

Page 77: ...age 1 24 TO VIEW AND MANAGE JOBS ON MORE THAN ONE SERVER 1 Configure the connection to the first server and log in See Getting Started for information on configuring the connection to the server 2 Click a blank server selection tab 3 Configure the connection to the next server and log in The Command WorkStation windows show the job lists for the additional server You can route and manage the jobs ...

Page 78: ...to the originating server are connected to the Command WorkStation multiple Send to Nickname_Devicename commands appear in the Job menu Jobs are transferred from the source server to the same area on the target server from Spool to Spool from RIP to RIP NOTE You cannot perform any other Command WorkStation functions while files are being transferred between servers 4 After verifying that the jobs ...

Page 79: ... internally 4 To archive the job s externally to the Command WorkStation hard disk or to a device on the network click Add 5 Browse to the device and folder to which you want to archive the job s and click OK The Archive Options dialog box shows external devices as available archive volumes Click to add a device ...

Page 80: ...w and selecting Move To or Copy To NOTE You cannot select the GA 1040 as the archive destination Additionally if you archived the job by selecting Server Internal you cannot copy or move the archived job Importing archived jobs from external media You can use the Import command to find and retrieve jobs previously archived to external devices This command can be used to retrieve files archived fro...

Page 81: ...y and for Job Log page size page 1 33 If you want to view the Job Log in a specific application you can specify one in the Preferences dialog box see page 2 4 then select View in Helper App from the Window menu After displaying the Job Log you can print it use the Print Pages dialog box or choose Print from the Window menu or export it to a tab delimited text file choose Export from the Window men...

Page 82: ... and total number of pages Information in the Notes 1 and Notes 2 fields is displayed if users entered this information when they printed NOTE If a PostScript or raster job was saved with DocBuilder or DocBuilder Pro with a new name and then printed it appears in the Job Log with the name of the original job not the new name you specified for the edited job The text in the Status column provides i...

Page 83: ...e 2 15 Clear Job Log Clears the Job Log only Reboot Causes the GA 1040 to be rebooted just as if you had selected Restart Server from the Shut Down menu on the Control Panel see the Configuration Guide Clear Clears all jobs in all server queues as well as all jobs archived on the GA 1040 hard disk the index of archived jobs in the Archive window all FreeForm masters the index of FreeForm masters i...

Page 84: ......

Page 85: ...dures that follow it is assumed that DocBuilder Pro is installed If DocBuilder Pro is not installed PDF files cannot be edited or merged using the thumbnail windows Job Management with DocBuilder The DocBuilder tool can be used in the following ways In the Thumbnail A window you can see thumbnails of the currently RIPping job as it is processed or of any PostScript PDF or raster data job see Previ...

Page 86: ... see page 3 15 Thumbnail B Open a selected job in the Thumbnail B window for viewing a full screen preview of the job or for copying pages into a job in the Thumbnail A window In order to merge jobs they must be of the same data type for example PostScript jobs cannot be merged with raster jobs Held jobs in the Spool area are automatically converted to PDF files but are not saved as PDF files unle...

Page 87: ...d as illustrated below In the figure boxes indicate types of job icons you would see in the Queues window Jobs that are held are shown with a yellow icon in a yellow row just beneath the Spool or RIP status bar Jobs that are held must be activated with a command in order to print Active jobs are shown in white with white icons new jobs are added above older jobs Spooled and held RIPped and held Pr...

Page 88: ... reference to the original job with the same name n a The Duplicate command is not available for raster jobs Rename Rename the job PostScript or PDF file with or without raster Unaffected but associated with the new name Hold Hold the job in the current place except for a job in the Print area which is moved to the Spool or RIP area depending on whether it still has raster data associated with it ...

Page 89: ...he Thumbnail A window where you can view a full screen preview of the job edit the job or merge it with like data from other jobs In order to merge jobs they must be of the same data type for example PostScript jobs cannot be merged with raster jobs Changed if job is edited unaffected if job is only viewed Thumbnail B Open a selected job in the Thumbnail B window for viewing a full screen preview ...

Page 90: ... 0 application included with the DocBuilder Pro option for Command WorkStation software is required to view the job When you select a job in the Spool area and choose Thumbnail A or Thumbnail B the Acrobat Distiller application launches and the conversion process occurs automatically Wait a few moments as the Command WorkStation prepares and then opens the job for viewing If DocBuilder Pro is not ...

Page 91: ... or PDF data you can discard newly generated Thumbnail data However in most cases thumbnail data is worth keeping as it takes up very little space and saves you the time required to generate it again Previewing the currently rasterizing job To see the progress of jobs as they are RIPped you can leave the Thumbnail A window open in RIP preview mode TO VIEW THUMBNAILS OF THE CURRENTLY RIPPING FILE 1...

Page 92: ...mbnail A or Thumbnail B from the Job menu If you choose Thumbnail A make sure the raster data preview icon at the left side of the window is selected If you choose a job in the Spool area the Adobe Acrobat 4 0 application automatically opens in the background enabling you to view the job in the thumbnail window NOTE Wait until all pages have been displayed before opening another PostScript PDF or ...

Page 93: ...epending on which area the job comes from Spool or RIP you can use the icons in the full screen preview to display adjacent pages rotate the page pan around the page zoom or close the preview The first illustration below shows a job from the Spool area the second illustration shows a job from the RIP area Click to view adjacent pages Click to close the full screen preview If scroll bar appears cli...

Page 94: ...e document The Thumbnail B window can also display thumbnails of a PostScript PDF or raster job and the document displayed in Thumbnail B can be used as a source for editing the document shown in Thumbnail A In order to copy or merge jobs using the Thumbnail A and B windows they must be jobs of the same data type In other words both jobs must be PostScript PDF or raster jobs you cannot merge a Pos...

Page 95: ...you select one or more pages in the Thumbnail A window the commands in the Page menu give you additional editing possibilities Most of the Page menu commands are also made available by right clicking pages in Thumbnail A Multiple undos of Page menu commands are possible Thumbnail B source Thumbnail A target Click here to close the Thumbnail B window Click here to close the Thumbnail A window Click...

Page 96: ... the file in Thumbnail A override the print option settings in Thumbnail B However the settings of files in Thumbnail B that require re RIPping are not overridden they are unchanged and remain with the pages that have been merged in Thumbnail A Printing merged jobs with settings that require re RIPping in order to be changed results in unexpected behavior If you want print option settings that req...

Page 97: ...om buttons along the left side of the Thumbnail A window see illustrations below To scroll through the pages in Thumbnail A you can drag the slider bar at the bottom of the screen click in the empty area to the left or right of the slider bar or click the arrows The illustration below shows a job from the Spool area Delete Deletes the currently selected page s Duplicate Duplicates the currently se...

Page 98: ... screen previews on page 3 9 3 To move pages within Thumbnail A left click to select the page s and hold down the mouse button as you drag the selected page s to the new location Shift click to select multiple sequential pages Ctrl click to select multiple non sequential pages If you move the page s on top of existing page s the page s will be overwritten Click to open a full screen preview of the...

Page 99: ...ew name and click OK Depending on the location of the original files the new file is now located in the Spool or the RIP area ready to print If you saved the edited file with a new name the original source file remains held in the Spool or the RIP area Replace single page Replace multiple pages Move single page Move multiple pages between two pages between two pages Move single page Move multiple ...

Page 100: ...in Thumbnail A NOTE To merge documents the page sizes of the source document and the target document must be the same the jobs must both be located in the same area Spool or RIP and the jobs must be of like data type for example both are PostScript PDF or raster jobs 3 In the Thumbnail B window left click to select the page s and hold down the mouse button as you drag the selected page s to the ne...

Page 101: ...ew position between pages before the first page or after the last page in Thumbnail A Replace single page Replace multiple pages Move single page Move multiple pages between two pages between two pages Move single page Move multiple pages before first page before first page Move single page Move multiple pages after last page after last page ...

Page 102: ...Multiple undos are available use Ctrl Z or the Undo command to undo all the way back to your first edit There is no Redo function NOTE Make sure to save the merged job before deleting any of the jobs you used to create the merged job In addition to print option settings that do not require re RIPping the pages of Thumbnail B that are moved into Thumbnail A adopt the document and user name some of ...

Page 103: ...ges to a Thumbnail A job not all users may see the results of those changes If you are unable to view changes in a job or if selecting a thumbnail window results in a message indicating zero pages then close and relaunch the Command WorkStation Fiery WebSpooler or Fiery Spooler Duplex Alignment command The Duplex Alignment command is used to manage the layout of a job when printing Duplex pages Du...

Page 104: ...ialog box in the Shift value area The horizontal and vertical coordinates are each selected from a separate pull down menu 5 Click Apply NOTE Duplex Alignment is specific to a page size and the paper source For example if you perform a Duplex Alignment for the Letter size paper in Upper Tray and then print a job from Lower Tray on Letter size paper the Duplex Alignment will not apply You must perf...

Page 105: ...rinting and binding NOTE The Imposition main window is referred to as the main window in Chapters 4 and 5 TO OPEN A JOB IN THE MAIN WINDOW Send the job you want to impose to the Hold queue or move it to the Spool area using the Command WorkStation For more information on sending jobs to the GA 1040 see the Printing Guide For information on using the Command WorkStation see Chapter 1 Select any hel...

Page 106: ... a page imaging process is invoked that generates a PDF version of the job on which DocBuilder Pro will perform imposition A status window is displayed while the job is imaged for the main window When it opens the main window displays the job No layout will be applied unless the job has been previously imposed Templates for common layouts are provided and can be invoked from the main window as des...

Page 107: ...asterizing the job Pages appear as a printer s spread that is they appear in the order in which they are printed as an imposed job In contrast a reader s spread shows pages in the order they are intended to be read You re already familiar with such a view the Thumbnail A and Thumbnail B windows image jobs as reader s spreads Reader s spread Printer s spread ...

Page 108: ...ls of actual content to Layout mode page numbers only Zoom in and out Drag the job preview around to make a particular page or sheet visible Go directly to a particular page or sheet The Zoom tool Pan tool Preview mode and Layout mode buttons are located in the top right corner of the window Pan tool Zoom tool View menu Sheet menu Layout mode Preview mode ...

Page 109: ... view You can use the view mode buttons to switch between a page view and a layout view of the job Preview mode approximates the appearance of the final printed output very closely for this reason it is sometimes called a WYSIWYG what you see is what you get preview Layout mode displays numbered generic pages that allow you to determine the location of source document pages in the imposed job and ...

Page 110: ...te that it increases the magnification of page views Each time you click the current magnification doubles up to a maximum of 800 3 Hold the Ctrl key and click with the left mouse button to zoom out Each time you click the current magnification halves down to a minimum of 12 4 Click the right mouse button with either the Zoom tool or the Pan tool to see the Zoom pop up menu Select Zoom In or Zoom ...

Page 111: ... zoom percents you can specify a custom zoom value TO SPECIFY A CUSTOM ZOOM VALUE 1 Click on the View menu at the bottom of the main window The current zoom value is displayed in the box 2 Specify a new zoom value You can type a new zoom value in the box or you can select a value from the pop up menu 3 Click OK or press Enter to confirm the new value The window reflects the change immediately View...

Page 112: ...ber of the sheet to display 3 Click OK or press Enter to go to the specified sheet Using templates A saved group of imposition settings is known as a template A template saves all current imposition settings except custom rotations of individual pages on a finished sheet and the page size setting You can apply any template to any job making it easy to apply imposition settings quickly and efficien...

Page 113: ...ot be saved 1 Click the Save template icon to the right of the Template pop up menu 2 In the dialog box that appears type a name for the template and click OK or press Enter For more information on creating templates see Managing templates on page 5 14 Saving your work To close the Imposition window click the close box in the top right corner TO SAVE THE IMPOSED JOB 1 Click the close box in the to...

Page 114: ...s with a new extension dbp as the suggested name If you mistakenly close the main window when you intend to keep working click Cancel in the Save As dialog box The original PostScript or PDF file remains intact even after the converted file has been edited and saved in the Imposition window For more information on how files are saved to the GA 1040 see File management on page 5 16 ...

Page 115: ... job immediately but are not saved permanently until you save the job itself You can specify imposition settings using controls in the settings panel on the left side of the main window The settings panel appears the first time you open the main window but can also be hidden to make additional space for viewing an imposed job To display or hide the settings panel click the triangle next to the Tem...

Page 116: ...t will be printed on one or both sides Because these settings affect virtually every other aspect of the imposition process you should specify sheet settings immediately after opening a job in the main window If necessary you can change the settings later the job is revised accordingly In general experimentation with job settings does not cause permanent changes or potentially loss of original job...

Page 117: ...hick paper in the job properties For more information on changing the job properties from the Command WorkStation see Chapter 1 Orientation Choose an item from this menu to specify the orientation of the sheet displayed in the main window This setting does not affect the orientation of pages on the sheet which is determined by the layout you specify or the way in which sheets are fed through the c...

Page 118: ...r job Rows Click the Rows up and down arrows to specify the number of rows in a layout Or you can specify the number of rows in the layout by typing a value in the Rows box Changes to the Rows value are reflected immediately in the main window whether you are in layout or preview mode The Rows value interacts with the Columns and Scaling values When you choose a value that causes content to extend...

Page 119: ...arks displayed For example ganged up business cards do not require fold marks while a 4 x4 book layout requires them To specify which marks are shown choose options in the dialog box that the Define button displays In this dialog box you can enable or disable trim marks fold marks and the individual elements of the job label The job label stores descriptive text used for the job name sheet informa...

Page 120: ...ge or shrink the page by a specified amount The values in this area interact with each other based on the specified layout and page size When you specify one or more values in the Scaling area DocBuilder Pro calculates the others for you For example when you specify a scaling percentage DocBuilder Pro calculates the resulting finished page size and supplies appropriate height and width values in t...

Page 121: ...roblems obvious content truncates at the edge of the preview sheet just as it would on a printed sheet Finished Height and Width The Finished Height and Width fields display current values for the height and width of a scaled page When you enter values for the height or width of the scaled page DocBuilder Pro supplies calculated values for scaling finished height and finished width Scale to fit Wh...

Page 122: ...or stapled on a common centered fold line Saddle stitched binding is the most common type of binding and is usually used for booklets Perfect signatures folded and stacked for binding The spine edges are trimmed and glued together Nested Saddle combination of saddle and perfect binding methods As with saddle stitch pages are grouped together and stapled or stitched across a common center fold The ...

Page 123: ... than having DocBuilder Pro impose them in the order required by a particular binding method A collate and cut layout reorders pages in a manner that causes them to fall into easily collated stacks when the sheets in the job are cut into individual pages The use of such a layout may allow multiple small jobs to be printed on a single sheet thus gang printing is commonly used as a means of saving p...

Page 124: ...ample when printing business cards you would print multiple copies of the same image to fill a larger sheet Conversely Gang Up Unique is often more appropriate for printing single copies of a document This option does not fully collate itself collate and cut is necessary but it optimizes the sheet size while limiting the run to a single copy To disable gang printing and enable binding settings sel...

Page 125: ...nt to reorder individual pages manually you can do so in the main window Use the following procedure to assign a different page to a particular location in the layout TO REORDER PAGES 1 Verify that layout mode is currently selected 2 Select the location s current page number type the new value and press Enter or press Tab to move to the next page in the layout You can add a blank cover page by typ...

Page 126: ...is performed in 90 clockwise increments when you click the Rotate icon in the upper right corner of a page To rotate a single page click the rotate icon on that page To rotate all pages in the job press the Shift and Ctrl keys and click the rotate icon on any page Rotate icon 16 1 2 15 Sheet 1 front side Sheet 1 back side 14 3 4 13 Sheet 2 front side Sheet 2 back side 12 5 6 11 10 7 8 9 ...

Page 127: ...e icon on Page 1 Pages 2 3 and 4 would also rotate because they are in the same location on the front and back sides of the sheet Setting gutter sizes DocBuilder Pro defines the locations of gutters for you according to the layout and sheet size governing the imposition of the job In layout view you can specify the size of a gutter by entering a value in its gutter size field and pressing Enter Fo...

Page 128: ... Chapter 2 TO SAVE IMPOSITION SETTINGS AS A TEMPLATE 1 Click the Save template icon the disk icon on the right side of the Template pop up menu 2 In the Save Template As dialog box type a name for the settings file When saving a template choose a descriptive name such as 4 Up Nested Saddle rather than something that won t provide as much information like My Settings If you plan to use the same tem...

Page 129: ...Pro and Acrobat technology DocBuilder Pro makes use of Adobe Acrobat technology to perform certain page level operations Keep the following tips in mind to ensure success Avoid the Touch Up tool in Acrobat If you need to use this tool on a source document do so before opening the document in DocBuilder Pro Do not use this tool on PDF files created by DocBuilder Pro such as saved impositions RIPped...

Page 130: ...er than the source documents they represent To maximize efficient use of server disk space it is strongly recommended that spool files not be kept on the GA 1040 any longer than necessary The Command WorkStation operator must delete spool files explicitly When you open a spool file in DocBuilder Pro a temporary file in PDF format is created on the Command WorkStation hard disk A PDF spool file is ...

Page 131: ... dialog box is that of the original spool file with a new extension dbp The original PostScript or PDF remains intact even after the converted file has been edited and saved in the Imposition window If imposition data has changed the data is written back to the GA 1040 and associated with the new PDF Maintaining associated imposition data separately from the job s PDF data allows DocBuilder Pro to...

Page 132: ......

Page 133: ...ugh the TopAccess home page This interface allows remote users to view controller and copier functions and manipulate jobs TopAccess can be used on Windows 95 98 NT 4 0 Me 2000 client computers with certain Internet browsers that support the Java language For specific information on the browsers supported with TopAccess see Getting Started Access privileges Both WebTools and TopAccess allow the si...

Page 134: ...ies are accessed directly from the TopAccess home page Utility Summary For more information Copier Configurations Allows you to view settings for the copier See your copier documentation Print Jobs Allows you to view information about the print jobs See Print Jobs on page 6 4 Printer Information Allows you to view information about the printer See your copier documentation Counter Allows you to vi...

Page 135: ...net browser application 2 Enter the IP address or the DNS name of the GA 1040 Check with the operator or administrator for this information The TopAccess screen is displayed The following sections describe the Print Job Counter and Options features of TopAccess ...

Page 136: ...creens press the Print Jobs button The Job Status tab is displayed Job Status tab All jobs except private jobs and stored jobs appear in the window on the Job Status tab Details about each job including its user name document name date and time paper size number of pages and copies are listed To delete a currently processing job that has been sent to the copier click the job s Delete button ...

Page 137: ...rinting Guide Stored Job tab Jobs that use the Stored Job printer driver print option that have been sent to the Direct or Print connections appear in the window on the Stored Job tab Details about each job including its user name document name date and time paper size number of pages and copies are listed To delete a stored job that has been sent to the copier click the job s Delete button To pri...

Page 138: ... entered in the printer driver when a department member sends a job to the GA 1040 The TopAccess Counter feature can then be used to view the total number of jobs that have been sent to the GA 1040 that use an assigned department code TO VIEW THE COUNTER SCREEN 1 Launch your Internet browser application 2 Enter the IP address or the DNS name of the GA 1040 Check with the operator or administrator ...

Page 139: ...1040 Check with the operator or administrator for this information 3 In the TopAccess window that appears click the Options button WebTool Summary For more information WebSpooler Allows you to view manipulate reorder reprint and delete jobs currently spooling processing or printing on the GA 1040 hard disk drive if one is installed It also allows you to view print and delete the Job Log See Fiery ...

Page 140: ...n dialog box appears enter the Administrator or Operator password A password is not required if you are logging in as a Guest 5 Click one of the buttons at the left to select one of the WebTools Move the cursor over the buttons to display information about the selections ...

Page 141: ...mmand WorkStation for information about icons and commands that is common to both tools Tracking and managing jobs with Fiery WebSpooler You can use Fiery WebSpooler to perform the following functions from your workstation Override current job option settings Delete jobs and cancel processing Duplicate or rename jobs RIP a job and hold the raster data Hold jobs in the spooled area or the RIPped ar...

Page 142: ...EBSPOOLER WINDOW 1 From the GA 1040 home page window click WebSpooler For instructions on how to access the GA 1040 home page window see page 6 7 2 To log in as Administrator enter the Administrator password and click OK To log in as Operator enter the Operator password and click OK To log in as Guest click OK without entering any password The Fiery WebSpooler window appears in a new browser windo...

Page 143: ...olor for the yellow and white printer icons is the same Spooled jobs Jobs listed in the area below the Spool status bar are PostScript files stored on the GA 1040 disk These jobs were sent to either the Print queue white icons or the Hold queue yellow icons RIPped jobs Jobs listed in the area below the RIP status bar are ready to print They have already been rasterized RIPped or processed for prin...

Page 144: ...th Fiery WebSpooler you must contact the operator or look at the Command WorkStation display to check this Manipulating job options and job flow Using the commands in the Job menu you can alter the destinations priorities and other characteristics of jobs that appear in the Fiery WebSpooler window To understand the effect each of these commands has on a job you need to understand the way the GA 10...

Page 145: ...ld it in the RIP area Held in RIP area indefinitely Print Print the job in its turn RIP it first if it does not have raster data Keep the printed job in the Print area until the job limit is reached Temporarily held in RAM until memory is needed for another job Print and Hold Print the job in its turn RIP it first if it does not have raster data After printing hold the PostScript data and the rast...

Page 146: ...y Downloader you cannot override the Orientation print option Thumbnail A Open the selected held raster data job in the Thumbnail A window where you can view a full screen preview of the job edit the job or merge it with raster data from other jobs Changed if job is edited unaffected if job is only viewed Thumbnail B Open the selected raster data job not necessarily a held job in the Thumbnail B w...

Page 147: ...job as it is processed or of any raster data job From the Thumbnail A window you can open a full screen preview of a raster file Using the Thumbnail A and Thumbnail B windows together you can merge raster data from more than one file even if the files were printed from different applications on different computer platforms DocBuilder s merge features eliminate the limitations of particular softwar...

Page 148: ...om the Page menu Page icons and arrows do not appear when moving page s from Thumbnail B to Thumbnail A Instead a blue outline appears around a Thumbnail A page that is to be replaced and a blue bar appears adjacent to or between Thumbnail A page s to indicate where the Thumbnail B page s are to be inserted The full screen preview window has a status bar the Command WorkStation does not the X butt...

Page 149: ...PRINT AND DELETE SAVE THE JOB LOG 1 Choose Show Job Log from the Fiery WebSpooler Window menu 2 Click All or specify a date range 3 Click OK The Job Log appears in a new browser window NOTE The Delete button appears only if you logged in as Administrator Update Print Delete ...

Page 150: ...g from the File menu or click the Print button The information displayed in the Job Log window prints to the current GA 1040 When you print the Job Log totals are printed for all appropriate columns 6 If you logged in as Administrator you can choose Delete Job Log from the File menu or click the Delete button to clear the Job Log The system administrator can also print and clear the Job Log from t...

Page 151: ...ion or a large number of copies Until recently the only way around these limitations was to use traditional printing systems to impose your document that is to arrange its pages in the correct order and orientation for printing and a variety of binding styles You might have used a service bureau to access high volume high resolution printers Today Fiery technology teamed up with digital print engi...

Page 152: ...g on the sheet must differ from the normal book reading order You can demonstrate this for yourself using an ordinary sheet of paper MODELING AN EIGHT PAGE BOOKLET 1 Fold the paper in half horizontally Fold the top edge of the sheet down to meet the bottom edge 2 Fold the paper again vertically Fold the left edge of the sheet over to the right edge Now you have a miniature version of a signature 3...

Page 153: ...light the page orientation NOTE Printing on both sides of the sheet is called duplex printing printing on only one side of the sheet is called simplex printing Not all print engines support duplex printing and of those that do variations in implementation exist DocBuilder Pro supports duplex printing that corresponds to the print options of the output device When you unfold the signature the page ...

Page 154: ... predefined layouts for common impositions such as booklets and brochures You can also save your own custom layouts for easy reuse Printer s marks In addition to specifying the placement of pages on a sheet the layout also specifies how the finished sheet will be cut and folded For example the layout specifies whether the large finished sheet is folded and cut to create a booklet or simply folded ...

Page 155: ...ok are printed However if the total page count is not an even multiple of the number of pages in the layout one signature may be laid out to accommodate the discrepancy For example if your layout places eight pages on a sheet and the total page count in the book is 12 one of its signatures holds only four content pages with the rest of the space on the sheet blank If you don t want blank pages in ...

Page 156: ...ect binding methods by stacking two or more groups one on top of another on a common fold line and gluing them together this is called a nested saddle The binding method to be used affects the order in which pages are placed on the sheet for example the page ordering used to perfect bind a book must be different from that used to saddle stitch the same job Thus the layout must also specify the met...

Page 157: ...ion of the edge of each page relative to the others The result is that the edges of pages furthest from the saddle s innermost fold seem to move away from the edges of pages closest to the innermost fold As the number of pages in the saddle increases so does the amount of this shift which is known as shingling To counteract the effects of shingling illustrated in an exaggerated manner below the bi...

Page 158: ... any aspect of the imposed job that is affected by creep Gang up printing It s clear that a layout is essential to define the elements of complex print jobs such as booklets and books but it can also be useful for smaller jobs Consider for example how you might approach the task of printing business cards It is slow wasteful and expensive to print a single business card per sheet when you can repe...

Page 159: ...f you need to print business cards for several different clients you could perform a Gang Up Repeat printing job for each but you might still wind up wasting paper and time if the jobs don t fit easily into a simple multiple of sheets A more efficient approach is to print several jobs on a single sheet and then print that sheet as many times as required The technique of printing multiple jobs on t...

Page 160: ......

Page 161: ...rint one page per sheet The printer s marks show where to cut the paper so that the content extends to the edge of the paper The following settings are applied for this layout Bleeds Printer s Marks trim marks and job label only Scale to Fit Gang Up Unique There are no page number restrictions for the 1 Up Full Bleed layout Appendix B Templates ...

Page 162: ...for a perfect bound book Each sheet is folded once and stacked on top of one another For more information on binding methods see page A 6 The following settings are applied for this layout Duplex Bleeds Printer s Marks fold marks trim marks and job label Scale to Fit Binding Perfect ...

Page 163: ... blank pages will be added if necessary Pages will be ordered in groups of four so that when folded each sheet will have four sequential pages For example 4 pages 8 pages NOTE The Creep Adjustment option has no effect on this template 4 1 2 3 Sheet 1 front side Sheet 1 back side 4 1 2 3 Sheet 1 front side Sheet 1 back side 8 5 6 7 Sheet 2 front side Sheet 2 back side ...

Page 164: ...for a saddle bound book All of the sheets are folded together one inside the other For more information on binding methods see page A 6 The following settings are applied for this layout Duplex Bleeds Printer s Marks fold marks trim marks and job label Scale to Fit Binding Saddle ...

Page 165: ...ber of pages Additional blank pages will be added if necessary Pages will be ordered so that when sheets are folded and stitched together into signatures the pages will be sequential For example 4 pages 8 pages 4 1 2 3 Sheet 1 front side Sheet 1 back side 8 1 2 7 Sheet 1 front side Sheet 1 back side 6 3 4 5 Sheet 2 front side Sheet 2 back side ...

Page 166: ... into three sections Although the three sections are the same width the space between each section varies so that the leftmost panel can be folded over the other two panels The following settings are applied for this layout Duplex Printer s Marks trim marks and job label only Scale to Fit Gang Up Unique ...

Page 167: ...only with jobs that have six pages If the job contains more or less than six pages an error message will appear The pages will be ordered as follows The 3 Up Trifold Brochure is usually folded as illustrated below 3 6 2 4 Sheet 1 front side Sheet 1 back side 1 5 ...

Page 168: ...sed most often in the case of a four panel brochure The finished brochure unfolds to double and then four times the original size The following settings are applied for this layout Duplex Printer s Marks trim marks and job label only Scale to Fit Gang Up Unique ...

Page 169: ... with jobs that have eight pages If the job contains more or less than eight pages an error message will appear The pages will be ordered as follows The 4 Up Gate Fold is usually folded as illustrated below 2 3 6 7 Sheet 1 front side Sheet 1 back side 4 8 5 1 ...

Page 170: ...finished booklet will have all pages in the correct order and rotation The following settings are applied for this layout Duplex Bleeds Printer s Marks fold marks trim marks and job label Scale to Fit Binding Saddle The 4 Up Head to Head layout should be used with jobs that have multiples of eight pages but it can be used with jobs that have any number of pages Additional blank pages will be added...

Page 171: ...this layout requires two folds the template applies a fold mark on the spine fold only For example 8 pages 16 pages The 4 Up Head to Head is usually folded as illustrated below 8 1 2 7 Sheet 1 front side Sheet 1 back side 6 3 4 5 16 1 2 15 Sheet 1 front side Sheet 1 back side 14 3 4 13 Sheet 2 front side Sheet 2 back side 12 5 6 11 10 7 8 9 ...

Page 172: ...lows many panels to be folded on top of one another without stressing the folded spine The most common example is a road map The following settings are applied for this layout Duplex Printer s Marks trim marks and job label only Scale to Fit Gang Up Unique ...

Page 173: ...y with jobs that have eight pages If the job contains more or less than eight pages an error message will appear The pages will be ordered as follows The 4 Up Z Fold is usually folded as illustrated below 2 3 6 7 Sheet 1 front side Sheet 1 back side 4 8 5 1 ...

Page 174: ......

Page 175: ...ve the overall performance of your system Schedule the printing workload by checking job ticket information before printing Print jobs with the same output and paper specifications together to minimize paper changes Also print routine jobs while you prepare to print jobs with special instructions or special media Reduce unnecessary server connections at the Command WorkStation If you use a second ...

Page 176: ... and with the Command WorkStation selected click End Task At the GA 1040 disconnect and reconnect the network cable and try printing a Test Page or Setting List If that fails reboot the server If the GA 1040 Control Panel does not respond to the Menu button press the Reset button turn off the server and turn it on again When it reaches Idle restart the Command WorkStation application Command WorkS...

Page 177: ...r of the job and the time the job was sent Time stamp and user information on the cover page of a reprinted job are not meaningful The job settings are not carried out as you expected If the user printed from Mac OS there may be two conflicting print settings You can check the job properties by double clicking the job See the Printing Guide for a table of job properties and conflicting properties ...

Page 178: ...to find the copier from their workstations the network administrator may need to troubleshoot their network connections and check settings on the servers they use for printing If settings have changed it may be necessary to reconfigure the GA 1040 For example if print servers or print queues on a Novell server are renamed or deleted or if accounts or permissions are changed the GA 1040 administrat...

Page 179: ...le to connect to the GA 1040 and you cannot print the Test Page check the GA 1040 s touch panel display Setup error messages For information on Setup error messages see the Configuration Guide If this happens Try this The display is completely blank Check the copier s Standby function If the copier is in Standby mode press the Standby key to see any messages on the display The copier is not in Sta...

Page 180: ......

Page 181: ...s 5 3 binding offset 5 15 binding options 5 8 binding styles nested saddle 5 8 A 6 perfect 5 8 A 6 saddle stitch 5 8 A 6 bleeds 5 6 A 4 C Cancel Printing command from Command WorkStation 1 10 2 9 from Fiery WebSpooler 7 5 Cancel RIPping command from Command WorkStation 1 10 2 9 from Fiery WebSpooler 7 5 Clear command archived jobs 1 25 C 4 FreeForm master jobs 1 29 from Command WorkStation 1 11 2 ...

Page 182: ...command 3 13 3 14 Duplicate command 3 13 3 14 editing options 3 13 3 14 Imposition feature 4 1 Insert blank page command 3 13 merging two files 3 16 Open Preview command 3 14 Preview command 3 13 DocBuilder differences 7 8 Download command 1 10 1 24 2 15 3 5 downloading files and fonts 2 12 duplexing 5 3 Duplex menu 5 3 duplex printing defined A 3 enabling 5 3 print engines A 3 print options A 3 D...

Page 183: ...reating A 2 defined A 4 Fold Marks 5 5 A 4 fonts Adobe Type 1 2 12 deleting 2 16 displaying font list 2 16 downloading 2 12 2 16 C 4 managing 2 15 to 2 16 printer fonts on server 2 16 printing font list 2 6 2 16 TrueType 2 12 Font Substitution Table 2 12 FreeForm master jobs filtering 1 29 master jobs job commands for 1 30 overview 1 27 printing variable data documents 2 11 FreeForm window changin...

Page 184: ...djustment menu 5 3 Finishing area 5 8 layout mode 4 5 navigating 4 4 opening 4 1 Orientation menu 5 3 preview mode 4 5 Printer s Marks 5 5 printer s spread 4 3 reader s spread 4 3 reordering pages 5 11 rows menu 5 4 Scaling area 5 6 settings panel displaying 5 1 size menu 5 2 template menu 4 9 view modes 4 5 4 6 inches abbreviation and keyboard shortcut 5 2 Insert blank page command 3 13 Installer...

Page 185: ...ed 5 4 A 4 maximum number of pages 5 4 rows in 5 4 layout mode characteristics 4 6 clipping indicators 5 7 defined 4 5 reordering pages 5 11 Zoom tool disabled 4 6 layout view 5 11 load balancing between servers 2 17 logging in to a server 1 5 Log in out slider 1 5 1 13 C 2 Log out command 1 11 2 23 M Manage Fonts command 1 11 2 15 2 23 margins 5 13 A 4 masters for variable data jobs 1 27 memory i...

Page 186: ...ing print jobs 3 8 preview mode characteristics 4 6 clipping icon 5 7 defined 4 5 Print and Hold command 1 9 1 23 3 4 7 5 Print area 1 21 Print command 1 9 1 11 1 23 3 4 7 5 Printed queue 1 3 1 21 7 3 print engines and duplex printing A 3 printer job icon 1 19 Printer Control Language PCL xv printer fonts see fonts printer settings overriding 1 9 1 10 3 2 printer s marks bleeds A 4 date 5 5 defini...

Page 187: ...mode 5 11 Repeat option 5 9 restricting access to server xvii Revert to Default Settings command 1 11 right mouse button commands 1 22 to 1 24 RIP defined xv RIP and Hold command 1 9 1 23 3 4 7 5 RIP area 1 20 RIPped jobs 1 2 7 3 RIPping 1 15 rotating pages 5 12 rows clipping of content area 5 4 selecting number in layout 5 4 Rows menu 5 4 S saddle defined 5 8 A 6 groups in 5 8 saddle stitch bindi...

Page 188: ...ooler 7 4 icons 1 19 in Queues window 1 2 spool file managing 5 16 PDF format 5 16 PostScript format 5 16 size of 5 16 status bars animation 1 16 in Queues window 1 2 1 16 Print 7 3 RIP 7 3 Spool 7 3 step and repeat printing 5 9 Stored Job viewing from TopAccess 6 5 switching servers 1 12 2 17 system information 1 12 system performance C 1 T template applying 4 9 creating 4 9 defined 4 8 deleting ...

Page 189: ...ndo in editing thumbnail views 3 11 3 18 Undo command 1 10 3 2 Unique option 5 10 Use Master option 2 11 V variable data printing 1 27 2 11 View in Helper App command 1 11 View menu 4 5 4 7 view modes compared 4 6 layout 4 5 preview 4 5 Volume column in Archive window 1 26 W warning Disk full C 1 WebDownloader WebTool see Fiery WebTools WebLink WebTool see Fiery WebTools Window menu commands 1 11 ...

Page 190: ...Copyright 2001 Electronics For Imaging ALL RIGHTS RESERVED IN A 335 1 1 KANDA NISHIKI CHO CHIYODA KU TOKYO 101 8442 JAPAN ...

Reviews: