background image

2

Introduction

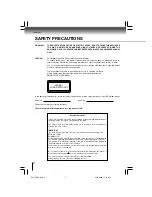
SAFETY PRECAUTIONS

In the spaces provided below, record the Model and Serial No. located on the rear panel of your DVD video player.

Model No.

Serial No.

Retain this information for future reference.

The following information applies only to the model for U.K.

WARNING:

TO REDUCE THE RISK OF FIRE OR ELECTRIC SHOCK, DO NOT EXPOSE THIS APPLIANCE
TO RAIN OR MOISTURE. DANGEROUS HIGH VOLTAGES ARE PRESENT INSIDE THE
ENCLOSURE. DO NOT OPEN THE CABINET. REFER SERVICING TO QUALIFIED PERSONNEL
ONLY.

CAUTION:

This Digital Video Disc Player employs a Laser System.
To ensure proper use of this product, please read this owner’s manual carefully and retain for
future reference. Should the unit require maintenance, contact an authorized service location.

Use of controls or adjustments or performance of procedures other than those specified herein
may result in hazardous radiation exposure.

To prevent direct exposure to laser beam, do not try to open the enclosure.
Visible and invisible laser radiation when open and interlocks defeated.
DO NOT STARE INTO BEAM.

CLASS 1

LASER PRODUCT

General Information

If the socket outlets in your home are not suitable for the plug supplied with this unit,
the plug must be cut off and an appropriate one fitted.

The plug severed from this mains lead must be destroyed as it is hazardous if
inserted into a live socket.

IMPORTANT

The wires in this mains lead are coloured accordance with the following code:
BLUE: NEUTRAL
BROWN: LIVE
As the colours of the wires in the mains lead of this unit may not correspond with
the coloured markings identifying the terminals in your plug, proceed as follows:
The wire that is coloured blue must be connected to the terminal in the plug which
is marked with the letter N or coloured black.
The wire that is coloured brown must be connected to the terminal which is marked
with the Letter L or coloured red.

Do not connect either wire to the earth terminal which is marked by the letter E or
by the safety earth symbol       or coloured green or green-and-yellow.

Use a 5A fuse which is approved by ASTA or BSI to BS1362.
Always replace the fuse cover after changing the fuse.

E-2-15 ESE-R.pmd

3/10/2006, 11:19 AM

2

Summary of Contents for E-2-15 ESE-R

Page 1: ...er radiation when open and interlocks defeated DO NOT STARE INTO BEAM CLASS 1 LASER PRODUCT General Information If the socket outlets in your home are not suitable for the plug supplied with this unit the plug must be cut off and an appropriate one fitted The plug severed from this mains lead must be destroyed as it is hazardous if inserted into a live socket IMPORTANT The wires in this mains lead...

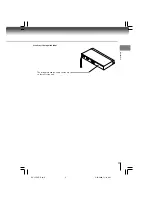
Page 2: ...3 Introduction Location of the required label The rating plate and the safety caution are on the rear of the unit E 2 15 ESE R pmd 3 10 2006 11 19 AM 3 ...

Page 3: ... Do not restrict the air flow of the unit by placing it in a place with poor air flow by covering it with a cloth or by placing it on carpeting 1 Read these instructions 2 Keep these instructions 3 Heed all warnings 4 Follow all instructions 5 Do not use this apparatus near water 6 Clean only with dry cloth E 2 15 ESE R pmd 3 10 2006 11 19 AM 4 ...

Page 4: ... use attachments accessories specified by the manufacturer 12 Unplug this apparatus during lightning storms or when unused for long periods of time 13 Refer all servicing to qualified service personnel Servicing is required when the apparatus has been damaged in any way such as power supply cord or plug is damaged liquid has been spilled or objects have fallen into the apparatus the apparatus has ...

Page 5: ...ug from the wall outlet at once 20 The mains plug is used as the disconnect device the disconnect device shall remain readily operable at any time 14 When you use headphones keep the volume at a moderate level If you use the headphones continuously with high volume sound it may cause hearing damage 15 Do not overload wall outlets extension cords or integral convenience receptacles as this can resu...

Page 6: ...ng or splashing or objects filled with liquids such as vases to be placed on the equipment DON T place hot objects or naked flame sources such as lighted candles or nightlights on or close to equipment High temperatures can melt plastic and lead to fires DON T use makeshift stands and NEVER fix legs with wood screws to ensure complete safety always fit the manufacturer s approved stand or legs wit...

Page 7: ...uctions Inspection and Maintenance This DVD video player is a high technology precision device If the optical pick up lens and disc drive parts become dirty or worn down the picture quality may be reduced To avoid reduction in picture quality it is recommended that regular inspection and maintenance cleaning or parts replacement be performed every 1 000 hours of use For further details contact you...

Page 8: ... Chapter 1 Chapter 2 Chapter 3 Structure of disc contents Normally DVD video discs are divided into titles and the titles are sub divided into chapters VIDEO CDs and audio CDs are divided into tracks DVD video disc VIDEO CD audio CD Each title chapter or track is assigned a number which is called title number chapter number or track number respectively There may be discs that do not have these num...

Page 9: ... This owner s manual explains the basic instructions of this DVD video player Some DVD video discs are produced in a manner that allows specific or limited operation during playback As such the DVD video player may not respond to all operating commands This is not a defect in the DVD video player Refer to instruction notes of discs may appear on the TV screen during operation A means that the oper...

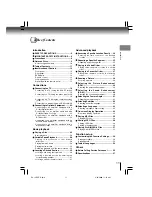
Page 10: ...Locating a Desired Section 30 Locating a title using the top menu 30 Locating a desired section by entering the corresponding number 31 Locating a specific chapter or track 31 Advanced playback Accessing a Specific Location Directly 34 Entering the time counter of the desired location 34 Repeating a Specific Segment 35 Repeating a specific segment 35 Playing in a Varied Order 36 Playing titles cha...

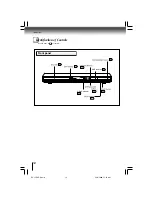
Page 11: ...12 Introduction Identification of Controls See the page in for details Front panel 26 27 26 15 26 13 20 HDMI indicator 26 31 SKIP buttons E 2 15 ESE R pmd 3 10 2006 11 19 AM 12 ...

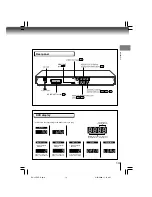
Page 12: ...us or messages etc Bad disc During playback Example During playback Example During playback Example Some discs may only display chaper numbers Some discs may only display track numbers Some discs may only display track numbers LOAD CLOSE 20 HDMI OUT jack 19 18 18 19 18 22 23 24 AV SCART socket AV No disc OPEN Audio CD VIDEO CD DVD video disc E 2 15 ESE R pmd 3 10 2006 11 19 AM 13 ...

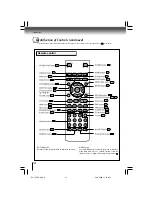
Page 13: ...control See the page in for details Remote control MENU button Use the MENU button to display the menu included on many DVD video discs To operate a menu follow the instructions in Locating a title using the top menu 30 RETURN button Return to menu display for VCD 2 0 discs with menu E 2 15 ESE R pmd 3 10 2006 11 19 AM 14 ...

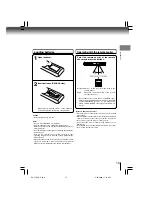
Page 14: ...nt Operating with the remote control Point the remote control at the remote sensor and press the buttons Distance About 7 m 23 feet from the front of the remote sensor Angle About 30 in each direction of the front of the remote sensor Do not expose the remote sensor of the DVD video player to a strong light source such as direct sunlight or other illumination If you do so you may not be able to op...

Reviews: