background image

Form No. 3442-428 Rev A

TITAN® Max Service Manual

Published: XX 2020

© 2020—The Toro® Company
8111 Lyndale Avenue South
Bloomington, MN 55420

Original Instructions (EN)

Contact us at www.Toro.com.

All Rights Reserved


Summary of Contents for TITAN

Page 1: ...rm No 3442 428 Rev A TITAN Max Service Manual Published XX 2020 2020 The Toro Company 8111 Lyndale Avenue South Bloomington MN 55420 Original Instructions EN Contact us at www Toro com All Rights Reserved ...

Page 2: ...Revision History Revision History Page 2 TITAN Max Service Manual 3442 428 Rev A ...

Page 3: ...he related topics covered in this manual We are hopeful that you will find this manual a valuable addition to your service shop If you have any questions or comments regarding this manual please contact us at the following address The Toro Company RLC SWS Customer Care Department 8111 Lyndale Avenue South Bloomington MN 55420 The Toro Company reserves the right to change product specifications or ...

Page 4: ...tener tightening sequence Component orientation that may not be obvious Critical Torque This icon is used to highlight an assembly torque requirement that is different than what is recommended in the Standard Torque Tables Fluid Specifications This icon is used to highlight fluid specifications and capacities that are less common and may not appear on the machine service decal or in the machine Op...

Page 5: ...e and Repairs 4 3 Chapter 5 Chassis 5 1 General Information 5 2 Service and Repairs 5 3 Chapter 6 Mower Deck 6 1 General Information 6 2 Service and Repairs 6 3 Chapter 7 Hydrostatic Drive System 7 1 General Information 7 2 Service and Repairs 7 3 Chapter 8 Electrical System 8 1 General Information 8 2 Service and Repairs 8 3 Appendix A A 1 Electrical Drawing Abbreviations A 2 Kohler Engine Electr...

Page 6: ...Preface Page 6 TITAN Max Service Manual 3442 428 Rev A ...

Page 7: ...Chapter 1 Safety Table of Contents Safety Instructions 1 2 Think Safety First 1 2 TITAN Max Service Manual Page 1 1 Safety 3442 428 Rev A ...

Page 8: ...ormally moving parts as if they were moving whenever the engine is running or has the potential to start Avoid burns Do not touch the engine muffler or other components which may be hot during operation while the unit is running or shortly after it has been running Avoid fires and explosions Use extreme care in handling fuel It is flammable and its vapors are explosive Extinguish all cigarettes ci...

Page 9: ...away from pin hole leaks or nozzles that eject hydraulic fluid under high pressure Do not use your hands to search for leaks Hydraulic fluid escaping under pressure can have sufficient force to penetrate under the skin and cause serious injury Seek medical attention right away if hydraulic fluid gets in the skin Personal Protective Equipment Tie back long hair and do not wear loose clothing or jew...

Page 10: ... the approximate number of square feet of fire it can extinguish Geometric symbol red square Class C fires involve electrical equipment such as appliances wiring circuit breakers and outlets Never use water to extinguish class C fires the risk of electrical shock is far too great Class C extinguishers do not have a numerical rating The C classification means the extinguishing agent is non conducti...

Page 11: ...ns and Maintenance Table of Contents Specifications 2 2 Torque Specifications 2 3 Equivalents and Conversions 2 8 U S to Metric Conversions 2 9 TITAN Max Service Manual Page 2 1 Specifications and Maintenance 3442 428 Rev A ...

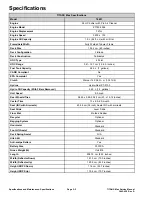
Page 12: ... Capacity With Filters Removed 4 45 L 1 2 gallons Unit Speed 9 0 mph Rear Wheels Tires 58 42 x 3 48 30 48 cm 23 x 12 12 inches Castor Tires 13 x 6 5 6 Smooth Seat INC with Armrests 60 96 cm 24 inch Seats INC with armrests Seat Slide Lever Slide Floor Mat Molded Rubber Recycler Optional Bagging System Optional Hourmeter Standard Foot Lift Assist Standard Deck Spring Assist N A Hitch Kit Standard An...

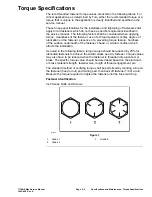
Page 13: ...h of the fastener s head or similar condition which affects the installation As noted in the following tables torque values should be reduced by 25 for lubricated fasteners to achieve the similar stress as a dry fastener Torque values may also have to be reduced when the fastener is threaded into aluminum or brass The specific torque value should be determined based on the aluminum or brass materi...

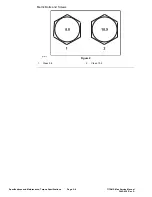
Page 14: ...Metric Bolts and Screws g272209 Figure 2 1 Class 8 8 2 Class 10 9 Specifications and Maintenance Torque Specifications Page 2 4 TITAN Max Service Manual 3442 428 Rev A ...

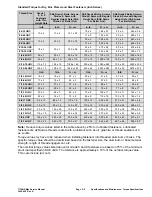
Page 15: ... 5 68 7 70 7 95 9 7 16 20 UNF 29 3 29 3 39 4 55 6 75 8 77 8 104 11 1 2 13 UNC 30 3 48 7 65 9 75 8 102 11 105 11 142 15 1 2 20 UNF 32 4 53 7 72 9 85 9 115 12 120 12 163 16 5 8 11 UNC 65 10 88 12 119 16 150 15 203 20 210 21 285 28 5 8 18 UNF 75 10 95 15 129 20 170 18 230 24 240 24 325 33 3 4 10 UNC 93 12 140 20 190 27 265 27 359 37 375 38 508 52 3 4 16 UNF 115 15 165 25 224 34 300 30 407 41 420 43 5...

Page 16: ...ce torque values listed in the table above by 25 for lubricated fasteners Lubricated fasteners are defined as threads coated with a lubricant such as oil graphite or thread sealant such as Loctite Torque values may have to be reduced when installing fasteners into threaded aluminum or brass The specific torque value should be determined based on the fastener size the aluminum or base material stre...

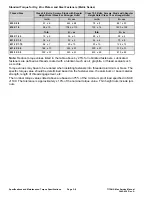
Page 17: ...b No 10 24 UNC 38 7 in lb 1 4 20 UNC 85 15 in lb 5 16 18 UNC 110 20 in lb 3 8 16 UNC 200 100 in lb Hole size material strength material thickness and finish must be considered when determining specific torque values All torque values are based on non lubricated fasteners Conversion Factors in lb X 11 2985 N cm ft lb X 1 3558 N m N cm X 0 08851 in lb N cm X 0 73776 ft lb Thread Cutting Screws Zinc ...

Page 18: ... 47 64 0 734375 18 653 1 4 0 2500 6 350 3 4 0 7500 19 050 17 64 0 265625 6 747 49 64 0 765625 19 447 9 32 0 28125 7 144 25 32 0 78125 19 844 19 64 0 296875 7 541 51 64 0 796875 20 241 5 16 0 3125 7 541 13 16 0 8125 20 638 21 64 0 328125 8 334 53 64 0 828125 21 034 11 32 0 34375 8 731 27 32 0 84375 21 431 23 64 0 359375 9 128 55 64 0 859375 21 828 3 8 0 3750 9 525 7 8 0 8750 22 225 25 64 0 390625 9...

Page 19: ...46 Cubic Feet Cubic Meters 0 02832 Volume Cubic Inches Cubic Centimeters 16 39 Tons Short Metric Tons 0 9078 Pounds Kilograms 0 4536 Weight Ounces Grams 28 3495 Pressure Pounds Square Inch Kilopascal 6 895 Foot Pounds Newton Meters 1 356 Foot Pounds Kilogram Meters 0 1383 Work Inch Pounds Kilogram Centimeters 1 152144 Quarts Liters 0 9463 Liquid Volume Gallons Liters 3 785 Liquid Flows Gallons Min...

Page 20: ...Specifications and Maintenance Torque Specifications Page 2 10 TITAN Max Service Manual 3442 428 Rev A ...

Page 21: ...Chapter 3 Troubleshooting Table of Contents General Troubleshooting 3 3 TITAN Max Service Manual Page 3 1 Troubleshooting 3442 428 Rev A ...

Page 22: ...s E Narrow down the focus of the problem Assess Performance Ensure you have all the necessary tools for testing Test all potential causes of the failure A Reevaluate and create new hypotheses if necessary Repair R Return the unit to service by repairing rebuilding or replacing Solution Confirmation Did the issue go away Was the root cause of the issue correctly repaired S Are there any other new s...

Page 23: ...lace the air cleaner element The seat switch is not functioning properly Check the seat switch indicator Replace the seat if necessary The electrical connections are corroded loose or damaged Check the electrical connections for good contact Clean the connector terminals thoroughly with electrical contact cleaner apply dielectric grease and make the appropriate connections The relay or switch is w...

Page 24: ...e loose Tighten the engine mounting bolts The engine pulley idler pulley or blade pulley is loose Tighten the appropriate pulley check to make sure idler springs are not over stretched The engine pulley is damaged Replace the engine pulley The blade spindle is bent Replace the spindle The machine vibrates abnormally The motor mount is loose or worn Check the mounting bolts The blade s is are not s...

Page 25: ...h Check the coil resistance battery charge charging system and wiring connections and replace parts if necessary The coil is damaged Replace the clutch There is inadequate current supply Repair or replace the clutch lead wire or electrical system Clean the connector contacts The clutch does not engage The rotor armature air gap is too large Remove the shim or replace the clutch TITAN Max Service M...

Page 26: ...Troubleshooting General Troubleshooting Page 3 6 TITAN Max Service Manual 3442 428 Rev A ...

Page 27: ...Chapter 4 Engine Table of Contents General Information 4 2 Service and Repairs 4 3 Engine Replacement 4 4 TITAN Max Service Manual Page 4 1 Engine 3442 428 Rev A ...

Page 28: ...General Information The Titan Max uses A 26 HP 747cc Kohler twin cylinder OHV 4 cycle engine with a pro air cleaner KT745 3094 Engine General Information Page 4 2 TITAN Max Service Manual 3442 428 Rev A ...

Page 29: ...ly g341898 Figure 3 1 Engine 6 PTO Clutch 2 Oil Drain Hose Assembly 7 Flat Idler Pulley 3 Muffler 8 Idler Arm Assembly 4 Engine Sheave 9 V belt 5 Clutch Anchor TITAN Max Service Manual Page 4 3 Engine Service and Repairs 3442 428 Rev A ...

Page 30: ...rain the oil into a suitable container 4 Close the fuel supply g344221 Figure 4 5 Remove the engine guard 6 Remove the deck drive belt from the mower deck Deck Drive Belt Removal page 6 10 7 Remove the hydrostatic drive belt from the machine Hydrostatic Drive Belt Removal page 7 8 8 Disconnect the chassis wire harness from the main engine wire harness g335893 Figure 5 9 Disconnect the red B wire f...

Page 31: ...continued g335895 Figure 6 10 Disconnect the black engine ground wire g344817 Figure 7 11 Disconnect the fuel supply line at the fuel filter TITAN Max Service Manual Page 4 5 Engine Service and Repairs 3442 428 Rev A ...

Page 32: ...ch anchor 18 Remove the engine from the frame Engine Installation 1 Prepare the frame and secure any fuel lines or wire harness components 2 Install the engine onto the frame 3 Align the 4 holes of the engine base to the frame and attach the 2 0 375 16 x 1 500 inch rear mounting screws and belleville washers loosely 4 Attach the front 2 screws and belleville washers through the clutch anchor and i...

Page 33: ...e clutch wire to the clutch 12 Connect the choke cable Choke Control Assembly Removal page 5 29 13 Connect the throttle cable Throttle Cable Assembly Installation page 5 27 14 Connect the black engine ground wire g344817 Figure 9 15 Connect the red B wire from the starter g335895 Figure 10 16 Connect the chassis wire harness to the main engine wire harness TITAN Max Service Manual Page 4 7 Engine ...

Page 34: ...inued g335893 Figure 11 17 Connect the fuel supply line to the fuel filter g349637 Figure 12 18 Install the engine guard 19 Open the fuel supply valve Engine Service and Repairs Page 4 8 TITAN Max Service Manual 3442 428 Rev A ...

Page 35: ...and verify proper oil level 21 Connect the battery by installing the positive cable first then the negative cable to the battery 22 Verify the proper function of the unit 23 Verify the engine RPM is set to 3600 100 TITAN Max Service Manual Page 4 9 Engine Service and Repairs 3442 428 Rev A ...

Page 36: ...Engine Service and Repairs Page 4 10 TITAN Max Service Manual 3442 428 Rev A ...

Page 37: ...Replacement 5 13 Right Console Replacement 5 16 Seat Replacement 5 19 Fuel Tank Replacement 5 22 Roll Over Protection System ROPS Replacement 5 24 Throttle Cable Assembly Replacement 5 26 Choke Control Assembly Replacement 5 29 Park Brake Handle Assembly Replacement 5 30 Motion Control Assembly Replacement 5 31 TITAN Max Service Manual Page 5 1 Chassis 3442 428 Rev A ...

Page 38: ...General Information The Titan Max series uses a 11 GA fully welded frame with a Roll Over Protection System ROPS Chassis General Information Page 5 2 TITAN Max Service Manual 3442 428 Rev A ...

Page 39: ...ffler Guard Bracket 3 Choke Control Cable 11 RH Motion Control Cover 4 RH Console 12 LH Console Bracket 5 Throttle Control Cable 13 LH Console 6 Upper Rear Trim 14 LH Cover 7 RH Console Support 15 LH Motion Control Cover 8 Rear Guard Assembly TITAN Max Service Manual Page 5 3 Chassis Service and Repairs 3442 428 Rev A ...

Page 40: ...ly 2 g341888 Figure 15 1 ROPS Assembly 5 Frame 2 Floor Mat 6 Step Plate 3 Rubber Grommet 7 Backer Plate 4 Floor Pan Assembly 8 Fascia Plate Chassis Service and Repairs Page 5 4 TITAN Max Service Manual 3442 428 Rev A ...

Page 41: ...Chassis Assembly 3 g341892 Figure 16 1 Seat 2 Fixed Seat Plate TITAN Max Service Manual Page 5 5 Chassis Service and Repairs 3442 428 Rev A ...

Page 42: ...Chassis Assembly 4 g341891 Figure 17 1 Fuel Hose Assembly 3 Vent Hose Assembly 2 Fuel Tank Chassis Service and Repairs Page 5 6 TITAN Max Service Manual 3442 428 Rev A ...

Page 43: ...Chassis Assembly 5 g341894 Figure 18 1 Grease Cap 2 Front Caster Wheel Assembly TITAN Max Service Manual Page 5 7 Chassis Service and Repairs 3442 428 Rev A ...

Page 44: ... unit so that the front wheels are off the ground block rear wheels 4 Using a hammer and flat head screw driver remove the grease cap g342953 Figure 19 5 Support the underside of the caster fork and remove the 0 313 18NC x 0 750 inch screw and washer securing the caster fork to the frame g342955 Figure 20 6 Remove the caster fork from the main frame Inspect the caster fork shaft for wear or damage...

Page 45: ...ng surface clean of debris 2 Using a 32 mm socket and a hammer install the lower bearing from the bottom side into the axle Verify the bearing is fully seated Note The bearings are sealed and do not require grease lubrication 3 Using a 32 mm socket and a hammer install the upper bearing from the bottom side into the axle Verify the bearing is fully seated Note The bearings are sealed and do not re...

Page 46: ... 750 inch screw and tighten to the caster shaft Torque the screw to 22 597 2 82 N m 200 25 in lb g342955 Figure 23 7 Using a 32 mm socket and a hammer install the grease cap onto the frame Note Replace the grease cap if damaged 8 Connect the battery by installing the positive cable first then the negative cable to the battery 9 Lower the unit and verify proper function Chassis Service and Repairs ...

Page 47: ...Raise and support the unit so that the front wheels are off the ground block rear wheels 4 Remove the 0 50 13 inch nut and 1 2 13 x 8 38 inch screw securing the caster wheel to the caster fork g342888 Figure 24 1 Nut 2 Screw 5 Remove the 2 seal guards and washers from the wheel hub g342889 Figure 25 6 Remove the caster wheel spanner from the bearings 7 Using a punch and a hammer remove the 2 beari...

Page 48: ...he wheel is clean and free of debris or excessive wear 2 Using a 1 1 6 inch socket and hammer install the 2 bearings into the caster wheel g342921 Figure 27 3 Install the caster wheel spanner into the caster wheel 4 Install the 2 seal guards and washers onto the caster wheel hubs Chassis Service and Repairs Page 5 12 TITAN Max Service Manual 3442 428 Rev A ...

Page 49: ...8 Connect the battery by installing the positive cable first then the negative cable to the battery Left Console Replacement Left Console Removal 1 Park the machine on a level surface and disengage the PTO Stop the engine wait for all moving parts to stop and remove key Engage the parking brake 2 Disconnect the battery by removing the negative cable first then the positive cable from the battery 3...

Page 50: ... Figure 30 1 Torx Screw 5 Remove the 2 screws T30 securing the left console bracket to the chassis g342988 Figure 31 6 Remove the fuel cap and disconnect the keeper line Note Ensure the keeper line does not fall into the fuel tank Chassis Service and Repairs Page 5 14 TITAN Max Service Manual 3442 428 Rev A ...

Page 51: ... fuel cap from the gas tank 2 Lower the left console into place Ensuring the left console seats properly on the support g342994 Figure 33 3 Install the keeper line into the fuel cap Install the fuel cap 4 Install the 2 screws T30 securing the LH console bracket to the chassis TITAN Max Service Manual Page 5 15 Chassis Service and Repairs 3442 428 Rev A ...

Page 52: ...irst then the negative cable to the battery Right Console Replacement Right Console Removal 1 Park the machine on a level surface and disengage the PTO Stop the engine wait for all moving parts to stop and remove key Engage the parking brake 2 Disconnect the battery by removing the negative cable first then the positive cable from the battery 3 Remove the T30 torx screw securing the RH console to ...

Page 53: ...w securing the control panel assembly to the console 6 Lift the console upward off of the machine while feeding the control panel assembly through the opening in the console Note The control panel assembly should be supported while servicing the machine to avoid damage to cables or the wire harness g344218 Figure 37 TITAN Max Service Manual Page 5 17 Chassis Service and Repairs 3442 428 Rev A ...

Page 54: ...ed firmly in place on the underside of the control panel assembly g344218 Figure 38 2 Secure the control panel assembly to the console with a hex screw 3 Install the 10 14 x 1 2 inch plastic screw securing the control panel assembly to the console 4 Install the 2 T25 screws securing the console to the console bracket on the underside of the console 5 Install the T30 torx screw securing the RH cons...

Page 55: ...e key Engage the parking brake 2 Disconnect the battery by removing the negative cable first then the positive cable from the battery 3 Slide the seat forward 4 Remove the 2 5 16 18 inch nuts and 2 0 312 18 x 1 000 inch carriage screws securing the seat plate to the chassis g344224 Figure 40 1 Nut 2 Carriage Screw 5 Tip the seat forward remove the 2 wire retainers from the bottom of the seat and s...

Page 56: ...from the seat g344220 Figure 42 7 Remove the seat from the seat plate Seat Installation 1 With the seat plate tipped forward hold the seat on the seat plate 2 Connect the seat switch to the seat Chassis Service and Repairs Page 5 20 TITAN Max Service Manual 3442 428 Rev A ...

Page 57: ...m of the seat and seat plate g344219 Figure 44 4 Install the 2 5 16 18 inch nuts and 2 0 312 18 x 1 000 inch carriage screws securing the seat plate to the chassis Torque the screws to 22 597 2 82 N m 200 25 in lb TITAN Max Service Manual Page 5 21 Chassis Service and Repairs 3442 428 Rev A ...

Page 58: ... part of the tank in low fuel situations as well as reducing the affect of debris in the tank g336089 Figure 46 1 Park the machine on a level surface and disengage the PTO Stop the engine wait for all moving parts to stop and remove key Engage the parking brake 2 Disconnect the battery by removing the negative cable first then the positive cable from the battery 3 Close the fuel supply valve Chass...

Page 59: ... Vent Hose Assembly 3 Fuel Shut Off Valve 2 Fuel Supply Line 7 Lift the fuel tank assembly from the machine by sliding the tank rearward and up away from the frame Fuel Tank Installation 1 Position the fuel tank assembly onto the frame with the vent ports toward the rear of the machine 2 Connect the 2 vent lines to the fuel tank 3 Connect the fuel supply line to the fuel tank and route the fuel li...

Page 60: ... installing the positive cable first then the negative cable to the battery Roll Over Protection System ROPS Replacement Roll Over Protection System ROPS Removal 1 Park the machine on a level surface and disengage the PTO Stop the engine wait for all moving parts to stop and remove key Engage the parking brake 2 Disconnect the battery by removing the negative cable first then the positive cable fr...

Page 61: ...at on the RH ROPS assembly g344235 Figure 51 5 Lift and remove the ROPS assembly from the machine Roll Over Protection System ROPS Installation 1 Install the ROPS assembly onto the machine 2 Install the 2 screws 4 washers and 4 nuts securing the LH ROPS assembly to the chassis Repeat on the RH ROPS assembly Note The orientation of the ROPS hardware is critical Verify the screws are orientated corr...

Page 62: ...to stop and remove key Engage the parking brake 2 Disconnect the battery by removing the negative cable first then the positive cable from the battery 3 Remove the control panel assembly from the right console Right Console Removal page 5 16 4 Remove the knob from the throttle lever g336055 Figure 53 5 Remove the 2 10 24 x 1 2 inch screws and 2 10 24 inch nuts securing the throttle control assembl...

Page 63: ...achine Throttle Cable Assembly Installation 1 Route the throttle cable through the right console between the ROPS and the hydraulic fluid reservoir under the fuel and vent lines and under the electrical g336057 Figure 55 2 Attach the throttle cable assembly to the control panel assembly using 2 screws and nuts 3 Install the knob on the throttle lever TITAN Max Service Manual Page 5 27 Chassis Serv...

Page 64: ...all the 4 5 16 18 x 2 3 4 inch torx screws 4 5 16 18 inch nuts 2 0 312 18 x 1 000 inch carriage screws and 2 5 16 18 inch nuts securing the rear guard to the mainframe Torque all fasteners to 24 29 3 95 N m 215 35 in lb 10 Install the 2 10 24 x 1 2 inch screws and 2 10 24 inch nuts securing the throttle cable assembly to the control panel assembly 11 Install the control panel assembly onto the rig...

Page 65: ...e 58 5 Remove the choke cable from the plate noting the position of the cable in the plate 6 Remove the control panel assembly from the right console Right Console Removal page 5 16 7 On the bottom side of the control panel assembly loosen the jam nut securing the choke lever in place Remove the nut from the choke cable 8 Pull the choke cable assembly through the control panel and out of the machi...

Page 66: ...Brake Handle Assembly Replacement Park Brake Handle Assembly Removal 1 Park the machine on a level surface and disengage the PTO Stop the engine wait for all moving parts to stop and remove key Engage the parking brake 2 Disconnect the battery by removing the negative cable first then the positive cable from the battery 3 Release the parking brake park brake handle down 4 Remove the left console L...

Page 67: ...rol Assembly Replacement Motion Control Assembly Removal 1 Park the machine on a level surface and disengage the PTO Stop the engine wait for all moving parts to stop and remove key Engage the parking brake 2 Disconnect the battery by removing the negative cable first then the positive cable from the battery 3 Remove the left and right consoles Left Console Removal page 5 13 Right Console Removal ...

Page 68: ...lation 1 Raise and support the unit so that the front wheels are off the ground block rear wheels 2 Position the motion control assembly in place with the linkage extending toward the transmission 3 Secure the motion control assembly to the frame g336044 Figure 62 4 Connect the motion control linkage to the transmission Chassis Service and Repairs Page 5 32 TITAN Max Service Manual 3442 428 Rev A ...

Page 69: ...rews Torque the screw to 40 67 4 07 N m 30 3 ft lb 8 Adjust the motion control linkages See the product Operator s Manual for the motion control linkage adjusting procedure 9 Lower the unit to the floor 10 Install the left and right consoles Left Console Installation page 5 15 Right Console Installation page 5 18 11 Connect the battery by installing the positive cable first then the negative cable...

Page 70: ...Chassis Service and Repairs Page 5 34 TITAN Max Service Manual 3442 428 Rev A ...

Page 71: ...ents General Information 6 2 Service and Repairs 6 3 Mower Deck Replacement 6 5 Deck Drive Belt Replacement 6 10 Mower Spindle Replacement 6 14 Belt Tensioner Replacement 6 17 TITAN Max Service Manual Page 6 1 Mower Deck 3442 428 Rev A ...

Page 72: ... deck and a 4 point lift system This includes a front deck strut for lateral stability All units have a 0 59 1 77 cm 1 5 4 5 inch height of cut range and are built from 10 GA steel Mower Deck General Information Page 6 2 TITAN Max Service Manual 3442 428 Rev A ...

Page 73: ... Pulley 13 Spindle Assembly 4 RH Belt Cover 14 Cutoff Baffle 5 Bearing Shield 15 Anti Scalp Roller 6 LH Belt Cover 16 Deck Step 7 Drive Blade Sheave 17 Deck Assembly 8 Idler Arm 18 Spindle Shaft 9 Discharge Deflector 19 Hi Flo Blade 10 Upper Deflector Bracket TITAN Max Service Manual Page 6 3 Mower Deck Service and Repairs 3442 428 Rev A ...

Page 74: ...ft 2 Transport Lock Rod 8 Deck Lift Gusset 3 Transport Lock Plate 9 Flange Bushing 4 Grommet 10 Deck Strut Assembly 5 Lower Hoc Angle 11 Deck Chain Assembly 6 Bracket Assembly 12 Deck Lift Shaft Mower Deck Service and Repairs Page 6 4 TITAN Max Service Manual 3442 428 Rev A ...

Page 75: ...ry by removing the negative cable first then the positive cable from the battery 3 Place 2 2x4 blocks underneath each side of the mower deck g344396 Figure 66 4 Place the height of cut pin into the third hole to lock the mower deck in the lowest height of cut position g344397 Figure 67 5 Lift and remove the floor pan from the machine TITAN Max Service Manual Page 6 5 Mower Deck Service and Repairs...

Page 76: ...344398 Figure 68 6 Using a spring removal tool remove the spring from the mower deck g344399 Figure 69 7 Remove the deck drive belt from the PTO clutch Mower Deck Service and Repairs Page 6 6 TITAN Max Service Manual 3442 428 Rev A ...

Page 77: ... washers securing the deck strut assembly to the frame g344401 Figure 71 9 Remove the 2 3 8 inch LH upper shoulder screws and 2 3 8 16 inch washers securing the deck support chains to the deck lift shaft Repeat on the RH side of the machine TITAN Max Service Manual Page 6 7 Mower Deck Service and Repairs 3442 428 Rev A ...

Page 78: ...he unit so that the front wheels are off the ground block the rear wheels 2 Place the mower deck under the machine 3 Lower the unit to the floor 4 Install the 2 3 8 inch LH upper shoulder screws and 2 3 8 16 inch washers securing the deck support chains to the deck lift shaft Repeat on the RH side of the machine g344402 Figure 73 Mower Deck Service and Repairs Page 6 8 TITAN Max Service Manual 344...

Page 79: ... nuts and 2 washers securing the deck strut assembly to the frame g344401 Figure 74 6 Install the deck drive belt to the PTO clutch g344400 Figure 75 7 Using a spring removal tool install the spring onto the mower deck TITAN Max Service Manual Page 6 9 Mower Deck Service and Repairs 3442 428 Rev A ...

Page 80: ...ement Deck Drive Belt Removal 1 Park the machine on a level surface and disengage the PTO Stop the engine wait for all moving parts to stop and remove key Engage the parking brake 2 Disconnect the battery by removing the negative cable first then the positive cable from the battery 3 Place the height of cut pin into the third hole to lock the mower deck in the lowest height of cut position Mower D...

Page 81: ... g344397 Figure 78 4 Lift and remove the floor pan from the machine g344398 Figure 79 5 Using a spring removal tool remove the spring from the mower deck TITAN Max Service Manual Page 6 11 Mower Deck Service and Repairs 3442 428 Rev A ...

Page 82: ...inch nut securing the idler pulley to the idler arm 9 Remove the deck drive belt from the mower deck Deck Drive Belt Installation 1 Route the deck drive belt around the mower pulleys 2 Tighten the 3 8 16 inch nut securing the idler pulley to the idler arm 3 Install LH belt cover onto the mower deck and secure with 4 0 250 20 x 0 500 inch screws Repeat on the RH side of the machine 4 Install the de...

Page 83: ...tinued g344400 Figure 82 5 Using a spring removal tool install the spring onto the mower deck g344399 Figure 83 6 Install the floor pan onto the machine TITAN Max Service Manual Page 6 13 Mower Deck Service and Repairs 3442 428 Rev A ...

Page 84: ...0 500 inch screws securing the LH belt cover to the mower deck Remove the LH belt cover from the mower deck Repeat on the RH side of the machine 3 Remove the deck drive belt from the mower deck 4 Raise and support the mower deck 5 From the underside of the mower deck remove the blade screw and washer securing each mower blade to the mower deck g344424 Figure 85 6 Lower the mower deck to the ground...

Page 85: ...e the bearing shields 10 Remove and discard the 6 5 16 18 x 7 8 inch taptite screws securing spindle assemblies to the mower deck g344426 Figure 87 11 Remove the spindle assemblies from the mower deck 12 Using a hammer and a punch remove the 2 bearings and spacers from each spindle assembly Mower Spindle Installation 1 Using a 32 mm socket and a hammer install the top bearings into the spindles TI...

Page 86: ...ch new taptite screws securing spindle assemblies to the mower deck Torque the screws to 13 6 18 98 N m 10 14 ft lb g344426 Figure 89 6 Install the bearing shields 7 Install each drive blade sheave and spindle shaft into the mower deck 8 Install the 0 750 16 inch spindle lock nut and washer securing the each spindle shaft to the drive blade sheaves Torque the nut to 135 58 149 N m 100 110 ft lb Mo...

Page 87: ...ll the deck drive belt onto the mower deck 13 Install the LH drive belt cover to the mower deck secure with 4 0 250 20 x 0 500 inch screws Repeat on the RH side of the machine 14 Install the mower deck onto the machine Mower Deck Installation page 6 8 Belt Tensioner Replacement Belt Tensioner Removal 1 Remove the mower deck Mower Deck Removal page 6 5 2 Remove the 4 0 250 20 x 0 500 inch screws se...

Page 88: ...hing and screw 0 375 16 x 2 5 inch from the idler arm Note Take note of the position of the belt guide next to the idler arm g344579 Figure 93 1 Flange Nut 5 Idler Bushing 2 Belt Guide 6 Idler Arm 3 Washer 7 Screw 4 Flat Idler Pulley 6 Remove the 5 16 18 inch flange nut and 3 8 16 x 1 750 inch screw securing the end of the idler arm to the mower deck Mower Deck Service and Repairs Page 6 18 TITAN ...

Page 89: ...he idler arm from the mower deck 9 Inspect the 6 friction washers for damage Replace if necessary Belt Tensioner Installation 1 Install the 0 375 16 x 2 5 inch screw into the underside of the idler arm Verify the screw is on the correct side of the idler arm 2 Install the idler bushing idler pulley washer idler belt guide and nut onto the idler arm TITAN Max Service Manual Page 6 19 Mower Deck Ser...

Page 90: ...iction washers over the hole where the end of the idler arm will be installed 4 Install the idler arm onto washer stack 5 Install the spacer 3 friction washers and washer onto the end of the idler arm g344580 Figure 97 1 Screw 4 Lift Lever Bushing 2 Washer 5 Idler Arm 3 Friction Washer 6 Washer Mower Deck Service and Repairs Page 6 20 TITAN Max Service Manual 3442 428 Rev A ...

Page 91: ...578 Figure 98 7 Verify the idler arm is installed in the correct orientation 8 Install the deck drive belt onto the mower deck 9 Install the LH belt cover onto the mower deck secure with 4 0 250 20 x 0 500 inch screws Repeat on the RH side of the 10 Install the mower deck onto the machine Mower Deck Installation page 6 8 TITAN Max Service Manual Page 6 21 Mower Deck Service and Repairs 3442 428 Re...

Page 92: ...Mower Deck Service and Repairs Page 6 22 TITAN Max Service Manual 3442 428 Rev A ...

Page 93: ...ystem Table of Contents General Information 7 2 Service and Repairs 7 3 Hydrostatic Drive Transmission Replacement 7 5 Hydrostatic Drive Belt Replacement 7 8 TITAN Max Service Manual Page 7 1 Hydrostatic Drive System 3442 428 Rev A ...

Page 94: ... 9 0 cst 55 SUS at 110 ºC 230 ºF and an API classification of SL is recommended A 20W50 engine oil has been selected for use by the factory and is recommended for normal operating procedures The ZT 3100 oil capacity is 4 45 L 150 fl oz with filters removed Hydrostatic Drive System General Information Page 7 2 TITAN Max Service Manual 3442 428 Rev A ...

Page 95: ...g341889 Figure 99 1 Hydraulic Tank 5 RH Transaxle Assembly 2 Hydraulic Hose 6 LH Transaxle Assembly 3 Hydraulic Routed Hose 7 Spacer Shaft 4 Hydro Bypass Arm TITAN Max Service Manual Page 7 3 Hydrostatic Drive System Service and Repairs 3442 428 Rev A ...

Page 96: ...ever 2 RH Motion Control Assembly 8 LH Control Handle Assembly 3 Brake Bracket 9 LH Motion Control Assembly 4 Brake Shaft 10 Lower Brake Linkage 5 Adjustable Yoke 11 Damper 6 Upper Brake Linkage Hydrostatic Drive System Service and Repairs Page 7 4 TITAN Max Service Manual 3442 428 Rev A ...

Page 97: ...are off the ground block rear wheels 4 Remove the drive wheels 5 Remove the deck drive belt from the mower deck Deck Drive Belt Removal page 6 10 6 Remove the hydrostatic drive belt from the machine Hydrostatic Drive Belt Removal page 7 8 7 Disconnect the motion control linkage from the transmission 8 Disconnect the bypass arm g336196 Figure 101 9 Disconnect the lower brake linkage from the transm...

Page 98: ...4 Support the transmission loosen and remove the 2 5 16 18 inch axle horn nuts washers and 2 5 16 18 x 3 00 inch screws Lower the transmission Hydrostatic Drive Transmission Installation 1 Lift and support the transmission and install the 2 5 16 18 x 3 00 inch axle horn screws washers and nuts 5 16 18 inch Do not fully tighten the nuts at this time 2 Align the cross shaft and install the screw 0 3...

Page 99: ...Connect the bypass arm 11 Connect the motion control linkage Note Attach the motion control linkage as shown with the offset toward the outside of the machine g336199 Figure 105 12 Install the hydrostatic drive belt onto the machine Hydrostatic Drive Belt Installation page 7 8 13 Install the deck drive belt onto the mower deck Deck Drive Belt Installation page 6 12 14 Verify that the 3 4 16 inch h...

Page 100: ...from the mower deck Deck Drive Belt Removal page 6 10 4 Raise and support the unit so that the front wheels are off the ground block rear wheels 5 Remove the 0 375 16 x 1 500 inch screw and belleville washer securing the anchor clutch Remove the anchor clutch 6 Remove the idler spring from the post 7 Remove the hydrostatic drive belt from the pulleys Hydrostatic Drive Belt Installation 1 Route the...

Page 101: ...Block and Fuses 8 4 Key Ignition Switch 8 4 Hour Meter 8 5 Operator Presence Switch Seat Switch 8 6 Neutral Switch Left and Right 8 7 Parking Brake Switch 8 7 Starter Solenoid 8 8 PTO Switch 8 8 Electric PTO Clutch 8 10 TVS Diode 8 16 TITAN Max Service Manual Page 8 1 Electrical System 3442 428 Rev A ...

Page 102: ...k switches on the motion control levers seat switch brake switch blade engagement switch PTO ignition switch 15 AMP main fuse and 20 AMP charging system fuse This system also uses a start relay electric PTO clutch hour meter TVS diode and starter solenoid Electrical System General Information Page 8 2 TITAN Max Service Manual 3442 428 Rev A ...

Page 103: ...Assembly 8 Solenoid 2 Hour Meter 9 Switch 3 Ignition Key 10 Battery 4 Wire Harness Adapter 11 Wire Harness 5 Bungle Strap 12 Battery Tray 6 PTO Switch 13 Bail Switch 7 Ignition Switch TITAN Max Service Manual Page 8 3 Electrical System Service and Repairs 3442 428 Rev A ...

Page 104: ...een the fuse blades If the fuse is OPEN no continuity replace the fuse and test the circuit Key Ignition Switch The ignition switch makes the proper connections for the starter safety circuits and accessories Detents inside the switch control the three switch positions OFF RUN and START The START position is spring loaded so that it automatically returns to the RUN position when released Ignition ...

Page 105: ...on 2 verify the PTO status icon light is illuminated when the PTO switch is in the ON position parking brake is released and the operator is in the seat The PTO status icon light should turn off when the PTO switch is turned off or the operator leaves the seat Icon 3 verify the parking brake status icon light is illuminated when the parking brake is engaged The parking brake status icon light shou...

Page 106: ...y g336419 Figure 110 Operator Presence Switch Seat Switch Test 1 Disconnect the wire harness from the operator presence switch located on the bottom of the seat assembly 2 Using a digital multi meter set to the OHM or continuity setting test the continuity between the two switch terminals When the seat is vacated the switch should NOT have continuity open When the operator is present the switch sh...

Page 107: ...have continuity open g336403 Figure 111 Parking Brake Switch The parking brake switch is a single pole plunger type switch normally open with two terminals When the plunger is depressed parking brake ON the circuit closes and there is continuity between the terminals This allows battery voltage to flow to the rest of the safety interlock system Parking brake ON the switch should have continuity cl...

Page 108: ...ty setting check to ensure that terminals 1 and 2 are open no continuity 3 Apply 12 volts DC to terminal 3 and ground terminal 4 Terminals 1 and 2 should now be closed continuity g336407 Figure 114 PTO Switch The PTO switch provides battery voltage from the ignition switch to the PTO clutch As part of the safety interlock system the PTO switch will prevent the engine from cranking starting when in...

Page 109: ...9 Figure 116 4 Using a digital multi meter set to the OHM or Continuity setting verify the following Pin 2 and 5 should have continuity closed Pin 1 and 4 should have continuity closed Pin 1 and 7 should NOT have continuity open Pin 2 and 8 should NOT have continuity open 5 With the switch in the OFF position button pushed IN Pin 1 and 7 should have continuity closed Pin 2 and 8 should have contin...

Page 110: ... against the brake material opposite the clutch plate When power is applied the friction plate is pulled toward the clutch plate and the two rotate as one When the clutch plate and the friction plate rotate as different speeds it is known as clutch slipping Electric PTO Clutch Removal 1 Park the machine on a level surface and disengage the PTO Stop the engine wait for all moving parts to stop and ...

Page 111: ...344398 Figure 118 5 Using a spring removal tool remove the spring from the mower deck g344399 Figure 119 6 Remove the deck drive belt from the PTO clutch TITAN Max Service Manual Page 8 11 Electrical System Service and Repairs 3442 428 Rev A ...

Page 112: ...tch to the machine 9 Remove the PTO clutch from the machine Electric PTO Clutch Installation 1 Install the PTO clutch onto the underside of the machine secure with the 2 spring washers and 7 16 x 3 inch screw Torque the screw to 66 4 82 7 N m 49 61 ft lbs 2 Connect the clutch wire connector to the PTO clutch Electrical System Service and Repairs Page 8 12 TITAN Max Service Manual 3442 428 Rev A ...

Page 113: ...336161 Figure 122 3 Install the deck drive belt onto the PTO clutch g344400 Figure 123 4 Using the spring removal tool install the spring onto the mower deck TITAN Max Service Manual Page 8 13 Electrical System Service and Repairs 3442 428 Rev A ...

Page 114: ...al problems use the following electrical troubleshooting steps These procedures will help determine if the clutch has failed as a result of or is the cause of an electrical problem 1 Park the machine on a level surface and disengage the PTO Stop the engine wait for all moving parts to stop and remove the key Engage the parking brake 2 Disconnect the clutch wire connector 3 Set the multi meter to m...

Page 115: ...eter to measure resistance OHM setting 4 Connect one multi meter lead to the engine chassis or battery ground Connect the other multi meter lead to each of the clutch connector terminals 5 The clutch connector terminals should never have continuity to ground and should be OPEN at all times 6 If continuity is found between the PTO connector and ground the PTO clutch and the PTO switch must be repla...

Page 116: ...nect the negative meter lead to the corresponding wire terminal 2 6 Connect a short jumper lead from terminal 3 to terminal 4 7 Turn the ignition switch to RUN and the PTO switch to the ON position 8 Record the amp reading and refer to the PTO Clutch Electrical Specification Chart below PTO Clutch Electrical Specification Chart Resistance OHMs AMP Draw Continuity to Ground 3 05 5 3 93 OPEN TVS Dio...

Page 117: ...ct the TVS diode from the harness 2 Connect each lead of the meter to each terminal of the TVS diode 3 If the TVS diode is internally shorted replace the TVS diode 4 If the TVS diode is not internally shorted check the wiring and the clutch TITAN Max Service Manual Page 8 17 Electrical System Service and Repairs 3442 428 Rev A ...

Page 118: ...Electrical System Service and Repairs Page 8 18 TITAN Max Service Manual 3442 428 Rev A ...

Page 119: ...Appendix A Foldout Drawings Table of Contents Electrical Drawing Abbreviations A 2 Kohler Engine Electrical Schematic A 3 TITAN Max Service Manual Page A 1 Foldout Drawings 3442 428 Rev A ...

Page 120: ...tified with the wire color followed by a or _ and then the line color e g R BK is a red wire with a black line OR_BK is an orange wire with a black line Note The electrical harness drawings in this chapter identify both the wire color and the wire gauge For example 16 BK on a harness diagram identifies a 16 gauge wire with black insulation Note A splice used in a wire harness will be identified on...

Page 121: ... Drawing Rev A Sheet 1 3442 428 Rev A Page A 3 Kohler Engine Electrical Schematic g350654 ...

Reviews: