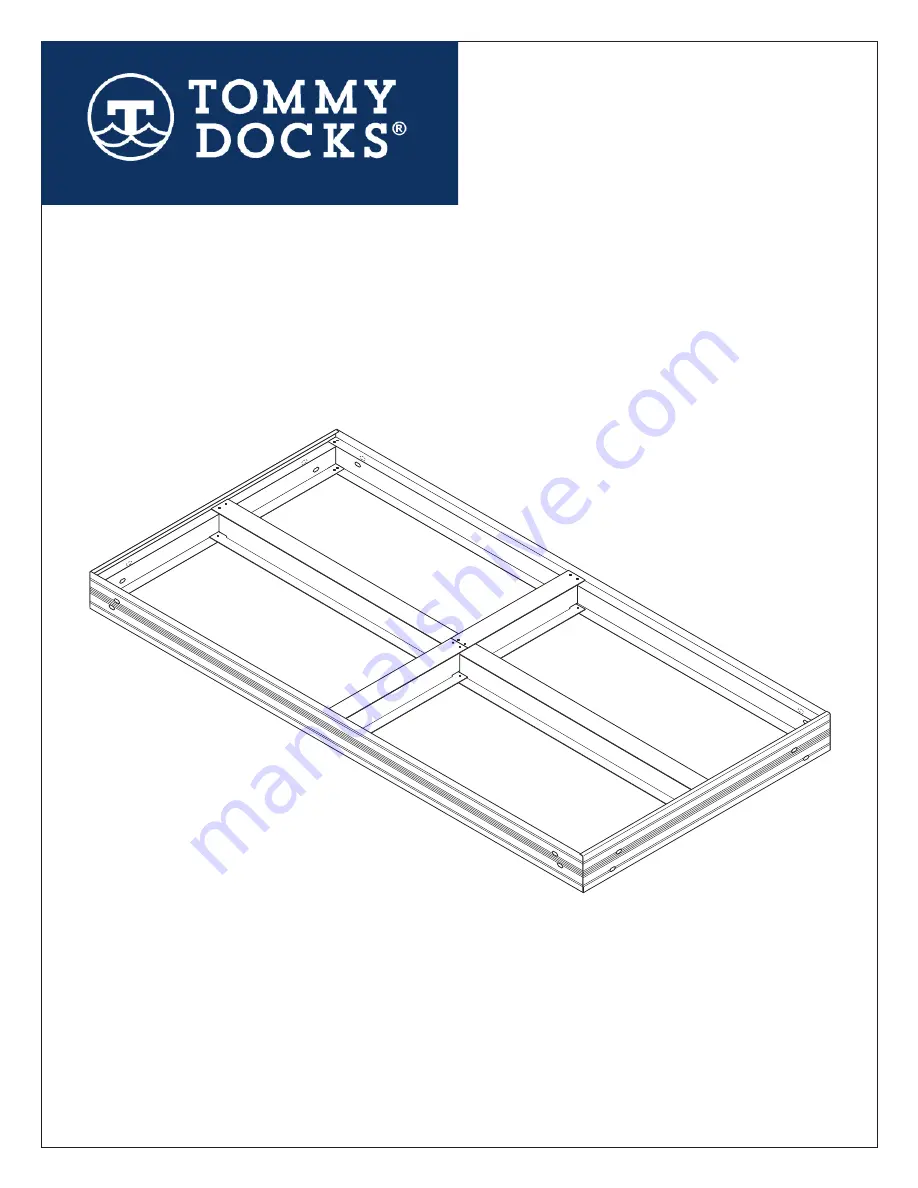
Aluminum Dock Frame
Assembly Instructions
Tommy Docks
4003 Dixie Ave, Wausau, WI 54401
Phone : 715-842-3804
Toll Free : 866-675-1880
Fax : 715-842-3420
www.tommydocks.com
Page 1: ...Aluminum Dock Frame Assembly Instructions Tommy Docks 4003 Dixie Ave Wausau WI 54401 Phone 715 842 3804 Toll Free 866 675 1880 Fax 715 842 3420 www tommydocks com...
Page 2: ...pping Screw Qty 2 Stainless Steel Hex Head Bolt Qty 20 Stainless Steel Tapered Head Screw Qty 20 Stainless Steel Nylon Locknut Qty 40 Hardware Aluminum Dock Kit Components 48 End Rail Qty 2 Side Rail...
Page 3: ...t the Tappered Head Stainless Steel Screws at the corner 2 screws per corner 2a Hand tighten the Stainless Steel Locknuts to all 4 corner screws at the top side of the frame 2b Flange 4x 4x Stainless...
Page 4: ...p of the End Rail Flange and the Bottom Flange of the I Beam sits on top of the Bottom Flange of Side Rail 3c Insert the screws and locknuts 3d and hand tighten 3e 3e Center I Beam End Rail Center I B...
Page 5: ...between the anges on the Side Rails 4b but not where it attaches to the center I Beam 4c Attach with the screws and locknuts 4d and hand tighten 4e 4e Intermediate Crossmember I Beam Side Rail Center...
Page 6: ...f the center I Beam 5a Insert the screws and lock nuts 5b and hand tighten 5c Attach the second Crossmember in the same manner as the rst but do not install the screws into this side rail yet 2x 2x Ce...
Page 7: ...the Crossmember into the Side Rail that remains unattached The purpose for this is to allow room to slide individual boards into place in the forward section of the frame If you are planning on makin...
Page 8: ...g Intermediate Crossmember 7b Use the Hex Bit to fully tighten the Stainless Steel Tapered Head Screw while holding in place the Stainless Steel Nylon Locknut with a 3 8 Box End Wrench NOTE When assem...
Page 9: ...the remaining deck boards into the frame Fit one end of the remaining End Rail into the Side Rail 9a The End Rail fits in between the flanges on the Side Rail 9b 9a 9b End Rail Side Rail 9c Flange of...
Page 10: ...e sure the top ange of the I Beam goes on top of the End Rail and the bottom ange of the I Beam sits on top of the bottom ange of End Rail 11a Insert the screws and locknuts 11b and hand tighten 11c 2...
Page 11: ...ropriately Use the Hex Bit to fully tighten the Stainless Steel Tapered Head Screw while holding in place the Stainless Steel Nylon Locknut with a 3 8 Box End Wrench NOTE When assembling the frame com...
Page 12: ...he frame corner connection is made by installing the 2 Self Tapping Screws provided 15a Fit corner together tightly and tighten using 5 16 Driver Bit 15b 14b 14a 2x 15a 15b Self Tapping Screw 5 16 Dri...
Page 13: ...olding in place the Stainless Steel Nylon Locknut with a 3 8 Box End Wrench 16b NOTE When assembling the frame components if you encounter holes that do not line up exactly it is acceptable to use a d...