background image


ProPlex IQ One+ Mini User Manual v1.1 – 30112020


21


DMX


RATE


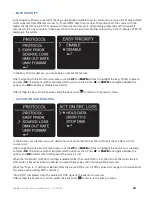
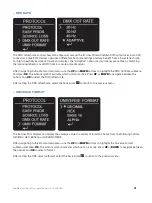
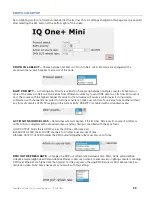
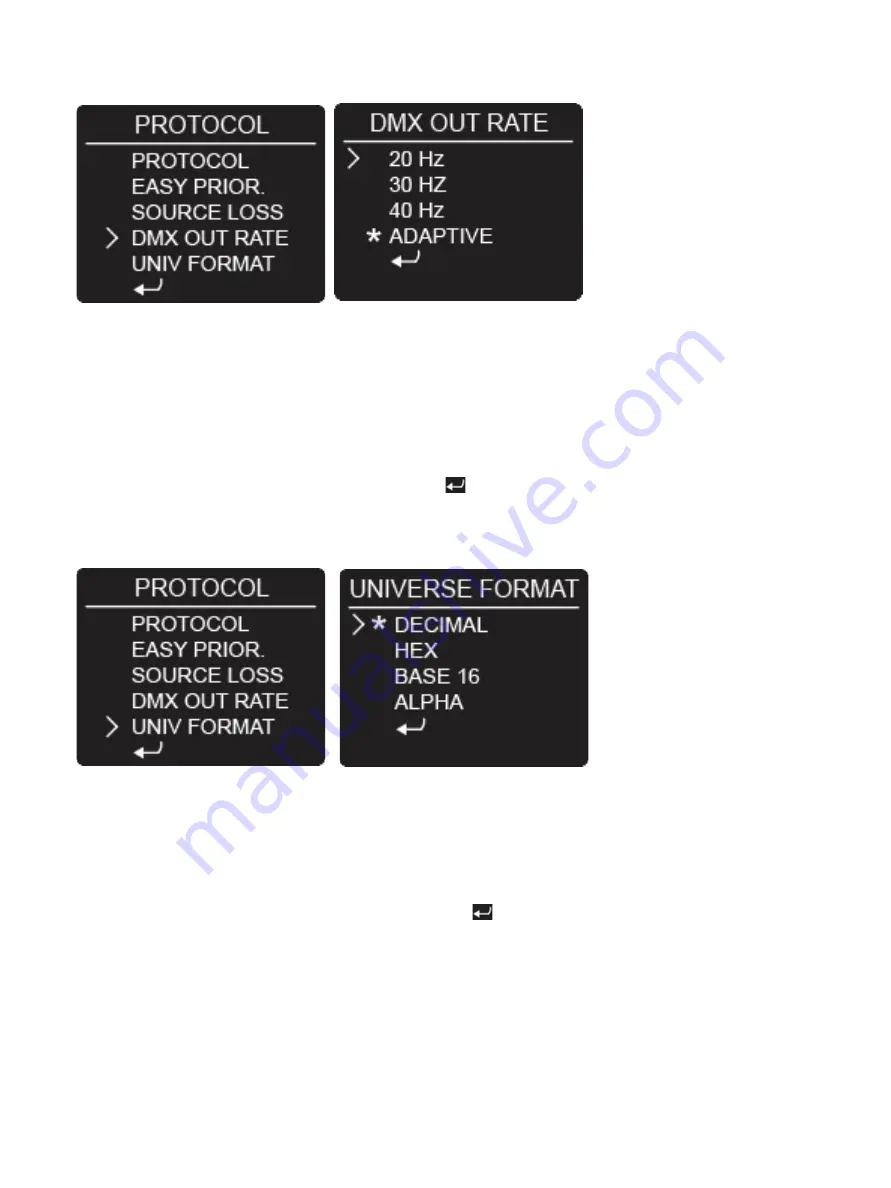
The DMX refresh rate controls how many times per second the IQ One+ Mini will refresh DMX output over 5-pin XLR 
connectors. Some DMX devices operate at different refresh rate settings and may benefit from a lower refresh rate. 
For high-speed devices like LED walls and displays, the “Adaptive” option can improve response time by matching 
the incoming refresh rate of DMX from a console or media server. 
 
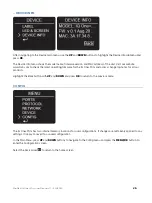
After navigating to the Protocol main menu, use the 

UP

 and 

DOWN

 buttons to highlight the DMX Out Rate submenu 

and press 

OK

. The asterisk symbol indicates which option is active. Press 

UP

 or 

DOWN

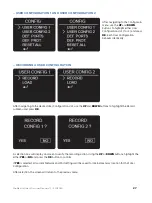
 to navigate between the 

options and 

OK

 to select the DMX refresh rate. 

 
After setting the DMX refresh rate, select the back arrow 

 to return to the previous menu 


UNIVERSE


FORMAT 


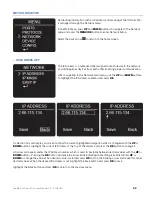
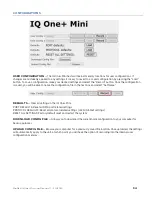
The IQ One+ Mini displays can display the universe value in a variety of formats. Choose from the following options: 
DECIMAL, HEX, BASE 16 or ALPHANUMERIC. 
 
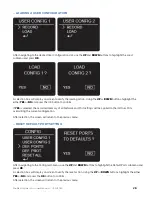
After navigating to the Protocol main menu, use the 

UP

 and 

DOWN

 buttons to highlight the Universe Format 

submenu and press 

OK

. The asterisk symbol indicates which option is active. Press 

UP

 or 

DOWN

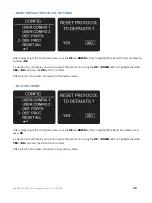
 to navigate between 

the options and 

OK

 to select a format. 

 
After setting the DMX universe format, select the back arrow 

 to return to the previous menu. 


Summary of Contents for ProPlex IQ One+ Mini

Page 1: ......

Page 2: ...oduction modification or distribution of this document for any other purposes without express written consent Specifications are subject to change without notice The information in this document supersedes all previously supplied information before the effective date listed above TMB has confidence in the accuracy of the document information herein but assumes no responsibility or liability for an...

Page 3: ... KITS 10 INSTALLING THE RACKMOUNT EARS 10 INSTALLING THE DUAL JOINERS 11 MOUNTING IN THE RACK 12 RACKMOUNT KIT ORDERING CODES 12 CONNECTION SCHEME 13 OPERATION 14 OVERVIEW 14 CONTROL NAVIGATION PANEL 14 MENU MAP 15 HOME SCREEN 16 MAIN MENU 16 PORT SETUP 16 UNIVERSE SET 16 PORT DIRECTION 17 RDM 18 PRIORITY 18 PROTOCOL SETUP 19 PROTOCOL 19 EASY PRIORITY 20 ACTION ON SOURCE LOSS 20 DMX RATE 21 UNIVER...

Page 4: ... 27 RECORDING A USER CONFIGURATION 27 LOADING A USER CONFIGURATION 28 RESET DEFAULT PORT SETTINGS 28 RESEST DEFAULT PROTOCOL SETTINGS 29 FACTORY RESET 29 BROWSER INTERFACE 30 STATUS 31 NODE SETUP 31 PORT ROUTING 32 PROTOCOL SETUP 33 CONFIGURATIONS 34 FIRMWARE UPGRADE 35 PROPLEX SOFTWARE 36 FRONT PANEL LED INDICATORS 37 REAR PANEL LED INDICATORS 38 TECHNICAL SPECIFICATION 39 RETURN PROCEDURE 40 CON...

Page 5: ...ponsibility for any labor expended or materials used to replace and or repair the Product without TMB s prior written authorization Any repair of the Product in the field and any associated labor charges must be authorized in advance by TMB Freight costs on warranty repairs are split 50 50 Customer pays to ship defective product to TMB TMB pays to ship repaired product ground freight back to Custo...

Page 6: ...res Include High power processor for glitch free data conversion patching and merging of up to four universes from multiple DMX Art Net and sACN sources Powerful and intuitive feature set control management via on board OLED display web Browser Interface or ProPlex Software Dual Neutrik etherCON ports allow very low latency linking of units designed for ring topology redundancy when used with ProP...

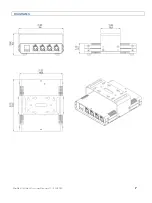
Page 7: ...ProPlex IQ One Mini User Manual v1 1 30112020 7 DIAGRAMS ...

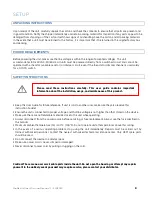
Page 8: ...he rheostat or dimmer channel is used solely for a 0 100 switch SAFETY INSTRUCTIONS Keep this User Guide for future reference If unit is sold to another user make sure they also receive this instruction booklet Ensure the unit is connected to proper voltage and that line voltage is not higher than that stated on the device Make sure there are no flammable materials close to the unit while operatin...

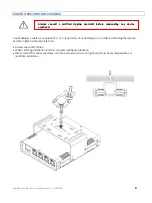
Page 9: ...se ProBurger couplers or equivalent C or O type clamps for attaching to truss After establishing the desired position tighten all appropriate bolts Always use safety cables When selecting installation location consider routine maintenance Never mount Mini enclosure where it will be exposed to moisture highhumidity extreme temperatures or restricted ventilation ...

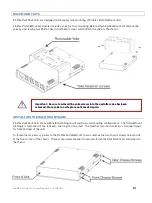
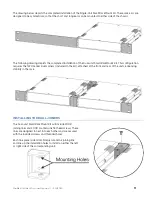
Page 10: ...screwing four Phillips head crosshead screws which attach the yoke to the chassis INSTALLING THE RACKMOUNT EARS ProPlex RackMount Kits are available for both Single unit and Dual unit mounting configurations The 1U RackMount Kit Single is comprised of two rack ears one long and one short The Dual has two short rack ears two dual joiners for front and rear of the units To fasten the rack ears or jo...

Page 11: ...t This configuration requires the TWO center Dual Joiners included in the Kit attached at the front and rear of the units enhancing stability in the rack INSTALLING THE DUAL JOINERS The Dual unit Small RackMount Kit will include FOUR joining links and FOUR countersunk flat head screws These links are designed to nest into each other and are secured with the included screws and threaded holes Each ...

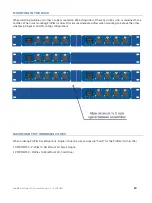
Page 12: ... another When rack mounting ProPlex IQ One Mini ensure adequate airflow when mounting one above the other whether in Single or Dual Mounting configurations RACKMOUNT KIT ORDERING CODES When ordering ProPlex RackMount Kits Single or Dual be sure and specify Small for the ProPlex IQ One Mini PP1RMKITSS ProPlex 1U RackMount Kit Small Single PP1RMKITSD ProPlex 1U RackMount Kit Small Dual ...

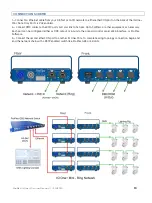
Page 13: ...d 2 Connect DMX cables to the DMX ports A D and link to fixtures Opto Splitters or other equipment as necessary Each port can be configured either as DMX output or input via the onboard control panel Web Interface or ProPlex Software 3 Connect the second etherCON port to another IQ One Mini To complete a ring topology connection begin and end the network chain with a RSTP enabled switch like ProPl...

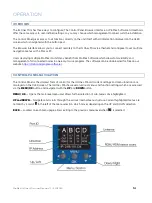
Page 14: ...ich allows total visibility and management of all connected nodes in one easy to use program The software can be downloaded for free on our website https tmb com proplex software CONTROL PANEL NAVIGATION The Control Panel is the simplest form of control for the IQ One Mini All current settings and menu functions are displayed on the OLED screen The IQ One Mini has several various menus and functio...

Page 15: ...ProPlex IQ One Mini User Manual v1 1 30112020 15 MENU MAP ...

Page 16: ...te in the main menu Menu selections will be highlighted by a carrot to the left of the Menu title Pressing the MENU OK button under the OLED display will enter the various sub menus Select the back arrow to return to the home screen PORT SETUP Each port A B C or D has individual settings which are accessed through the Ports menu In the Main Menu press UP and DOWN buttons to navigate to the Ports m...

Page 17: ...rrow will appear under the universe number which is used to navigate between decimal values with the UP or DOWN buttons Pressing the OK button will make the arrow blink indicating that editing is enabled Press UP or DOWN to change the value When desired value is selected press OK to stop the blinking arrow and repeat for other decimal values When the desired Universe value is set highlight the Sav...

Page 18: ...iority Zero 0 is the lowest priority and 200 is the highest After navigating to the desired Port A B C or D press UP and DOWN buttons to select the Priority submenu and press OK A selection box will display on screen to show the current highlighted navigation which is changed with the UP or DOWN buttons Highlight the current Priority number at the top of the display and press the OK button to set ...

Page 19: ...e home screen PROTOCOL In the Protocol submenu you can select between Art Net or sACN or Art Net sACN lightning protocols In the case of Art Net sACN both protocols remain active After navigating to the Protocol main menu use the UP and DOWN buttons to highlight the Protocol submenu and press OK The asterisk symbol indicates which option is active Press UP or DOWN to navigate between the options a...

Page 20: ... Easy Priority After setting the Easy Priority feature select the back arrow to return to the previous menu ACTION ON SOURCE LOSS In the Source Loss submenu you can determine what action the IQ One Mini will take if the Art Net or sACN source is lost After navigating to the Protocol main menu use the UP and DOWN buttons to highlight the Source Loss submenu and press OK The asterisk symbol indicate...

Page 21: ...submenu and press OK The asterisk symbol indicates which option is active Press UP or DOWN to navigate between the options and OK to select the DMX refresh rate After setting the DMX refresh rate select the back arrow to return to the previous menu UNIVERSE FORMAT The IQ One Mini displays can display the universe value in a variety of formats Choose from the following options DECIMAL HEX BASE 16 o...

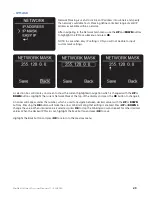
Page 22: ...tons to highlight the IP Address submenu and press OK A selection box will display on screen to show the current highlighted navigation which is changed with the UP or DOWN buttons Highlight the current IP Address at the top of the display and press the OK button to change it An arrow will appear under the IP Address number which is used to navigate between decimal values with the UP or DOWN butto...

Page 23: ...n screen to show the current highlighted navigation which is changed with the UP or DOWN buttons Highlight the current Network Mask at the top of the display and press the OK button to change it An arrow will appear under the number which is used to navigate between decimal values with the UP or DOWN buttons Pressing the OK button will make the arrow blink indicating that editing is enabled Press ...

Page 24: ...studios having independent networks all attached to one console NOTE You will not be able to apply a custom mask if the Easy IP feature is enabled After navigating to the Network main menu use the UP and DOWN buttons to highlight the Easy IP submenu and press OK The asterisk symbol indicates which option is active Press UP or DOWN to navigate between the options and OK to enable or disable the Eas...

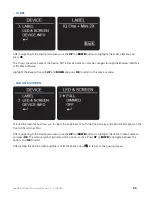
Page 25: ...d DOWN and press OK to return to the previous menu LED AND SCREEN The LED Screen menu allows you to select the brightness of both the OLED display and LED indicator lights on the front of the IQ One Mini After navigating to the Device main menu use the UP and DOWN buttons to highlight the LED Screen submenu and press OK The asterisk symbol indicates which option is active Press UP or DOWN to navig...

Page 26: ...firmware for the IQ One Mini and access change log notes for all our products Highlight the Back button with UP and DOWN and press OK to return to the previous menu CONFIG The IQ One Mini has two internal memory locations for user configurations If changes are mistakenly applied to any settings it is easy to revert to a saved configuration In the Main Menu press UP and DOWN buttons to navigate to ...

Page 27: ...NFIGURATION After navigating to the desired User Configuration slot use the UP and DOWN buttons to highlight the Record submenu and press OK A selection box will display on screen to verify the recording action Using the UP or DOWN buttons highlight the either YES or NO and press the OK button to confirm If YES is selected all current Network and Port settings will be saved to internal memory loca...

Page 28: ... YES is selected the recorded memory of all Network and Port settings will be applied to the IQ One Mini overwriting the current configuration After selection the screen will return to the previous menu RESET DEFAULT PORT SETTING After navigating to the Config main menu use the UP and DOWN buttons to highlight the Default Ports submenu and press OK A selection box will display on screen to verify ...

Page 29: ...OWN buttons highlight the either YES or NO and press the OK button to confirm After selection the screen will return to the previous menu FACTORY RESET After navigating to the Config main menu use the UP and DOWN buttons to highlight the Reset All submenu and press OK A selection box will display on screen to verify the reset action Using the UP or DOWN buttons highlight the either YES or NO and p...

Page 30: ...address into the internet address bar Press enter to open the Browser Interface When first accessing the Browser Interface you will see the Navigation Menu On the left side of the screen These menu options will help you manage the various settings within the unit The right side of the screen displays information from the currently chosen menu and will change depending on the menu selection ...

Page 31: ... NODE NAME Change the name of the node to a desired name The value in this field is directly editable and can be used to differentiate Nodes by area or placement e g Truss 1 FOH 2 or Server Room East IP ADDRESS Change the IP Address to a desired address The value in this field is directly editable Note IQs that require a firmware update must be in the same subnet as ProPlex Software MASK Commonly ...

Page 32: ...splayed according to the Universe Number format If the number entered is in a different format than the selected format the entered number will be converted to the selected Universe Number format e g Node is in Alpha Numeric mode and 17 typed the field will show P PORT RDM Turn RDM ON or OFF by port enabled by a checkbox on the screen Port Indicator LEDs will change color depending on RDM status P...

Page 33: ...full one console can take over control of a universe from another without any form of complex HTP LTP merging in the system EASY PRIORITY is enabled with a dropdown menu ACTION ON SOURCE LOSS Determines what will happen if the IQ One Mini loses its source of Art Net or sACN Action is selected with a dropdown menu and any timing is specified with the entry field HOLD OUTPUT holds the last DMX value...

Page 34: ...tion file in the text box and select Set Name DEFAULTS Clear all settings in the IQ One Mini PORT DEFAULTS Reset all DMX port related settings PROTOCOL DEFAULTS Reset all protocol related settings sACN Art Net settings RESET ALL SETTINGS Factory default reset and restart the system DOWNLOAD CONFIG FILE Allows you to download the current node configuration to your computer for backup purposes UPLOA...

Page 35: ...ng in the powerCON connector Hold for 3 seconds until the device screen indicates you have entered the Bootloader Mode Using the IP address displayed on the screen type it into the internet address bar of your browser and press enter You will be directed to the Firmware Upgrade page Click the Browse button and find the destination where the bin firmware file is saved The firmware upgrade screen wi...

Page 36: ...0 36 PROPLEX SOFTWARE ProPlex Software v2 includes a full suite of configuration and monitoring features and simplifies managing multiple nodes on a network The software is available for free on our website Visit www tmb com for more information ...

Page 37: ...ProPlex IQ One Mini User Manual v1 1 30112020 37 FRONT PANEL LED INDICATORS PORT STATUS The IQ One Mini has multicolor activity LEDs for each output port on the front of the unit ...

Page 38: ...ProPlex IQ One Mini User Manual v1 1 30112020 38 REAR PANEL LED INDICATORS NETWORK STATUS ...

Page 39: ...e Network Protocol Art Net sACN E1 31 Art Net sACN Universes 4 Universes RDM Support Yes DMX Isolation Optical up to 1000V Power Input 100 240 VAC 50 60 Hz Power Consumption 10W Power Connector Neutrik powerCON Cooilng Convection Operating Temperature 4º to 104º F 20º to 40º C Unit Dimensions WxHxD 7 48 x 3 63 x 8 75 in 190 x 92 3 x 222 3 mm Shipping Dimensions WxHxD 9 75 x 4 75 x 13 75 in 247 65 ...

Page 40: ...A prior to shipping the unit Be prepared to provide the model number serial number and a brief description of the cause for the return Be sure to properly pack the unit any shipping damage resulting from inadequate packaging is the customer s responsibility TMB reserves the right to use its own discretion to repair or replace product s Proper UPS packing or double boxing will better ensure product...

Page 41: ... 9739 Toll Free 0800 652 5418 techsupport tmb com LOS ANGELES 1 818 899 8818 LONDON 44 0 20 8574 9700 NEW YORK 1 201 896 8600 BEIJING 86 10 8492 1587 CANADA 1 519 538 0888 A full service company providing technical support customer service and follow up Providing products and services for the industrial entertainment installation defense broadcast research telecommunications and signage industries...

Page 42: ...ProPlex IQ One Mini User Manual v1 1 30112020 42 T H I S P A G E I N T E N T I O N A L Y B L A N K ...

Reviews: