

Device Overview
3
6
2
5
1
4
1
1
2
Left / Right Buttons
3
4
Jack 1 / Jack 2
5
LED Indicator
6
Universal Mount
LED Indicator
LED Activity
Status
ANT Active
3 Flashes Red
1 Flash Blue
BLE Connected
Pairing
Cycle Computer (Private ANT)
3
Kommander may appear as a Shift, Remote, or
groupset depending on the cycle computer.
BLE
The device must be paired to the system as a BLE
keyboard in order to control applications. These are
generic instructions, actual devices may differ.
1
Press any button to wake the device. The indicator
will flash red 3 times indicating starting in ANT mode.
2
On the connecting device (computer or other) search
for BLE keyboard.
3
Connect to 'Skommander'
The device must be paired to the cycle computer before
it can control functions.
NOTE:
Ant mode turns off if BLE is connected. It
assumes you're indoors and wish to control a BLE
device.
1
Press any button to wake the device. The indicator
will flash red 3 times indicating starting in ANT mode.
2
Initiate a search for new sensors
4
Once connected, Kommander will transmit its
capabilities. Some cycle computers may ask you to
configure the buttons while others have set
functions.
A rubber o-ring is included for round, ovalized and alternative
mounting such as under a stem while using remote buttons
attached to the jacks, or TT/Triathlon configurations.
Soft Mount Installation
Select the location for the remote and hold remote against
the bar.
1
Hook the bottom of the o-ring onto the lower device
mounting tab.
2
While holding the device in place, apply tension to the
o-ring while wrapping it around the bar and hook the
second end over the other mounting tab.
3
1
2
2
1
© 2021 Titan Lab Inc
Version 1.00 Feb 2021
T
Kommander Instructions
1
2
3
4
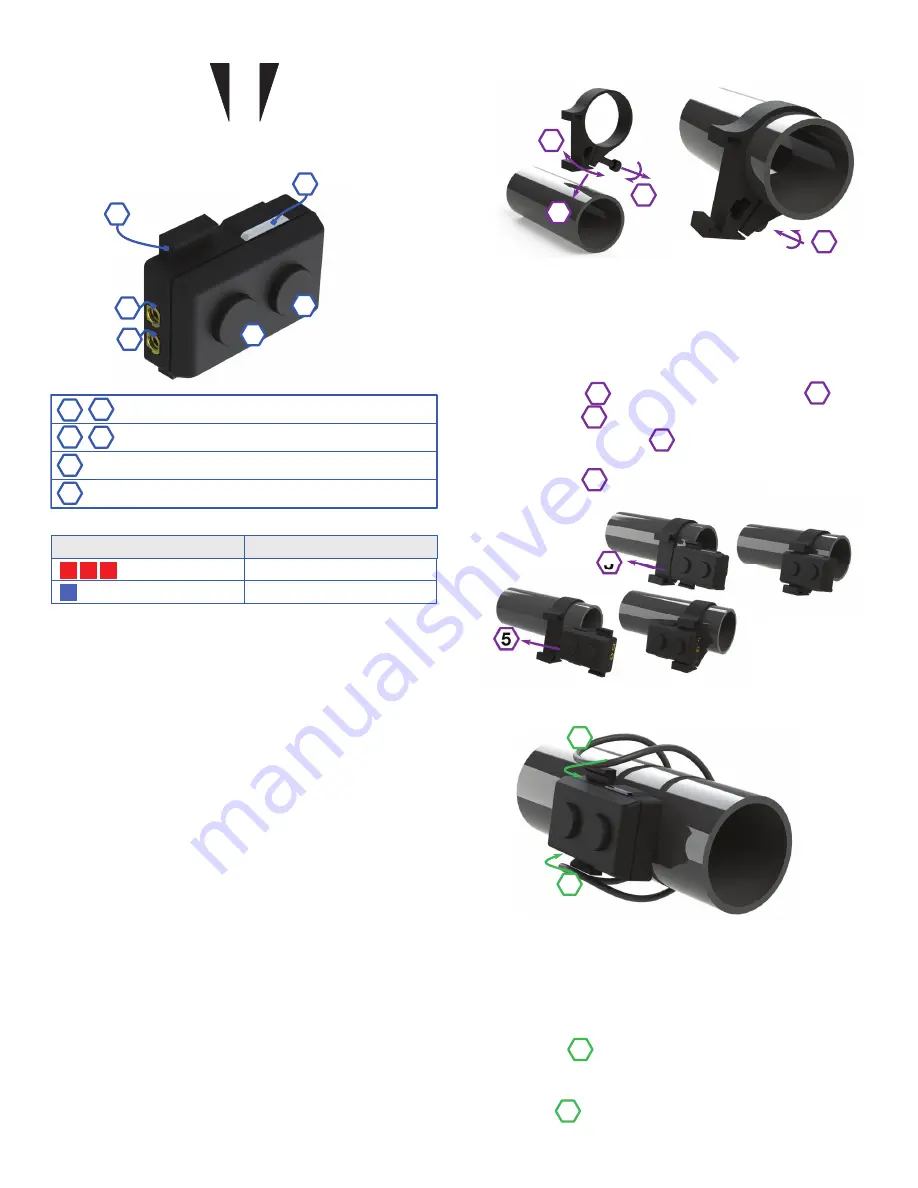
Hard Mount Installation
Two hardmounts are included. One for 31.8mm and one for
26.2mm round handlebars. Both can be installed in the same
manner.
1
2
3
4
Insert and tighten the bolt such that the mount cannot
move.
4
Push the mount over the handlebar and position
3
Remove the bolt and stretch open the mount
2
Select the location for the remote. The suggested location
is to the right of the stem far enough from the stem to
allow access to the jacks for accessories
1
5
Normal
Reversed
5
Slide the device into the mount from the right side.
5
*LED not visible in
reverse mounting


