background image

Operating instructions

for Shukuma Motion Controller

Getting started with the SMC

This document describes the means of interacting with the controller through the user interface, and how to use the main 

controller.

Included with your SMC:

• controller

• power cable

• camera cable

• velcro

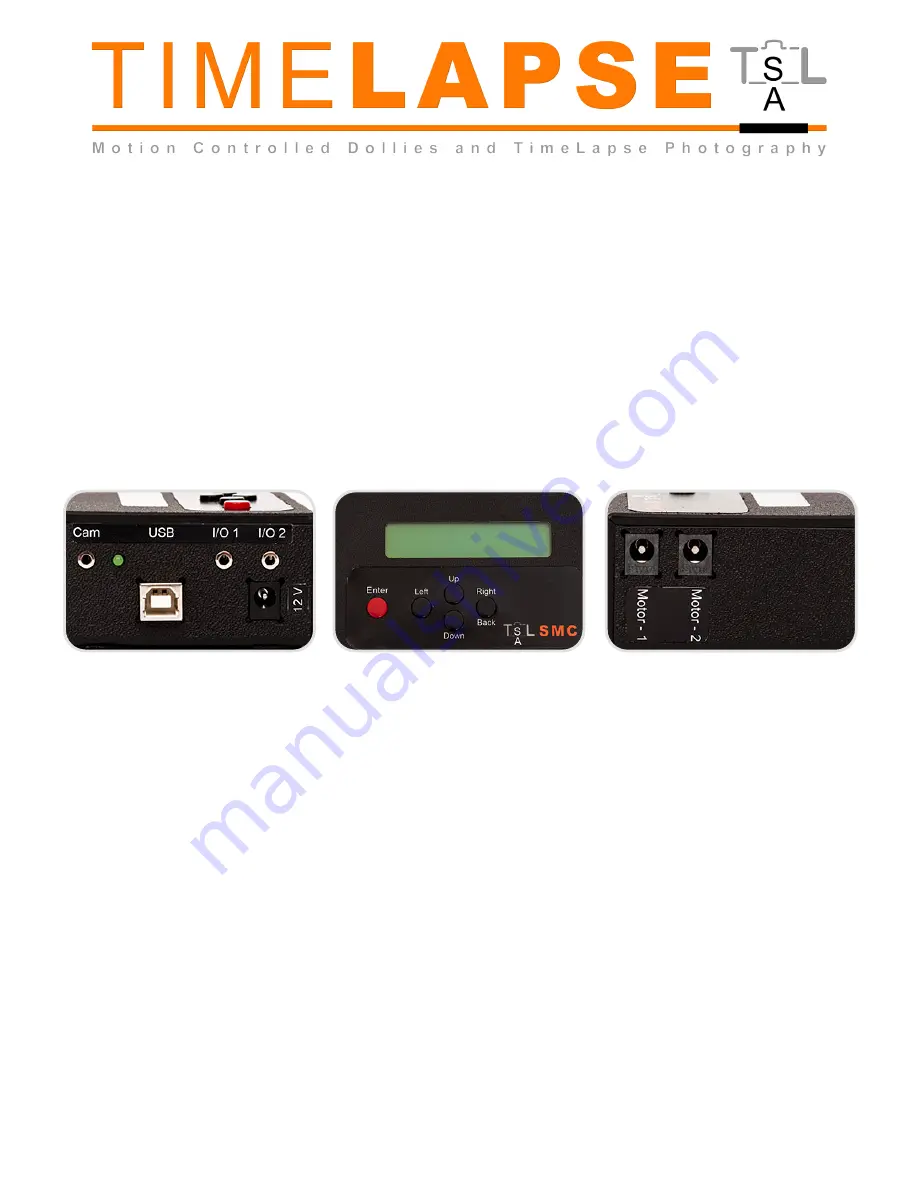
Buttons There are five pushbuttons.  Each button is multifunctional.

The four black buttons are “LEFT”, “RIGHT”, “UP” and “DOWN” while the red button to the lower left is the “ENTER” 

button.

ENTER: 

• Brings up the main menu, or selects a menu item.

• Saves the current value being edited

• Exits manual motor control 

UP: 

• Selects the menu item directly above

• Increases the value of the currently selected item

• Increases motor speed (manual motor control) 

DOWN: 

• Selects the menu item directly below

• Decreases the value of the currently selected item

• Decreases motor speed (manual motor control) 

LEFT: 

• Moves input selection left (main screen only)

• Moves current motor left (manual motor control) 

RIGHT: 

• Moves input selection right (main screen only)

• Cancels value input (when changing the value of a selected item)

• Moves current motor right (manual motor control) 

www.timelapsesa.co.za   |   info@timelapsesa.co.za   |   +27 82 331 4438             1

Summary of Contents for Shukuma

Page 1: ...menu or selects a menu item Saves the current value being edited Exits manual motor control UP Selects the menu item directly above Increases the value of the currently selected item Increases motor s...

Page 2: ...d also allows for quick modification of key operating parameters This screen has the following layout On the first line we have the current status On or Off the intervalometer timing 3s and a count of...

Page 3: ...p 09 2 10 Min Pulse Heavy loads or weak motors p 09 2 b Axis 2 Fine tune adjustments on the motor for motor port 2 2 1 Ramp Shots ramp in out of shots p 09 2 2 Lead In of shots before move starts p 0...

Page 4: ...on targets p 17 4 12 Cal Spd hi Setting the calibration targets p 17 4 13 Alt Out Pre ms Using SMC to control other devices p 18 4 14 Alt Out Post ms Using SMC to control other devices p 18 4 15 USB T...

Page 5: ...XIS 1 2 1 Ramping or feathering into moves The SMC motion controller can feather or ramp into and out of moves causing moves to start slowly and get faster within the video providing a nice accelerati...

Page 6: ...e its own lead in and lead out times defined however to function a ramp value must be set for that axis as well Leads are executed through the ramping feathering function of the controller by simply p...

Page 7: ...N to select Axis x and press ENTER 3 DOWN to select Angle and press ENTER 4 UP or DOWN and choose between 0 45 and 90 5 ENTER to save or RIGHT to abort without saving 2 6 Calibrating the controller Th...

Page 8: ...TER 4 UP or DOWN and choose between 0 45 and 90 degree calibration modes 5 ENTER to start the calibration process or RIGHT to exit without calibrating 6 After the move is completed use UP or DOWN to i...

Page 9: ...ENTER 4 UP or DOWN to input the correct pitch circumference in inches for your output gear 5 ENTER to save or RIGHT to exit without saving 2 10 Adjust minimum pulse for heavy loads or weak motors If y...

Page 10: ...Menu 1 ENTER to enter the main menu 2 DOWN to select Camera and press ENTER 3 DOWN to select Interval and press ENTER 4 UP or DOWN to alter the value 5 ENTER to save or RIGHT to abort 3 2 Limiting th...

Page 11: ...in the SMC unless it exceeds your configured interval time However for interleaved or shoot move shoot motion control it is essential to dial in the correct exposure time to prevent motor movement dur...

Page 12: ...WN to select Camera and press ENTER 3 DOWN to select Focus Tap and press ENTER 4 UP or DOWN to alter the value 5 ENTER to save or RIGHT to abort 3 6 Cameras that require focus with shutter many Nikons...

Page 13: ...commend to use percentage Displaying in Relative Speeds Percentage When displaying in relative speeds the main screen will show a floating point number and the symbol on the speed value for the given...

Page 14: ...at full speed for a brief period of time usually on the order of milliseconds and then in all continuous motion modes you are able to choose from any one of 255 different speeds from completely stoppe...

Page 15: ...mode and run an axis below the defined slow speed threshold the backlight dimmer will not work until the SMC is re started When you have engaged in continuous motion at a speed under the slow speed th...

Page 16: ...puts each input port may instead be converted to outputs to trigger external devices like relays lights etc As with inputs the behavior of triggering an output is to connect the given output to the co...

Page 17: ...anges clean Resetting the permanent memory requires a restart of the SMC controller and it may take longer than normal to restart the first time after resetting the memory You should always reset the...

Page 18: ...ccept a 5V trigger input Setting Output Trigger Signals There are two timers you can set for the output signals length of time to trigger before an exposure and length of time to trigger after an expo...

Page 19: ...s Merlin Running on USB Power Alone If you wish to only control the Merlin and your camera with the SMC and not control other DC motors via the motor ports you may power the SMC off of five volts via...

Page 20: ...cus enabled or disabled Obviously if the auto focus is disabled on the camera body this setting will have no effect but with auto focus off it can be thought of as the padding after the motor moves an...

Reviews: