19
18
19
18
English
5
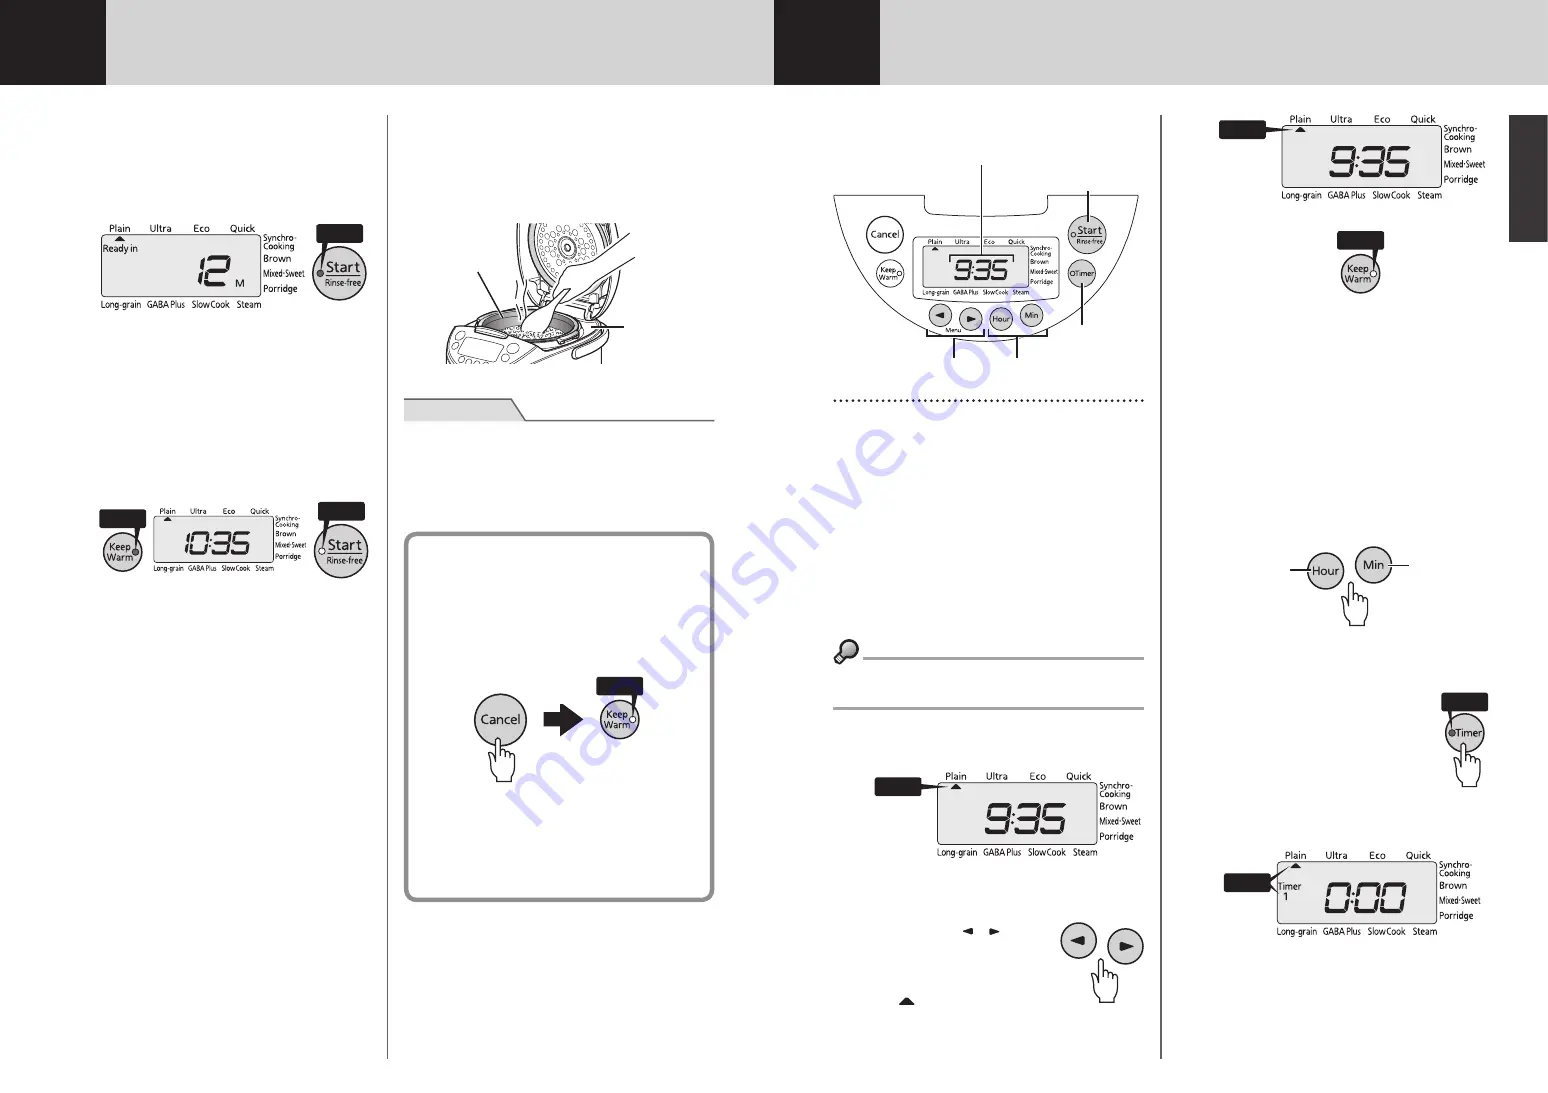
Once the Rice Is Done Cooking
Once the final steaming process
begins, the remaining time will
be displayed.
The time until steaming is completed will be
shown on the display in 1-minute increments.
On
• Steaming times will vary depending upon the
selected menu.
Once the rice is fully cooked,
the Keep Warm function will
automatically engage (the Start
lamp will turn off).
The Keep Warm lamp will turn on and an
alarm (8 beeps) will sound.
On
Off
• If you added ingredients under the “Porridge”
menu, or a longer cooking time is required,
etc., you can set the desired additional
cooking time. Simply press the [Hour] and
[Min] keys once the Keep Warm lamp turns
on, and then press the [Start/Rinse-free]
key. The cooking time can be extended up
to 15 minutes in increments of 1 minute, a
maximum of 3 times.
• Stir the rice well before reheating.
1
Stir and loosen the cooked rice.
Be sure to stir and loosen the rice as soon as
cooking is complete.
• Due to the shape of the inner pot, the rice is
slightly sunken at the center when cooking is
finished.
Condensation
will collect
in the upper
casing.
Inner pot
Note
●
Be sure to wipe off any hot water that collects on
the upper casing or that runs onto the outside of
the rice cooker when you open the lid immediately
after cooking or while the Keep Warm function is
on.
When you are done using the
rice cooker...
1
Press the [Cancel] key to turn off the
Keep Warm function.
The Keep Warm lamp will turn off.
Off
2
Disconnect the power plug from the
outlet.
3
Clean the rice cooker. (See p.31 to
36.)
6
Setting the Timer
When cooking
rinse-free rice,
press the key twice.
1
2
3, 5
6
4
Using the Timer function (Timer 1 /
Timer 2)
You can preset the time that you want cooking
to be actually completed.
• Select either “Timer 1” or “Timer 2” and set the
desired completion time. The start of cooking will
be automatically adjusted so that the operation is
completed at the preset time.
• Each timer can be set to different times. e.g.
“Timer 1” for breakfast and “Timer 2” for dinner.
• The preset timer settings will be stored in
memory.
●
Example setting: If “Timer 1” is set to 13:30,
cooking will be completed at 13:30.
1
Check the present time.
Blinks
• See p.43 for the procedure to set the
present time.
2
Press the [ ] [ ] key
to select the desired
menu.
The symbol will blink
while the menu is being selected.
Blinks
•
Confirm that the Keep Warm lamp is off.
Off
• It is not necessary to press the [Menu] key if
the desired menu is already selected.
3
If you selected the “Porridge”
menu, use the [Hour] and [Min]
keys to set the desired cooking
time.
• Each time the [Hour] key is pressed, the
set time will increase by 5 minutes. Each
time the [Min] key is pressed, that time will
decrease by 5 minutes.
• The cooking time can be set to any 5-minute
increment between 40 and 90 minutes.
Increases
by 5 min.
Decreases
by 5 min.
• The default setting is for 60 minutes. Adjust
as desired.
4
Press the [Timer] key to
select either “Timer 1”
or “Timer 2”.
The selected setting will switch back
and forth between “Timer 1” and
“Timer 2” each time the [Timer] key is pressed.
Both the Timer lamp and the displayed “Timer
1” or “Timer 2” will blink.
Blinks
• The previously preset time will be displayed.
It is not necessary to set the timer again if the
desired completion time is already displayed.
Blinks
Summary of Contents for JKT-S10A
Page 26: ...47 46 30cm 30cm COOKBOOK 7A 1 2 3 1 2 3 1...
Page 27: ...49 48 IH IH...
Page 39: ...73 72 1 2 Note 1 2 Note 320 Note Note...
Page 40: ...75 74 75 74 Note Note 1 7 8 Plain Start Rinse free Cancel Note 20g 2 3 1 1 Note 2 2 1 3 1 2 3...
Page 45: ...TIGER CORPORATION Head Office 3 1 Hayamicho Kadoma City Osaka 571 8571 Japan...


