ASSEMBLY INSTRUCTIONS
CANSOLIDATOR
®
If you have damaged
or missing parts,
please contact us
by phone or email.
CONTACT
US FIRST!
Thrive Life
™
|
691 South Auto Mall Drive
American Fork, UT 84003
| 877-743-5373 | [email protected]
Copyright © Thrive Life, 2013. All Rights Reserved.
Assembly Instructions
CANSOLIDATOR
®
ADJUSTING FOR CAN WIDTH
CONFIGURATION
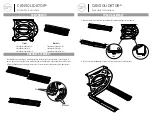
1.
Before attaching the next track, hold it slightly above
the bracket with your first can in between both tracks.
Then, using the numbers on the bracket, determine the
appropriate width between tracks to accommodate the
can (leave about
⅛
" on each side of the can so that it
doesn’t bind in the track). Now press the track down-
ward into the bracket. Continue this process with each
track to achieve the desired width for all tracks.
2.
Finally, using the numbers on the top and bottom side
of the bracket, attach the remaining 2 bracket sets to
the top of the CanSolidator in the corresponding bracket
holes. Attach the front bracket right side up (same as
lower brackets) and the rear bracket upside down. When
this is complete, the CanSolidator is ready to be filled
with cans.
Note:
To conserve space above your Cansolidator, you may
turn the top front bracket upside down if you are not storing
larger fruit/pie filling cans and you are not building
additional CanSolidator levels on top.
Stack’em
—The CanSolidator is designed to be stackable. Simply insert more tracks into the top brackets
of your existing CanSolidator and up you go!
Note
:
Do not stack your CanSolidator more than 4 levels high.
Expand’em—
You can easily expand your CanSolidator as
wide as you’d like. Just connect more brackets end to end,
insert tracks, and away you go!
NEED MORE PARTS?
Contact us at (877) 743-5373 or www.thrivelife.com

