


K-Cube
™ Liquid Crystal Controller
Chapter 3: Getting Started
Rev A, September 11, 2020
Page 7
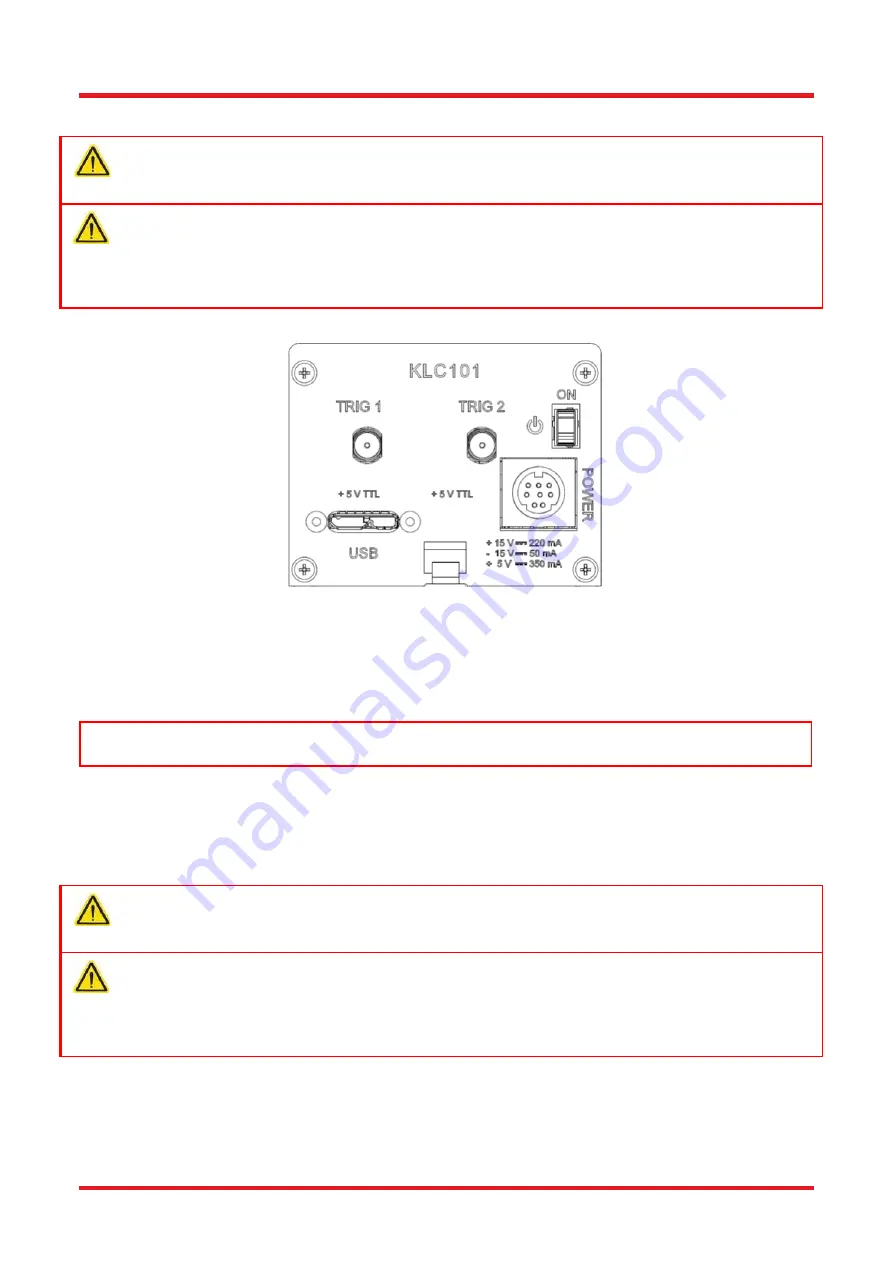
3.3.3. Front Panel
Warning
The unit must be connected only to a DC supply as detailed in Section 3.3. Connection to a supply of a
different rating may cause damage to the unit and could result in injury to the operator.
Caution
Ensure the power switch on the front panel of the unit is switched off before connecting power to the K-
Cube. Always power up the K-Cube unit by its ON switch. DO NOT connect the K-Cube unit to a 'live'
external power supply. Doing so (i.e. “hot plugging”) carries the risk of PERMANENT damage to the unit.
Similarly, to power down the unit, turn the power switch off before disconnecting the power supply.
Figure 6
Front Panel
POWER
- Eight pin connector for connecting the unit to a regulated DC power supply of the rating detailed in
Section 3.3.2.
USB
- USB port for system communications..
Note
The USB cable length should be no more than 3 meters unless a powered USB hub is being used.
ON
- Power ON/Standby switch.
TRIG 1 and TRIG 2
- SMA connectors for use with external trigger input and output signals (5 V TTL levels).
The function is set to trigger IN or OUT via the settings panel.
3.3.4. Connecting to a Power Supply
Warning
The unit must be connected only to a DC supply as detailed in Section 3.3. Connection to a supply of a
different rating may cause damage to the unit and could result in injury to the operator.
Caution
Ensure the power switch on the front panel of the unit is switched off before connecting power to the K-
Cube. Always power up the K-Cube unit by its ON switch. DO NOT connect the K-Cube unit to a 'live'
external power supply. Doing so (
i.e. “hot plugging”) carries the risk of PERMANENT damage to the unit.
Similarly, to power down the unit, turn the power switch off before disconnecting the power supply.
1)
Using the front panel connector as shown above, connect the unit to a regulated DC power supply of the
rating detailed in Section 3.3.
2)
Switch on the Power Supply unit, then switch on the KLC101.
3)
The version number of the embedded software is displayed for a few seconds.
Summary of Contents for K-Cube KLC101
Page 1: ...KLC101 K Cube Liquid Crystal Controller User Guide ...
Page 2: ...K Cube Liquid Crystal Controller ...
Page 5: ......
Page 28: ...www thorlabs com ...


