14 | Installing Independent Sensors
DeviceLink Connect
Installing Independent Sensors
Smart Sensor Assembly (RTD and Current Transducer)
PT100 (Temperature RTD) sensors and current transducers require the use of an intermediate connection cable called a Smart-
Cable. Each Smart-Cable connects to the DeviceLink Connect via one of the four available USB ports. The following
information describes the connection and wire removal process for Smart-Cables.
Wire Insertion
1. The wires can be pushed in by hand. Place the wire fully
into the circular Wire Hole. The wire should easily insert to
a depth of about 7/16 of an inch.
2. Pull lightly on the wire to ensure that the wire is being
retained by the terminal block.
Wire Removal
1. Insert the micro-screwdriver into the rectangular Insert/
Release slot for the wire that you want to remove.
Inserting the micro-screwdriver into the slot requires
some additional downward pressure to actually open the
wire clamp that retains the conductor. You will notice that
the tool will bottom out when initially inserted; then with a
small amount of additional applied pressure, penetrate
into the slot an additional 10%. This additional
penetration will open a clamp allowing for the easy
removal of the conductor.
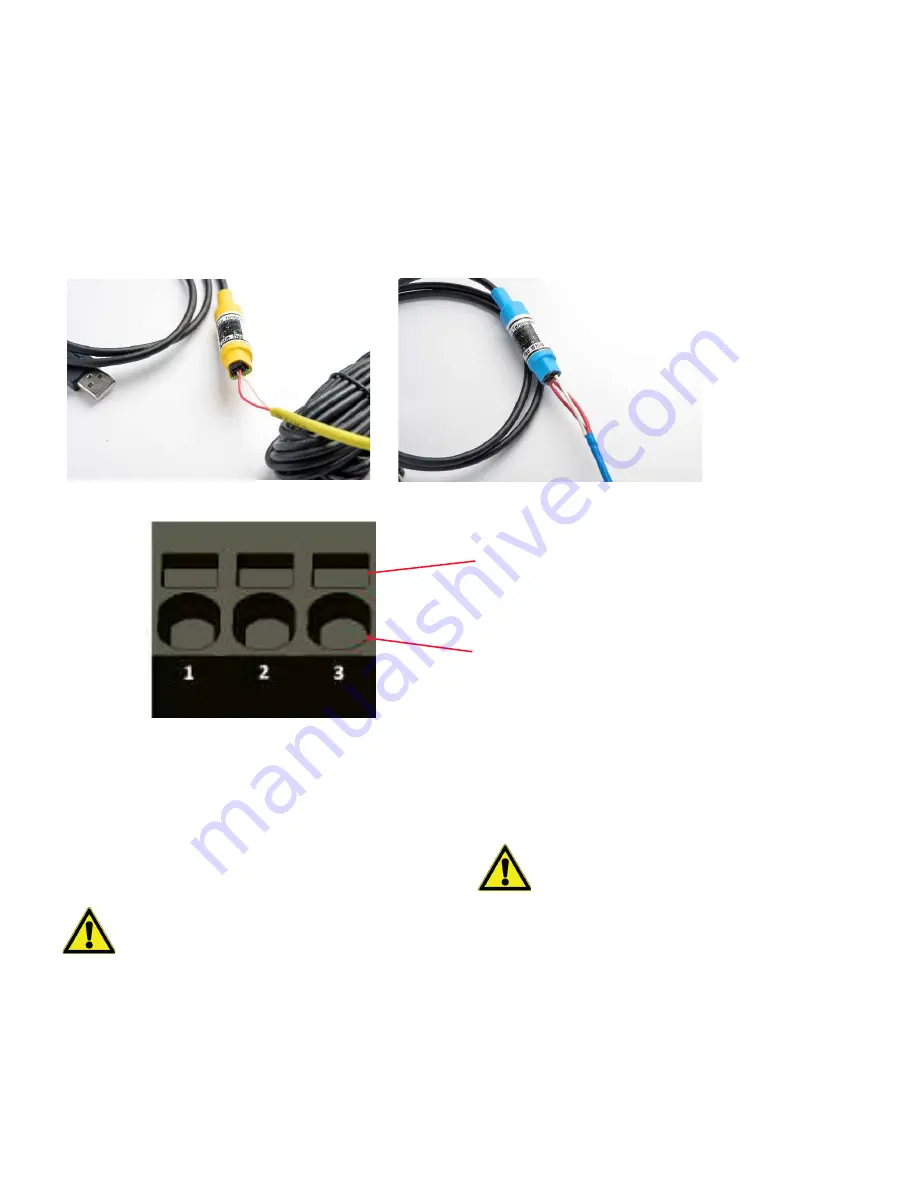
Figure 16. Yellow: 2-wire CT sensor
Figure 17. Blue: 3-wire PT100 RTD sensor
Figure 18. Smart-Cable terminal block (RTD shown)
Insert/Release Slot
Wire Hole
CAUTION:
If inserting stranded wire, ensure that
all the strands are fully inserted into the hole and
not allowed to float free. Loose strands could
easily short to adjacent conductors.
CAUTION:
The Insert/Release slot can be easily
damaged by using too much downward force or
tweaking of the micro-screwdriver.


