


Thermo Scientific
DensityPRO User Manual
B-1
Appendix B
Flashing the Application Firmware
Flash
Application
Firmware
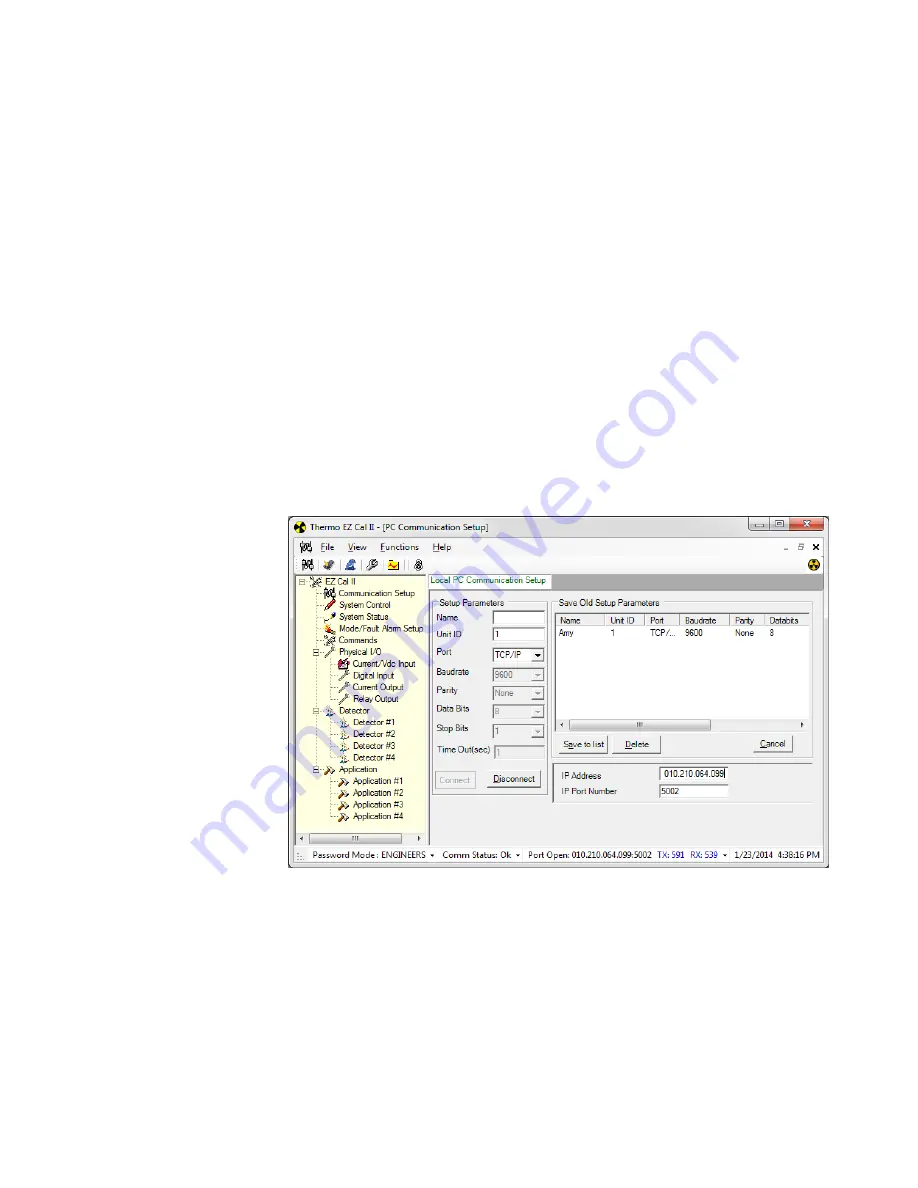
The first time you apply power to the gauge, the screen shown in Figure B-1 should
display. If this screen does not appear, the gauge has been at least partially set up. If
you are unsure about what settings have been entered, or if the gauge has been moved
to a new location, it is recommended that the gauge be reset to the factory defaults and
set up again. To reset all entries in EZ Cal II, including the communication settings, to
the factory defaults, go to Commands
Common Action
Erase all Ram and set
defaults (Cold Start).
If access to this screen is desired at a later time, it may be accessed by selecting PC
Comm Setup from the Functions dropdown menu at the top of the screen, or by
clicking the first icon button, which is circled in Figure B-1.
Figure B-1.
Local PC Communication Setup Screen
Summary of Contents for DensityPRO NAI Series
Page 2: ......
Page 4: ......
Page 6: ...This page intentionally left blank ...
Page 8: ...This page intentionally left blank ...
Page 14: ...xiv DensityPRO User Manual Thermo Scientific This page intentionally left blank ...
Page 134: ......
Page 158: ......
Page 195: ......


