This feature is useful in secondary analysis software applications that organize
files based on amplicon and specimen information (Connect cloud-based
platform applications: Variant Analysis (VA) module, Next-generation
Confirmation (NGC) module; desktop applications: SeqScape
™
Software,
Variant Reporter
™
Software, Minor Variant Finder Software).
6.
Click Next.
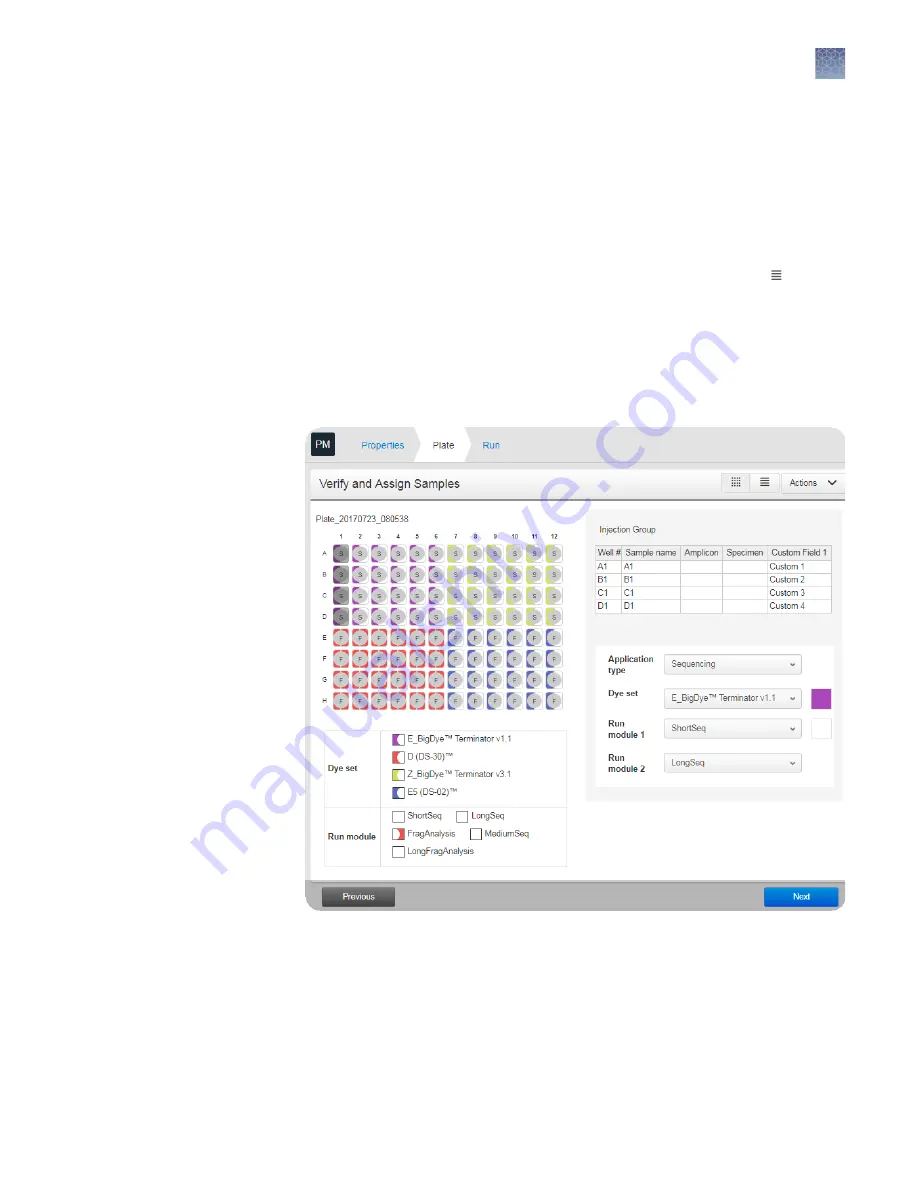
This procedure describes using the Plate view. Alternatively, you can click and use
keyboard short-cuts to enter information. See “Keyboard shortcuts for the sample
1.
In the Plate screen, select one or more injection groups: Click a well to select one
injection group; shift+click or click+drag to select multiple injection groups.
Each set of 4 wells on the plate is referred to as an injection group.
The default injection order is: A1-D1, E1-H1, A2-D2, E2-H2....A12-D12, E12-H12.
2.
If you are creating a mixed plate, select the Application type for the selected
injection groups.
3.
(Optional) Edit the default Sample name (well) for each well.
Note:
If multiple injection groups are selected when you edit the Sample name
or Sample type, both wells with the same capillary number are edited. For
example, if injection groups A1–D1 and E1–H1 are selected, and you change the
Assign wells:
Sample and run
information
Chapter 5
Create or modify a plate setup from the Plate Manager
Set up a plate using default settings (Plate Manager)
5
SeqStudio
™
Genetic Analyzer Instrument and Software User Guide
71


