d.
Touch a custom dye, then touch Export.
e.
Select a location, then touch Export.
f.
Import the custom dye on another instrument ( Settings
4
Maintenance
and Service
4
Calibration
4
Dye calibration
4
Custom
dye
4
Manage
4
Import).
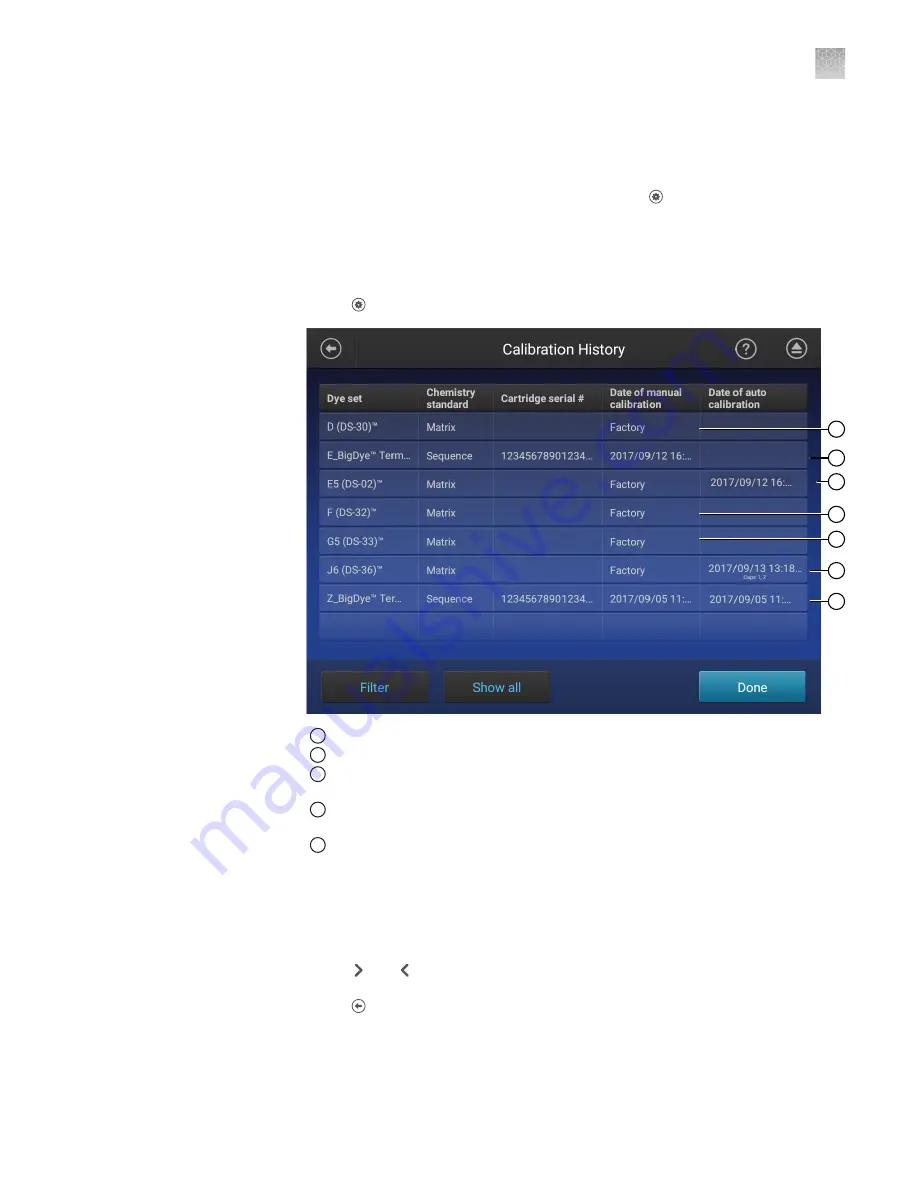
In the home screen:
1.
Touch Settings
4
Maintenance and Service
4
Calibration history.
2
4
3
1
1
5
1
1
Factory calibration (default calibration that is not optimized for the instrument).
2
Manual dye calibration performed by a user.
3
Factory calibration that has been optimized by auto calibration and does not require
manual calibration.
4
Automatic adjustment of the baseline calibration to optimally reduce pull
‑
up (false
secondary peaks under a true peak).
5
A manual dye calibration and an auto dye calibration have been performed.
2.
Touch a dye set.
A thumbnail of each capillary calibration spectrum is displayed, with the q, and c
values (see “Spectral Quality Value“ on page 196 and “Condition number“ on
3.
Touch and to view a full-screen calibration spectrum for each capillary.
4.
Touch to return to the list of dye sets on the Calibration History screen.
5.
(Optional) Touch Filter to narrow the dye set list down by dye sets.
a.
Select or deselect the dyes listed.
View the dye
calibration history
Appendix C
Dye calibration and install standard checks
Calibrate dyes
C
SeqStudio
™
Genetic Analyzer Instrument and Software User Guide
201


