background image


48


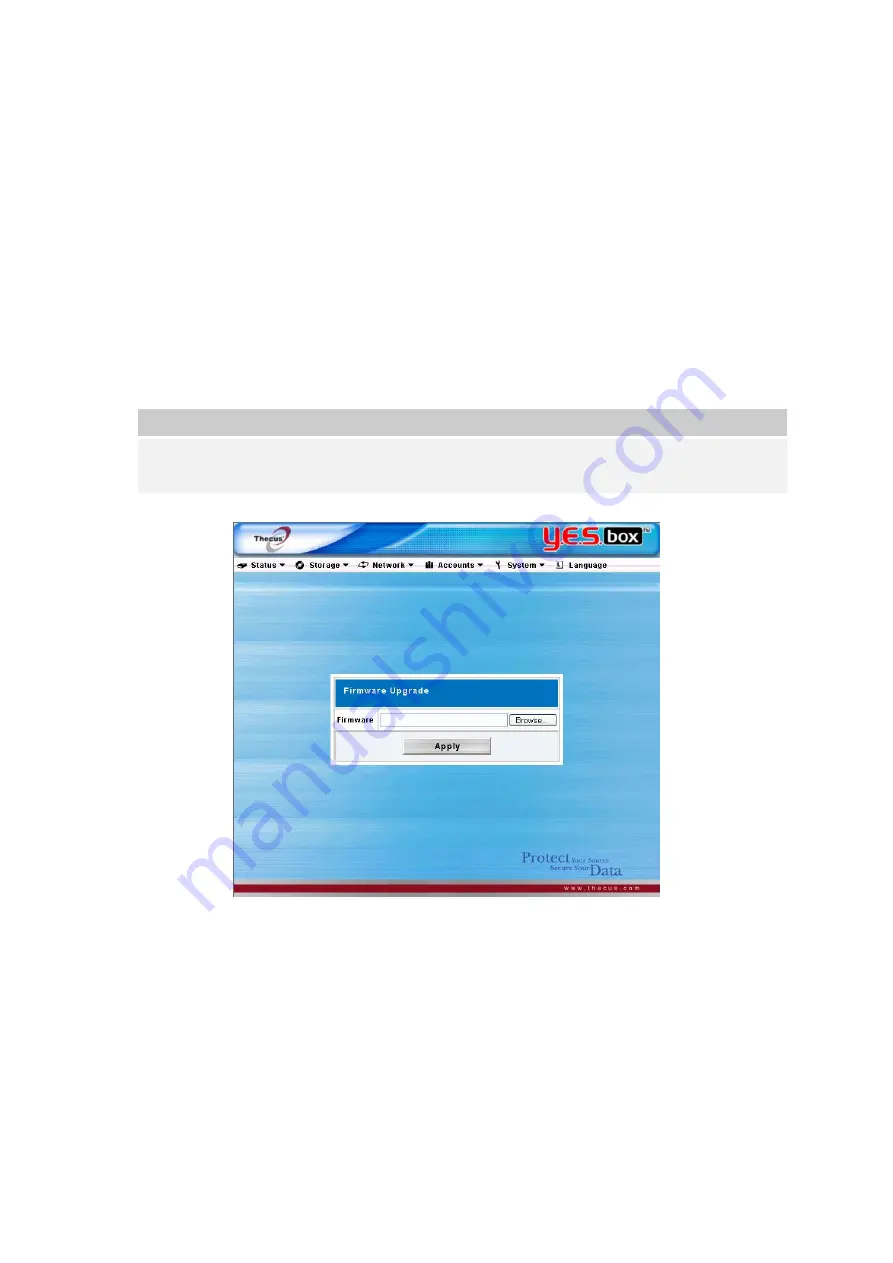
Upgrading System Firmware 


From the 

System

 menu, choose the 

Firmware


Upgrade

 item and the 

Firmware


Upgrade

 screen appears.   


Follow the steps below to upgrade your firmware 

1. Use 

the 

Browse

 button to find the firmware file. 

2. Press 

Apply

3.  The beeper beeps and the system’s Busy LED blinks until the upgrade is 

complete. 


Note:  

The beeper only beeps if it is enabled in the System Notification menu. 

Check Thecus website for the latest firmware release and release notes. 


Change Administrator Password 


From the 

System

 menu, choose the 

Administrator


Password

 item and the 

Change


Administrator


Password

 screen appears. Press 

Apply

 to confirm 

password changes. See the following table for a detailed description of each item. 


New Password 

Type in a new administrator password 

Confirm Password 

Type the new password again to confirm. 

Summary of Contents for Y.E.S. Box N2100

Page 1: ...Y E S Box N2100 Your Enhanced Storage User s Manual...

Page 2: ...our feedback Thecus Technology Corporation reserves the right to modify the contents of this manual without notice Limited Warranty Thecus Technology Corporation guarantees all components of Thecus N2...

Page 3: ...16 Configure RAID Settings 17 Manage Folders 19 USB Storage Expansion 24 Configure Network Settings 25 LAN 1 Configuration 25 LAN 2 Configuration 26 WLAN Configuration optional 28 Configure Network S...

Page 4: ...ckup 69 Mac OS X Backup Utilities 71 Appendix A Troubleshooting Guide 72 Forgotten Network IP Address 72 When RAID status is in Degraded mode 72 File System Check Utility 75 Forgotten Password 77 Erro...

Page 5: ...er data response all at once The YES Box N2100 allows data consolidation and sharing between Windows SMB CIFS UNIX Linux and Apple OS X environments The YES Box N2100 s user friendly web management in...

Page 6: ...green Blinking green Network activity LAN 2 LED green Blinking green Network activity USB LED USB Device Connection Blinking blue 5 seconds USB device connected successfully For universal USB memory c...

Page 7: ...b switch Power Socket Connect the power cord ideally to a surge protector Hard Disk Installation The YES Box N2100 supports up to two Serial ATA SATA hard disks To install hard disks into the YES Box...

Page 8: ...by pulling up the top panel of the YES Box N2100 4 Carefully insert a standard 3 5 SATA hard disk into the cage and secure the hard disk with screws from the included accessory pack Note Disk 1 is at...

Page 9: ...ws from the included accessory pack Note Properly secure the HDDs to the cage to prevent damage to the connectors and help cooling of the disk drives 6 Carefully lower the hard disk tray back into the...

Page 10: ...g properly by checking all front panel LEDs for any error indications The system will beep for one second to notify that it is ready for use Installation Wizard The handy Thecus Setup Wizard makes con...

Page 11: ...click on Setup exe 3 The Setup Wizard will start and automatically detect all YES Box N2100s on your network If none are found please check your connection and refer to the Troubleshooting Guide at t...

Page 12: ...The YES Box N2100 offers FTP Server and iTunes Server options 8 Refer to the following chart and select the hard disk configuration that best suits your usage model RAID 0 Spanning Combine 2 physical...

Page 13: ...r password 10 Finished Access the current YES Box N2100 administrator webpage by pressing the Web Management button You can also configure another YES Box N2100 at this point Setup Options Higher Perf...

Page 14: ...10...

Page 15: ...er s network IP address must be on the same subnet as the YES Box N2100 If the N2100 has default IP address of 192 168 1 100 your managing PC IP address must be 192 168 1 x where x is a number between...

Page 16: ...ure Shows current system processor temperature HDD Temperature Shows current hard disk drive temperature Fan RPM Shows cooling fan speed in revolutions per minute RPM Fan Speed Control Select to contr...

Page 17: ...the System Information screen appears You can change the system information that appears on the Login page by entering the new information here and pressing Apply to confirm System Description Shows...

Page 18: ...ob is sent to a printer printing may suddenly fail If your print jobs seem to be locked up press the Remove All Documents button to clear the print queue may resolve the issue Print Server Setup Windo...

Page 19: ...printer as Default Printer Select Yes and all your print jobs will be submitted to this printer by default Click on Next button 9 Click on Finish button Note Not all USB printers are supported Please...

Page 20: ...w all external USB hard disks that are currently connected to the system Disk No Indicates the hard disk slot location Capacity Shows the hard disk capacity in megabytes Model Displays the hard disk m...

Page 21: ...e RAID Configuration screen appears RAID Level Shows the type of RAID used in the system Total Capacity Shows the total storage capacity after the RAID configuration Status Indicates the status of the...

Page 22: ...te Supports 2 HDDs This option protects against single hard disk failure and provides data redundancy RAID Check the box of the hard disk you wish to add to the storage volume Stripe size This sets th...

Page 23: ...data in the current RAID system The data will not be recoverable Manage Folders From the Storage menu choose Folder and the Folder screen appears This screen allows you to create and configure folder...

Page 24: ...lder screen appears This screen allows you to add a folder After entering the information press Apply to create new folder Folder Name Enter the name of the folder Description Provide a description th...

Page 25: ...s you to change folder information After entering the information press Submit to apply the changes Folder Name Display the name of the current folder Description Change the description of the current...

Page 26: ...ears This screen allows you to configure access to specific folder for the users and groups Select a user or a group from the left hand column and then choose Deny Read Only or Writable to configure t...

Page 27: ...Server USB One Button Copy and USB HDD These special folders are created when the RAID is created To manage these service folders select Service Folder from the Storage menu You may edit these folder...

Page 28: ...ed the entire volume will be copied automatically to the default USB HDD folder The YES Box N2100 supports up to 6 USB external storage devices All file names on the USB disk volume are case sensitive...

Page 29: ...r YES Box N2100 LAN 1 Port LAN 1 IP can be set to a Static IP address or Dynamic IP address Static Administrator has to enter IP Netmask Gateway DNS Server fields Dynamic If there is already a DHCP se...

Page 30: ...he unit for 10 seconds This will reset your network settings password and turn off Jumbo Frame Support LAN 2 Configuration The YES Box N2100 supports a second network connection for higher service ava...

Page 31: ...ton on the back for 10 seconds This will reset your network settings password and turn off Jumbo Frame Support LAN 1 and LAN 2 have to be on different LAN segments e g 192 168 1 x for LAN 1and 192 168...

Page 32: ...te Currently supported mini PCI wireless LAN cards are MSI MS 6833B CNet CWM 854 and Gemtek WMIR 174G Currently supported USB wireless dongles are 3Com 3CRUSB10075 Zyxel G220USB PCI GW US54mini USB do...

Page 33: ...e WEP Key can be set to 64 bit or 128 bit The WEP key may be constructed with these alphanumeric characers 0 9 and A F When length is set to 64 you must enter 10 characters e g 2FAB2CAFE0 When length...

Page 34: ...ed End IP Specifies the end IP address available to be leased DNS Server Displays the Domain Name Service DNS server IP address Note The WLAN will use the DNS server specified on LAN 1 The IP Sharing...

Page 35: ...e WebDisk support Enter the port if this option is enabled SMB CIFS Enable or disable SMB CIFS protocol for Windows Apple Unix drive mapping UPnP Enable or disable Universal Plug and Play protocol UPn...

Page 36: ...the WINS server IP address if your network has a WINS server installed N2100 will automatically register its name and IP address with WINS service Work Group Domain To specify your N2100 as a member...

Page 37: ...nguage as your OS here in order to properly view the files and directories on the server Zone Specifies Zone for Applet Talk service If your AppleTalk network uses extended networks and is assigned wi...

Page 38: ...and password set up in Accounts Users page Access control to each share folder is set up in Storage Folder ACL page When trying to access N2100 YES Box anonymously just enter anonymous as the user nam...

Page 39: ...code Specify tag encoding for MP3 files stored in N2100 All ID3 tags will be send out in UTF 8 format Note The server same can be different from your host name Rescan will interrupt Disk Power Managem...

Page 40: ...stalled the YES Box will reboot After the YES Box is rebooted the Media Server is ready for use Media Server Operation Media Server Enable disable Media Server Service Media Folder Select the folder t...

Page 41: ...standards Please check the UPNP website for more information http www upnp org Digital Living Network Alliance DLNA The Digital Living Network Alliance DLNA formely Digital Home Working Group is an al...

Page 42: ...Add Press the Add button to add a user to the list of local users Modify Press the Modify button to modify a local user Delete Press the Delete button to delete a selected user from the system How to...

Page 43: ...l User Configuration screen 2 Click on Delete button and the user is deleted from the system How to Modify a User 1 Select an existing user from the Local User Configuration screen 2 Click on the Modi...

Page 44: ...ress the Modify button to modify a local group Delete Press the Delete button to delete a selected group from the system How to Add a Group 1 In the Groups screen click on the Add button 2 The Local G...

Page 45: ...n the Groups screen select a group name from the list 2 Press Modify button to modify the members in a group 3 To add a user into a group select the user from the Users List press the button to move t...

Page 46: ...m occurs Email Notification Enable disable email notifications of system problems SMTP Server Specifies the hostname IP address of the SMTP server Port Specifies the port to send outgoing notification...

Page 47: ...runcate All Log File Clear all log files I I Use the forward I and backward I buttons to browse the log pages INFO Provides all log information including warning messages and error messages WARN Shows...

Page 48: ...r See the following table for a detailed description of each item Date Sets the system date Time Sets the system time Time Zone Sets the system time zone NTP Server Select Yes to allow the N2100 to sy...

Page 49: ...Configuration Backup Restore screen appears From here you can download or upload system configurations See the following table for a detailed description of each item Download Save and export current...

Page 50: ...ule into your N2100 Uninstall Click to uninstall module Enable Disable Click to enable disable a module Check Update Click to check for new versions of the module Note Not all the module supports this...

Page 51: ...Default item and the Reset to Factory Default screen appears Press Apply to reset the YES Box N2100 to factory default settings Warning Resetting to factory defaults will not erase the data stored in...

Page 52: ...complete Note The beeper only beeps if it is enabled in the System Notification menu Check Thecus website for the latest firmware release and release notes Change Administrator Password From the Syste...

Page 53: ...the System menu choose Reboot Shutdown item and the Shutdown Reboot System screen appears Press Reboot to restart the system or Shutdown to turn the system off Logout To logout of System Web Manageme...

Page 54: ...Box N2100 web user interface supports multiple languages Choose the Language menu and the Change Language screen appears This screen allows you to select preferred language for the system menu Press A...

Page 55: ...files or access public files on the YES Box N2100 just enter the YES Box s IP address into your browser Manage Files Folders The buttons on the login page are WebDisk Music Gallery and Login buttons T...

Page 56: ...ile name the file will be downloaded Back Move up to the parent folder File Search Search for specific files or folders Sort Arrange all files and folders by type name size or last modified date Delet...

Page 57: ...oad button NOTE This function will appear only if the user has write access to the folder Login Click on the Login button to log into the YES Box N2100 For more information on how to setup user rights...

Page 58: ...parent folder Add Add a new album or photos Edit Edit the name and description of the selected album or photo Each name is limited to 20 characters and each description is limited to 255 characters De...

Page 59: ...he Create Album button Password Protect an Album Select the album to be protected click on the Edit button and the Album Edit screen will appear The owner of the album can enter an album password to p...

Page 60: ...y Click on the Add button to upload pictures into the album The Upload Photos screen will appear Users can select and upload up to 8 pictures at a time Once the picture is uploaded you can view it in...

Page 61: ...cal user to upload pictures into their photo album Users of Windows XP can upload thru Windows XP Publish Wizard 1 Click on the XP Publishing Wizard icon 2 The XP Web Publishing Wizard Client screen a...

Page 62: ...on the Run button 4 Once the Wizard is installed use the Windows file manager to browse the folder that contains the picture you want to publish On the left pane the will be an icon Publish this fold...

Page 63: ...o the Photo Web Server by placing a check mark on the top left hand corner of the picture Click on the Next button 7 You PC will start to connect to the Photo Web Server 8 Select Y E S box Photo Galle...

Page 64: ...60 9 Login into the N2100 with your local username and password 10 The N2100 will then display the welcome page 11 Create your album by entering an album name and click on the Create Album button...

Page 65: ...61 12 Select the album you want to upload your pictures to 13 Confirm the target album 14 Windows will show picture upload in progress...

Page 66: ...the Wizard will ask you whether if you want to go to the website Click on the Finish button to go to your Photo Web Server 16 Click on the user s icon to go to the user s album 17 You will see the us...

Page 67: ...63 18 You will see the pictures just selected in the album EXIF Information Click on the one of the pictures The EXIF information of the picture will be displayed next to the picture...

Page 68: ...64 Slide Show You can click on the Start Slide Show icon on the top right hand corner to start the slide show To stop the slide show click on the Stop Slide Show icon on the top right hand corner...

Page 69: ...ap share folders on the YES Box N2100 so that you can access them through the My Computer folder in Windows You can connect to the shared network folders on the YES Box N2100 as follows 1 Go to the My...

Page 70: ...lder over your network Alternatively you may enter the folder name you wish to connect to or its IP address 6 Click Finish When the Connect As window appears enter a user name and password 7 Click OK...

Page 71: ...en connecting using SMB CIFS protocol type smb 192 168 1 100 Folder1 When connecting using AFP protocol type afp 192 168 1 100 Folder1 Click Connect 3 When MAC OS X is trying to connect N2100 it will...

Page 72: ...will ask you whether to create a DB file Click Yes Note If you can not find Thecus Backup Utility on your CD please download it from the Thecus website 1 Click Add to create a Backup task 2 The Add n...

Page 73: ...orts MAC OS X Just copy the Thecus Backup Utility dmg to your MAC OS X machine and double click to execute it Windows XP Data Backup If you use Windows XP Professional you can also use the Windows Bac...

Page 74: ...t and point to All Programs Accessories System Tools Backup to start the wizard 2 Click Next to skip past the opening page Choose Backup files and settings from the second page and then click Next 3 S...

Page 75: ...ailable for the Mac OS X including iBackup Psyncx iMSafe Rsyncx Folder Synchronizer X Tri BACKUP Impression Intego Personal Backup SilverKeeper and Apple s dotMac Backup utility to name just a few To...

Page 76: ...n use the setup wizard to retrieve the IP of your N2100 1 Start the Setup Wizard and it will automatically detect all Thecus IP storage products on your network 2 You should be able to find the IP add...

Page 77: ...low the steps outlined in Hard Disk Installation 3 Power on the YES Box N2100 and log in as admin 4 Go to Storage RAID page and click on the Config button 5 Check on the check box new disk in the RAID...

Page 78: ...our data is still accessible and intact During RAID rebuild the performance of the system is lower than normal If possible we suggest not using the machine until it is fully rebuilt The time required...

Page 79: ...is time all the file services will be stopped Warning File System Check Utility works only with LAN 1 not LAN 2 1 When you point your browser to 192 168 1 100 you will see the following screen 2 If yo...

Page 80: ...76 3 When the file system check is finished the result will be displayed in your browser NOTE If the file system is corrupted beyond repair you may have to remove RAID and recreate the file system...

Page 81: ...et button during booting process and N2100 s LAN 1 IP address will be set to 192 168 1 100 temporarily At this time all the file services will be stopped 1 When you point your browser to 192 168 1 100...

Page 82: ...f HTTP Port 80 HTTPS port 443 Error Detection There are three ways the system detects an error and lets you know there is a problem 1 The Error LED on the bottom left of the system s front panel glows...

Page 83: ...disk fails then the system will try to mount the disk and you might still be able to access the data in the first disk under read only mode At this time you should try to recover as much data as you c...

Page 84: ...ds b This resets the N2100 to its default IP address and password settings Default IP 192 168 1 100 Default admin password admin 1 The reset button is near the LAN connector 2 Attach the power cord an...

Page 85: ...a hub or a router 5 Check if the Admin login webpage shows up and works fine Then check if the system status is normal and the HDD power LED works fine In case the results are positive it means the N2...

Page 86: ...ss of PC or NB as 192 168 1 111 and then login NAS 2 Power LED glows blue and Busy LED keeps blinking Firmware corrupted MB is bad Y 0 Reset the IP Address and admin password to default setting a Powe...

Page 87: ...urrence A RAID helps prevent against the loss of data due to hard disk failure A RAID offers additional hard disk drives that can avert data loss from a hard disk drive failure If a hard drive fails t...

Page 88: ...ate a system volume The factors for selecting a RAID level are z Your requirements for performance z Your need for data security z Number of hard disk drives in the system z Capacity of hard disk driv...

Page 89: ...volume The system can then use multiple hard drives for faster read and write The stripe size parameter that was set when the RAID was created determines the size of each block No parity calculations...

Page 90: ...m Adapter AC 100 240Volt 50 60Hz System LED Power LED System LED Network LED x 2 Hard drive LED x 2 USB one copy button LED Physical Mechanical Dimensions 160 W mm 85 H mm 200 D cm Function Specificat...

Page 91: ...ser Authentication Local User Supports built in user accounts Windows client program Server management utility program Web based administration Web based server management interface Administration Ema...

Page 92: ...m http www php net z This product includes software developed by the University of California Berkeley and its contributors z This product includes software developed by Winning Strategies Inc z This...

Page 93: ...at no cost HOWEVER this copyright paragraph must appear on a credits page accessible in the public online and offline documentation of the program Modified versions of the CGIC library should not be...

Page 94: ...nt it that you can change the software or use pieces of it in new free programs and that you know you can do these things To protect your rights we need to make restrictions that forbid anyone to deny...

Page 95: ...patents We wish to avoid the danger that redistributors of a free program will individually obtain patent licenses in effect making the program proprietary To prevent this we have made it clear that...

Page 96: ...if its contents constitute a work based on the Program independent of having been made by running the Program Whether that is true depends on what the Program does 1 You may copy and distribute verba...

Page 97: ...om the Program and can be reasonably considered independent and separate works in themselves then this License and its terms do not apply to those sections when you distribute them as separate works B...

Page 98: ...orm with such an offer in accord with Subsection b above The source code for a work means the preferred form of the work for making modifications to it For an executable work complete source code mean...

Page 99: ...the recipient automatically receives a license from the original licensor to copy distribute or modify the Program subject to these terms and conditions You may not impose any further restrictions on...

Page 100: ...tain countries either by patents or by copyrighted interfaces the original copyright holder who places the Program under this License may add an explicit geographical distribution limitation excluding...

Page 101: ...D INCLUDING BUT NOT LIMITED TO THE IMPLIED WARRANTIES OF MERCHANTABILITY AND FITNESS FOR A PARTICULAR PURPOSE THE ENTIRE RISK AS TO THE QUALITY AND PERFORMANCE OF THE PROGRAM IS WITH YOU SHOULD THE PR...

Reviews: