background image

Bedienungsanleitung
Instruction manual
Mode d’emploi
Instrucciones de uso
Gebruiksaanwijzing
Istruzioni per l'uso

Kat. Nr. 30.3054

RoHS

TFA_No. 30.3054_Anleit_08_16  05.08.2016  09:30 Uhr  Seite 1

Summary of Contents for 30.3054

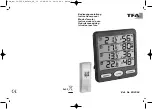
Page 1: ...Bedienungsanleitung Instruction manual Mode d emploi Instrucciones de uso Gebruiksaanwijzing Istruzioni per l uso Kat Nr 30 3054 RoHS TFA_No 30 3054_Anleit_08_16 05 08 2016 09 30 Uhr Seite 1...

Page 2: ...3 2 Fig 1 Fig 2 A 10 A 8 A 9 A 7 A 5 A 3 A 4 A 1 A 2 A 6 B 1 C 2 C 1 B 2 B 3 TFA_No 30 3054_Anleit_08_16 05 08 2016 09 30 Uhr Seite 2...

Page 3: ...aften wir nicht f r inkorrekte Messwerte und Folgen die sich aus solchen ergeben k nnen Beachten Sie besonders die Sicherheitshinweise Bewahren Sie diese Bedienungsanleitung gut auf 2 Lieferumfang Fun...

Page 4: ...te und die Batterien au erhalb der Reichweite von Kindern auf Batterien nicht ins Feuer werfen kurzschlie en auseinander nehmen oder aufladen Explosionsgefahr Batterien enthalten gesundheitssch dliche...

Page 5: ...heit oder C Celsius als Temperaturanzeige auszuw hlen 6 5 Temperatur Tendenzanzeige Die Tendenzpfeile zeigen Ihnen an ob die Temperaturwerte aktuell steigen fallen oder gleich bleiben 6 6 Komfortstufe...

Page 6: ...Sie alle gew nsch ten Alarme eingestellt und aktiviert haben 7 2 Display Anzeige der eingestellten Alarmwerte Dr cken Sie einmal die ALARM SET Taste im Normalmodus um sich die eingestellten Alarm Ober...

Page 7: ...nensensor anzeigen zu lassen Dr cken Sie ein weiteres Mal die ALARM SET Taste um zur Normalansicht zur ckzukehren 7 3 Alarmfall Im Alarmfall blinkt das entsprechende Symbol und ein Alarmton ert nt Bee...

Page 8: ...as Funk Thermo Hygrometer erlaubt dem Anwender die Anzeige der Tem peratur und Luftfeuchtigkeitsmesswerte auf der Basisstation mithilfe einer externen besseren Referenzquelle zu kalibrieren Der Anwend...

Page 9: ...ontrolled transmitters for moni toring up to 4 rooms expandable to 8 transmitters Maximum minimum alarm values Tendency indicators Comfort zones 4 For your safety This product is exclusively intended...

Page 10: ...artment again Caution Risk of injury Keep this instrument and the batteries out of the reach of children Batteries must not be thrown into a fire short circuited taken apart or recharged Risk of explo...

Page 11: ...friendly face RH 45 65 a neutral face RH 45 or sad face RH 65 to indicate the comfort level of the climate To connect more transmitters repeat steps 1 to 5 The correct switch position for the transmit...

Page 12: ...Press the CHANNEL button until the arrow appears on the desired channel Press and hold ALARM SET button for 3 seconds 6 7 Maximum and minimum values Press the MIN MAX button MAX appears on the display...

Page 13: ...display Confirm the setting with the ALARM SET button Repeat the above steps until all alarms are deactivated 8 Positioning and fixing of the basic station and the transmitter With the foldable leg a...

Page 14: ...m Germany 08 16 The temperature display will be flashing Press the CHANNEL or the MIN MAX button to correct the tempera ture value Press the ALARM SET button briefly on the display appears the normal...

Page 15: ...Nous vous remercions d avoir choisi l appareil de la Soci t TFA 1 Avant d utiliser l appareil Veuillez lire attentivement le mode d emploi Vous vous familiariserez ainsi avec votre nouvel appareil vo...

Page 16: ...metteurs 4 8 B Touches Fig 1 B 1 Touche MIN MAX B 1 Touche ALARM SET B 1 Touche CHANNEL C Bo tier Fig 2 C 1 Support d pliable C 2 Compartiment piles D metteur Fig 3 Bo tier avant D 1 Lampe signal de...

Page 17: ...instal l appara t sur l cran Contr lez les piles et effectuez une nouvelle tentative liminez les ventuelles sources de parasitage Vous pouvez activer manuellement la r ception Appuyez sur la touche C...

Page 18: ...ues la port e d mission peut se trouver r duite consid rablement Si n cessaire cherchez de nouveaux emplacements pour l metteur et ou pour la station de base Maintenez la touche ALARM SET appuy e apr...

Page 19: ...t des d chets Ce produit a t fabriqu avec des mat riaux de construction de haute qualit qui peuvent tre recycl s et r utilis s Les piles et accus usag s ne peuvent en aucun cas tre jet s dans les ordu...

Page 20: ...Zum Ottersberg 12 D 97877 Wertheim Allemagne 08 16 En tant qu utilisateur vous avez l obligation l gale de rapporter les piles et accus usag s votre revendeur ou de les d posez dans une d chetterie p...

Page 21: ...asmettitore 4 8 Vi ringraziamo per aver scelto l apparecchio della TFA 1 Prima di utilizzare l apparecchio Leggete attentamente le istruzioni per l uso Avrete cos modo di familiarizzare con il vostro...

Page 22: ...inizializzazione manualmente B Tasti Fig 1 B 1 Tasto MIN MAX B 1 Tasto ALARM SET B 1 Tasto CHANNEL C Struttura esterna Fig 2 C 1 Supporto pieghevole C 2 Vano batteria D Trasmettitore Fig 3 Struttura...

Page 23: ...simbolo dell allarme Confermare con il tasto ALARM SET LO AL e 20 C predefinito IN 10 C o il limite minimo di temperatura impo stato viene visualizzato sul display Premere il tasto CHANNEL finch non...

Page 24: ...io utilizzare solo un panno morbido leggermente inu midito Non usare solventi o abrasivi Rimuovere le batterie se non si utilizza l apparecchio per un periodo prolun gato Collocare il dispositivo in u...

Page 25: ...ti contenuti sono Cd cadmio Hg mercurio Pb piombo Questo apparecchio etichettato in conformit alla Direttiva UE sullo smaltimento delle apparecchiature elettriche ed elettroniche WEEE 9 1 Sostituzione...

Page 26: ...ersberg 12 D 97877 Wertheim Germania 08 16 Questo prodotto non deve essere smaltito insieme ai rifiuti dome stici Il consumatore tenuto a consegnare il vecchio apparecchio presso un punto di raccolta...

Page 27: ...4 8 Hartelijk dank dat u voor dit apparaat van de firma TFA hebt gekozen 1 Voor u met het apparaat gaat werken Leest u a u b de gebruiksaanwijzing aandachtig door Zo raakt u vertrouwd met uw nieuw ap...

Page 28: ...n Fig 1 B 1 MIN MAX toets B 1 ALARM SET toets B 1 CHANNEL toets C Behuizing Fig 2 C 1 Standaard uitklapbaar C 2 Batterijvak D Zender Fig 3 Behuizing front D 1 Lamp voor het uitzenden van signalen Weer...

Page 29: ...elen Het alarmsymbool verschijnt op het display Bevestig met de ALARM SET toets LO AL en 20 C standaardinstelling IN 10 C of de ingestelde temperatuur ondergrens verschijnt op het display Druk op de C...

Page 30: ...en nieuwe opstellingsplaats voor zender en of basisappa raat 9 Schoonmaken en onderhoud Maak het apparaat met een zachte enigszins vochtige doek schoon Geen schuur of oplosmiddelen gebruiken Stel de g...

Page 31: ...s de nationale of lokale bepalingen te brengen om een milieuvriendelijk verwijderen te garanderen De benamingen van de zware metalen zijn Cd cadmium Hg kwikzilver Pb lood Verwijder de batterijen als u...

Page 32: ...ann GmbH Co KG Zum Ottersberg 12 D 97877 Wertheim Duitsland 08 16 Dit apparaat is gemarkeerd in overeenstemming met de EU richt lijn WEEE over het verwijderen van elektrisch en elektronisch afval Dit...

Page 33: ...o este dispositivo de TFA 1 Antes de utilizar el dispositivo Lea detenidamente las instrucciones de uso De este modo se familiarizar con su nuevo dispositivo conocer todas las funciones y componentes...

Page 34: ...autom ticamente los valores medidos internos Pantalla IN para el sensor interno y emisor 4 8 A 10 Indicaci n para el sensor interno y emisor 4 8 B Teclas Fig 1 B 1 Tecla MIN MAX B 1 Tecla ALARM SET B...

Page 35: ...las posibles fuentes de interferencia Tambi n puede comenzar la inicializaci n manualmente Pulse la tecla CHANNEL hasta que aparezca la flecha en el canal deseado Si quiere buscar todos los canales in...

Page 36: ...9 Cuidado y mantenimiento Limpie el dispositivo con un pa o suave ligeramente humedecido No utilice medio abrasivo ni disolventes Mantenga pulsada la tecla ALARM SET despu s de ajustar el valor y esto...

Page 37: ...ser reciclados y reutilizados Las pilas y bater as no pueden desecharse en ning n caso junto con la basura dom stica Como consumidor est obligado legalmente a depositar las pilas y bater as usadas de...

Page 38: ...ania 08 16 Las denominaciones de los metales pesados que contienen son Cd cadmio Hg mercurio Pb plomo Este dispositivo est identificado conforme a la Directiva de la UE sobre residuos de aparatos el c...

Reviews: