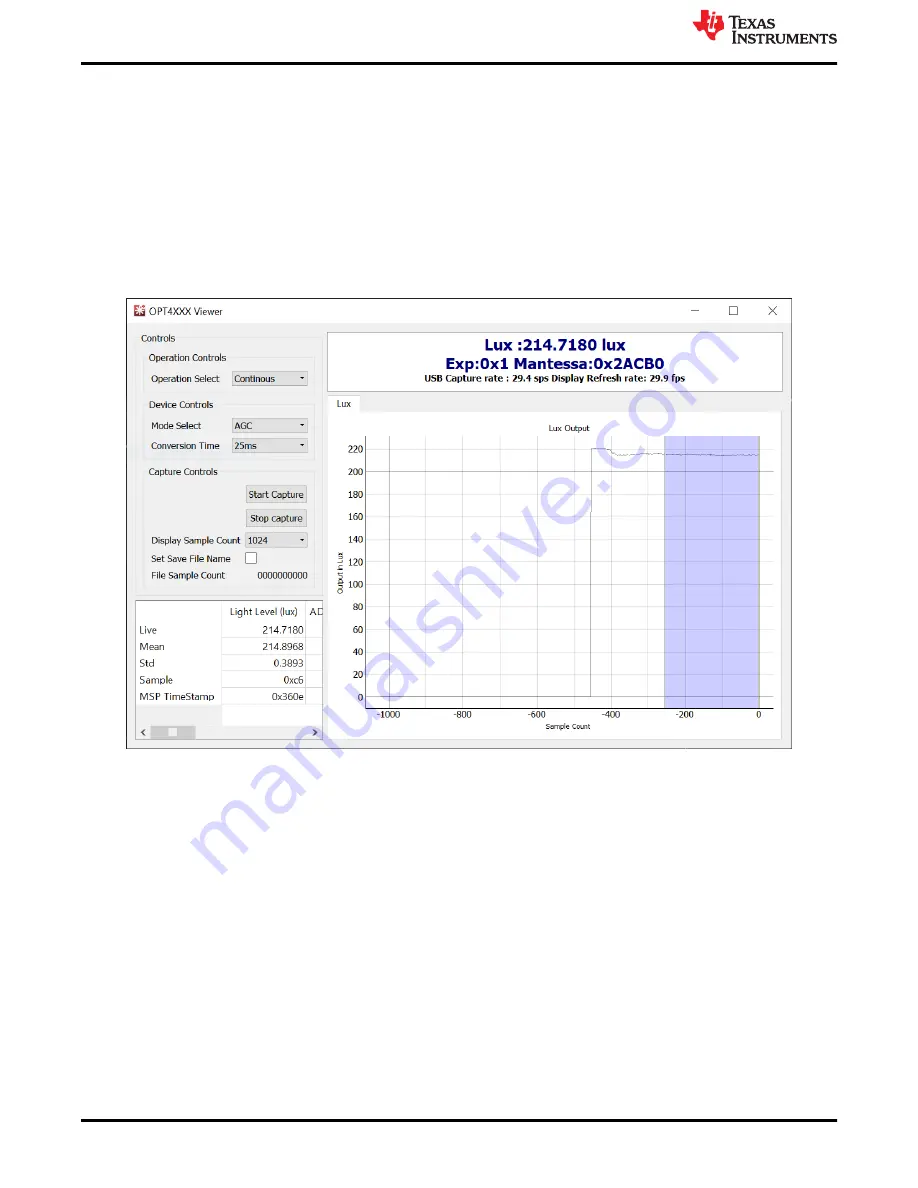
3.5 OPT4001EVM Software Operation
This section primarily discusses how to operate the OPT4001EVM software. The GUI has a primary window
that is used to configure and read from the OPT4001YMNEVM, along with two other windows that are used to
access different features of the OPT4001YMNEVM. Basic GUI functionality and a description of the tabs are
also presented in this section.
3.5.1 Getting Started
To quickly start using the device, click the
Operation Select
drop-down menu and select
Continuous
to bring
the device out of power down mode. Then click
Start Capture
to begin data capture. The green LED on the
motherboard will turn off. Lux data will appear above the lux plot as shown. The plot will also start to populate
with the device lux readings.
Figure 3-13. GUI Capture Running
If the GUI is not responsive, check the other Latte scripts window, which is minimized by default. If the message
Operation I2C Register Read for command [REGRx01] Failed
is displayed this means that the OPT4001 IC or
coupon is not detected by the motherboard. Ensure the coupon is plugged in and properly oriented.
3.5.2 Feature Descriptions
Lux Plot
In the center of the GUI window you will see a plot showing the lux reading from the device on the y-axis and
the sample number on the x-axis. The plot settings can be tweaked by right clicking on the plot. The x-axis and
y-axis options under the right-click menu allow the range of x and y-axes displayed to be changed. There is also
an auto option that will dynamically change the range to match the data. Scrolling will zoom in to or zoom out
from the plot. Left-clicking and dragging will display a yellow rectangle that will, upon releasing the mouse, zoom
the data to the rectangle drawn. Right-clicking and dragging up or down zooms the y-axis. Right-clicking and
dragging right or left will zoom the x-axis. Right clicking and selecting
View All
will reset the view.
OPT4001YMNEVM Software
14
OPT4001YMNEVM User's Guide
Copyright © 2021 Texas Instruments Incorporated


