Radiator/Oil Cooler/Fan Shroud
Removal
Note:
Collect and contain liquids in suitable containers.
Dispose of all liquids according to local regulations and
mandates.
1.
Perform the fan guard and fan removal procedures
found in this chapter.
2.
Remove the bolts (3) securing the left rear access
cover to the chassis.
3.
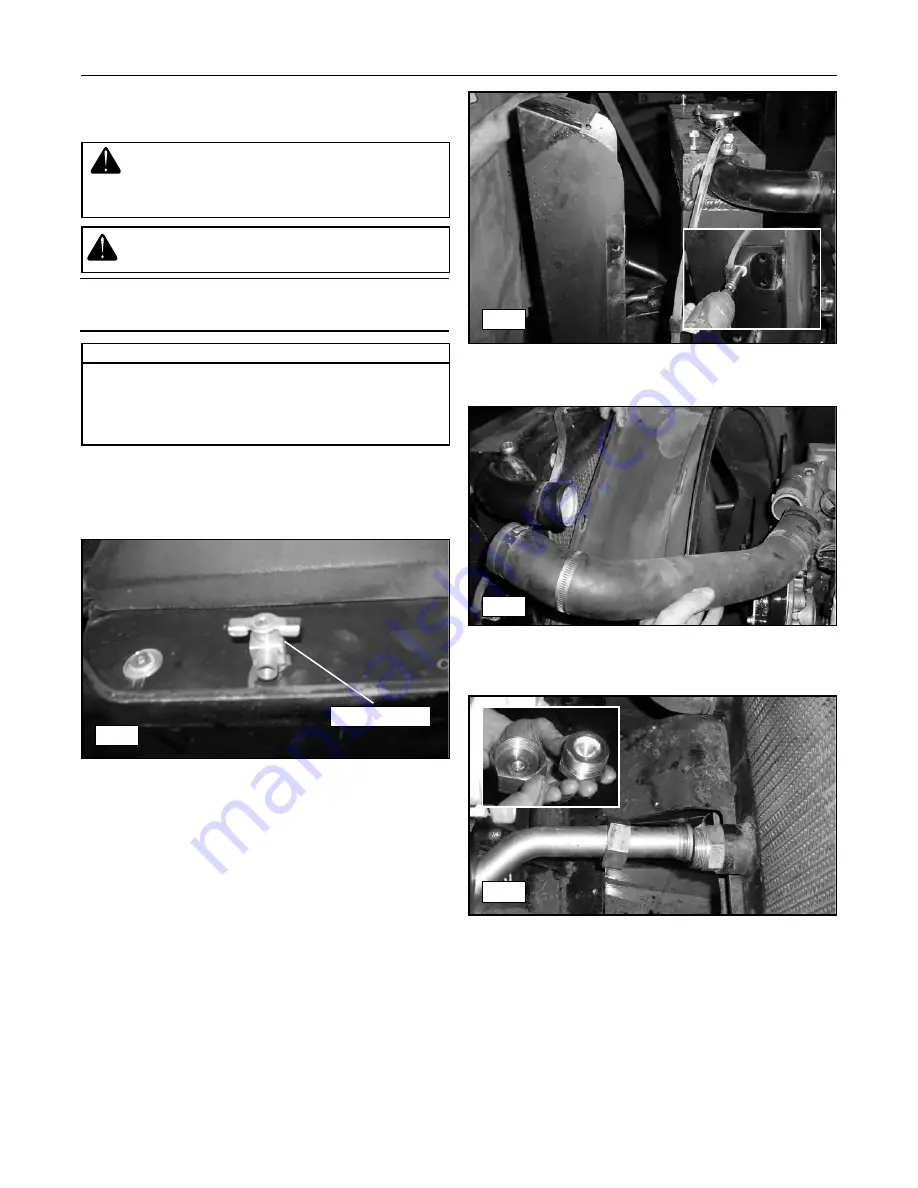
Twist the valve control counter clockwise to drain
the cooling system (fig. 8-7).
4.
Remove the bolts (6) securing the outer shroud to
the chassis, then remove the shroud (fig. 8-8).
5.
Remove the upper hydraulic cooler hose. Cap or
plug the exposed ends of the engine, cooler, and
hose upon removal (fig. 8-9).
6.
Loosen and disconnect the lower hydraulic line
from the cooler. Cap and plug the line and cooler
opening upon disassembly (fig. 8-10).
8-3
Compact Track Loader
8. Radiator and Oil Cooler
8-7
Required Tools
Socket Wrench
Pliers
Screwdriver
Hydraulic Caps/Plugs (various sizes)
Drain Valve
Personal injury can result from exposure to hot
fluids and components. Allow the machine to
cool thoroughly before attempting any type of
service on the cooling or hydraulic systems.
Cooling system conditioner contains alkali.
Avoid contact with skin and eyes.
8-10
8-8
8-9
Summary of Contents for PT100G Forestry
Page 1: ...PT 100G PT 100G Forestry Part Number 2076 286 Printed 8 10 Service Manual Compact Track Loader...
Page 2: ......
Page 6: ......
Page 12: ......
Page 14: ......
Page 22: ......
Page 40: ......
Page 52: ......
Page 62: ......
Page 66: ......
Page 80: ......
Page 98: ......
Page 102: ......
Page 116: ......
Page 136: ......
Page 138: ......
Page 140: ......
Page 141: ......


