background image

Wireless Modem Router User Guide


- 47 - 


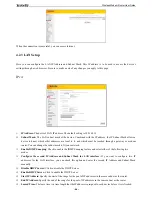
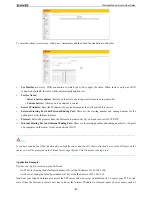
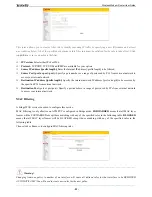
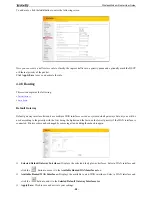
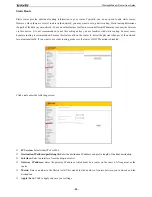
To enter the virtual server screen, click 

NAT -> Virtual Server

 and then click the 

Add 

button to add rules.


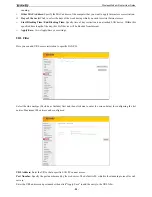
Use  Interface:

  Select  a  WAN  connection  to  which  you  wish  to  apply  the  rules.  When  there  is  only  one  WAN 

connection available, the rules will be automatically applied to it.


Service Name:


Select a Service option:

 Allows you to select an existing service from the drop-down list.


-


Custom Service: 

Allows you to customize a service.


Server IP Address:

 Enter the IP address of your local computer that will provide this service.


External  Starting  Port  and  External  Ending  Port: 

These  are  the  starting  number  and  ending  number  for  the 

public ports at the Internet interface.


Protocol:

 Select the protocol from the Protocol drop-down list. If you are unsure, select TCP/UDP. 


Internal Starting Port and Internal Ending Port: 

These are the starting number and ending number for the ports 

of a computer on the router’s local area network (LAN).


_________________________________________________________________________________________________ 

Note: 

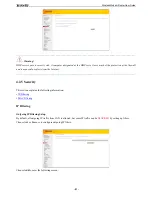
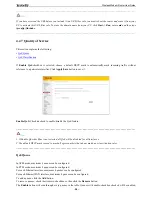
If you have enabled the UPnP functionality on both the router and your PC that is attached to one of the LAN port on the 
router, you will be prompted on the Virtual Server page that the UPnP interface is being used. 

_________________________________________________________________________________________________ 


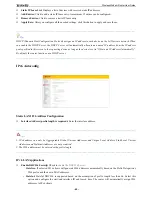
Application Example: 

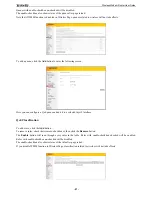
You have set up two servers on your LAN side: 

- An FTP server (using the default port number of 21) at the IP address of 192.168.1.100 
- A web server (using the default port number of 80) at the IP address of 192.168.1.110 

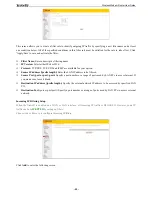
And want your friends on Internet to access the FTP server and web server on default ports. To access your FTP or web 
server  from  the  Internet,  a  remote  user  has  to  know  the  Internet  IP  address  or  Internet  name  of  your  router,  such  as 

Summary of Contents for D151

Page 1: ...Wireless Modem Router User Guide 1...

Page 2: ...duced transmitted transcribed stored in a retrieval system or translated into any language in any form or by any means without the prior written permission of Shenzhen Tenda Technology Co Ltd All phot...

Page 3: ...APTER 4 ADVANCED SETTINGS 14 4 1 DEVICE INFO 14 4 2 ADVANCED SETUP 17 4 2 1 Layer2 Interface 18 4 2 2 WAN Service 20 4 2 3 LAN Setup 44 4 2 4 NAT 46 4 2 5 Security 51 4 2 6 Parental Control 54 4 2 7 Q...

Page 4: ...79 4 5 5 TR 069 Client 80 4 5 6 Internet Time 80 4 5 7 Access Control 81 4 5 8 Update Software 82 4 5 9 Reboot 83 APPENDIX 1 CONFIGURE YOUR PC 84 WINDOWS 7 84 MAC 86 APPENDIX 2 JOIN YOUR WIRELESS NETW...

Page 5: ...Wireless Modem Router User Guide 5 About This Manual This user manual describes how to install configure operate and troubleshoot the modem router in a simple and easy to understand way...

Page 6: ...ing applications such as large file transfers streaming HD video and multiplayer gaming The unit comes with a wide range of premium features and applications such as IPv6 TR069 SNMP Multicast IP tunne...

Page 7: ...p to 24Mbps downstream 1Mbps upstream Built in firewall prevents hacker attacks Channel auto select for optimum performance FDM technology enables telephoning faxing and surfing activities to proceed...

Page 8: ...Off System is functioning incorrectly WLAN Blinking Transferring data Off Wireless is disabled Solid Wireless is enabled ADSL Slow Blink Physical connection failure Fast Blink Synchronizing Solid ADSL...

Page 9: ...____________________________________________________________________________________ WPS RESET Press it for 1 3 seconds to enable WPS connection or 7 seconds to restore all configurations to factory d...

Page 10: ...ard on the included CD automatically or using a web browser manually The Setup Wizard on the auto run CD can automatically configure your PC s TCP IP properties and direct you to the web login window...

Page 11: ...________________________ Tip If you changed the login user name and password and forget them press the Reset button on the device and then enter the default settings of admin _________________________...

Page 12: ...n provided to you by your ISP If a secondary DNS server address is available enter it also _________________________________________________________________________________________________ Note If you...

Page 13: ...____________________________________________________ Tip 1 If you customize a new security key write it on a sticky label and attach it to the bottom of the unit You will need the new security key if...

Page 14: ...with a solid understanding of networking concepts who want to configure the router for unique situations This chapter includes the following sections Device Info Advanced Setup Wireless Diagnostics Ma...

Page 15: ...eenshot WAN Here you can view the WAN Information including Interface Description Type IGMP NAT Firewall Status IPv4 Address and VLAN ID as seen in the screenshot Statistics Here you can view the pack...

Page 16: ...3 respectively represent the LAN port1 LAN port2 LAN port3 and LAN port4 of the device _________________________________________________________________________________________________ Statistics WAN...

Page 17: ...ess connection as seen in the screenshot DHCP Here you can view the DHCP leases including IP and MAC addresses of the PCs hostnames and remaining lease time as seen in the screenshot 4 2 Advanced Setu...

Page 18: ...rface for connecting to Internet via an Ethernet cable By default system applies the ATM Interface ADSL uplink If you directly connect to the ADSL line via a phone cable first refer to To set up the A...

Page 19: ...to configure the WAN service for Internet access _________________________________________________________________________________________________ Tip If you are unsure about the VPI VCI parameters se...

Page 20: ...link To setup WAN Service for ATM Interface If you configured the ATM Interface ADSL uplink follow steps below to configure the WAN service Click Advanced Setup WAN Service and then click the Add butt...

Page 21: ...Tip For PPPoE IPoE and Bridging Internet connection types you must first select EoA on the ATM Interface Screen for more information see To set up the ATM interface __________________________________...

Page 22: ...ster the MAC address of the network interface card in your computer when your account is first opened They then accept traffic only from the MAC address of that computer If so configure your router to...

Page 23: ...anged by removing all and adding them back in again _________________________________________________________________________________________________ WAN DNS Here you can configure the WAN DNS address...

Page 24: ...settings if everything is correctly set When the PPPoE connection is successful you can access Internet IP over Ethernet IPoE If your ISP uses DHCP to assign your IP address or if your ISP assigns you...

Page 25: ...____________________________________________________ Obtain an IP address automatically This allows the router to automatically acquire IP information from your ISP or your existing networking equipme...

Page 26: ...tically 2 Check Launch Dhcp6c for Prefix Delegation IAPD 3 If your ISP is using stateful DHCPv6 check Launch Dhcp6c for Address Assignment IANA also 4 Click Next Next Apply Save To configure a static...

Page 27: ...in IPoE mode _________________________________________________________________________________________________ Here you can configure the NAT settings If you are unsure about the options please keep...

Page 28: ...terfaces can have multiple WAN interfaces served as system dns servers but only one will be used according to the priority with the first being the higest and the last one the lowest priority if the W...

Page 29: ...instead of sharing it with others you can use the Bridging DSL link type and create a dialup program on your PC If you have selected the EoA from the ATM Interface screen in Layer2 Interface you will...

Page 30: ...simply configure multiple ATM interfaces and then follow the instructions above _________________________________________________________________________________________________ PPPoA If you have sel...

Page 31: ...out modification Multicast Proxy If enabled the router will use multicast proxy If you are not sure about the options on this screen simply enter your ISP user name and password and leave the other op...

Page 32: ...stem dns servers but only one will be used according to the priority with the first being the higest and the last one the lowest priority if the WAN interface is connected Priority order can be change...

Page 33: ...If you have selected the IPoA from the ATM Interface screen in Layer2 Interface you will see the screen above when you click the WAN Service tab select the configured interface and click Next 1 Edit...

Page 34: ...ick Next The default setting is recommended ______________________________________________________________________________________________ Note Default gateway interface list can have multiple WAN int...

Page 35: ...ic DNS server IP information ask your ISP to provide it _________________________________________________________________________________________________ Confirm your settings and then click Apply Sav...

Page 36: ...________________ Note If you select IPv6 or IPv4 IPv6 dual stack skip to IPv6 _________________________________________________________________________________________________ PPP User Name This is fo...

Page 37: ...tgoing packets including management packets on the WAN port will be changed to the device s WAN IP address Only change the default settings if necessary Enable PPP Debug Mode Only enable this feature...

Page 38: ...ded if you cannot locate this information Here you can configure the WAN DNS address Click the Select DNS Server Interface from available WAN interfaces option OR select the Use the following Static D...

Page 39: ...een 1 Select IPoE 2 Edit the Enter Service Description This field is optional We recommend that you keep the default 3 Select a network protocol IPv4 IPv6 or IPv4 IPv6 dual stack 4 Click Next ________...

Page 40: ...Address The gateway IP address provided by your ISP for accessing Internet Enter the IP address subnet mask gateway IP address provided by your ISP or select Obtain an IP address automatically and the...

Page 41: ...ext to enter the screen below 4 Select Use the following Static IPv6 DNS address and manually enter the DNS server address If you have two DNS server addresses enter the second also 5 Click Next Apply...

Page 42: ...can configure the WAN DNS address After you configure it click Next The default setting is recommended if you cannot locate this information Here you can configure the WAN DNS address Click the Selec...

Page 43: ...our PC for Internet access or enjoy the entire Internet connection instead of sharing it with others you can select the Bridging and create a dialup program on your PC Click Advanced Setup WAN Service...

Page 44: ...r You can change the subnet mask to fit your network Enable IGMP Snooping Check to enable the IGMP Snooping feature and select either of the following two modes Configure the second IP Address and Sub...

Page 45: ...______________________________________________________________________ IPv6 Autoconfig Static LAN IPv6 Address Configuration Interface Address prefix length is required Enter the interface address ___...

Page 46: ...our Enable MLD Snooping MLD is used by IPv6 routers for discovering multicast listeners on a directly attached link If disabled on layer2 devices IPv6 multicast data packets will be broadcast on the e...

Page 47: ...Internal Ending Port These are the starting number and ending number for the ports of a computer on the router s local area network LAN ________________________________________________________________...

Page 48: ...enter 192 168 1 100 5 Click the Apply Save button 6 Your friends on Internet will then be able to access your FTP server simply by entering ftp 183 37 227 201 in his browser To configure your router t...

Page 49: ...l Ending Port fields _________________________________________________________________________________________________ Port Triggering Some applications such as games video conferencing remote access...

Page 50: ...en Port Start Open Port End These are the starting number and ending number for the ports that will be automatically opened by the built in firewall when connections initiated by an application are es...

Page 51: ...osed to exploits from the Internet _________________________________________________________________________________________________ 4 2 5 Security This section explains the following information IP F...

Page 52: ...fix length Enter the LAN IP address to be filtered Source Port port or port port Specify a port number or a range of ports used by LAN PCs to access Internet If you are unsure leave it blank Destinati...

Page 53: ...etwork Destination Port port or port port Specify a port number or a range of ports used by PCs from external network to access your internal network MAC Filtering A bridge WAN service is needed to co...

Page 54: ...ering rule Frame Direction Select a frame direction from the drop down list WAN Interfaces Select a WAN interface from the drop down list 4 2 6 Parental Control This section explains the following inf...

Page 55: ...AN device will be blocked from Internet Apply Save Click to Apply Save your settings URL Filter Here you can add URL access restriction to specific LAN PCs Select the URL List Type Exclude or Include...

Page 56: ...pply Save button to save it Enable QoS Check uncheck to enable disable the QoS feature _________________________________________________________________________________________________ Note 1 If Enabl...

Page 57: ...ou can configure a QoS queue and add it to a selected layer2 interface QoS Classification To add a rule click the Add button To remove rules check their remove checkboxes then click the Remove button...

Page 58: ...d as system default gateways but only one will be used according to the priority with the first being the highest and the last one the lowest priority if the WAN interface is connected Priority order...

Page 59: ...ting is recommended because this feature allows the router to detect the physical changes of the network layout automatically If you want to use static routing make sure the router s DHCP function is...

Page 60: ...static DNS server IP addresses for the system Here you can configure the WAN DNS address For IPv4 Click the Select DNS Server Interface from available WAN interfaces option OR select the Use the follo...

Page 61: ...ster a domain name and have that name associated with your IP address by public Domain Name Servers DNS However if your ISP gave you a dynamic changing public IP address you cannot predict what your I...

Page 62: ...bility DSL parameter configurations must be supported by ISP to take effect Actual parameters see Statistics xDSL resulted from the negotiation between your router and ISP Wrong configurations may fai...

Page 63: ...e the device for various Internet applications automatically UPnP devices can automatically discover the services from other registered UPnP devices on the network If you use applications such as mult...

Page 64: ...e of your printer Make and model Enter the make and model of your printer Apply Save Click to apply and save your settings 4 2 13 Storage Service Available only in D301 The Storage service allows you...

Page 65: ...e directory is to be created 3 Click Apply Save to apply and save your settings To remove an existing user account 1 Check Remove next to the user account 2 Click the Remove button 4 1 14 Interface Gr...

Page 66: ...ients to a WAN Interface in the new group add the DHCP vendor ID string By configuring a DHCP vendor ID string any DHCP client request with the specified vendor ID DHCP option 60 will be denied an IP...

Page 67: ...the WAN iterface of the tunnel Associated LAN Interface Specify the LAN iterface of the tunnel Manual If you select Manual configure the following settings also IPv4 Mask Length Specify the IPv4 Mask...

Page 68: ...omatic If Automatic is selected no configurations are required Apply Save Click to apply and save your settings 4 1 16 Certificate This section explains the following information Local Certificates Tr...

Page 69: ...tificate 1 Click the Import Certificate button on the local certificates page to enter the page below 2 Enter the certificate name 3 Paste the certificate content and private key 4 Click Apply to appl...

Page 70: ...tent 4 Click Apply to apply your settings 4 1 17 Multicast Here you can configure the multicast feature To configure IGMP for IPv4 1 Check the LAN to LAN Intra LAN Multicast Enable box 2 Check the Meb...

Page 71: ...nchanged from factory defaults if you are not an advanced user This is strongly recommended 4 1 18 IPTV If you check the Enable IPTV checkbox you must choose a layer2 interface and then configure the...

Page 72: ...Bridge Station Info 4 3 1 Basic This page allows you to configure basic features of the wireless LAN interface You can enable or disable the wireless LAN interface hide the network from active scans...

Page 73: ...Press the hardware WPS button on the device for 1 second and the WPS LED will keep blinking for about 2 minutes Within the 2 minutes press the WPS button on your wireless computer or other device Whe...

Page 74: ...oup Rekey Interval Specify a key update interval WPA WAPI Encryption Select AES or TKIP AES 4 3 3 MAC Filter The MAC based Wireless Access Control feature can be used to allow or disallow clients to c...

Page 75: ...t There are three options available Enabled Enabled Scan and Disabled Select Disabled in Bridge Restrict which disables wireless bridge restriction Any wireless bridge will be granted access Selecting...

Page 76: ...to your local network If a test displays a fail status click Rerun Diagnostic Tests at the bottom of this page to make sure the fail status is consistent If the test continues to fail click Help and f...

Page 77: ...ur local hard drive The configuration file can later be imported to your device in case the device is reset to factory default settings Update Here you can restore the configuration from a file saved...

Page 78: ...Log Log If Enable is selected the system will begin to log all the selected events Log Level All events above or equal to the selected level will be logged Display Level All logged events above or equ...

Page 79: ...og Reset Click to clear and reset the Security Log 4 5 4 SNMPAgent Simple Network Management Protocol SNMP allows a management application to retrieve statistics and status from the SNMP agent in this...

Page 80: ...r password WAN Interface used by TR 069 client Select the WAN interface used by the TR 069 client from the drop down list Display SOAP messages on serial console If Enable is selected SOAP messages wi...

Page 81: ...d to allow an ISP technician to access your Broadband Router for maintenance and to run diagnostics The user name user can access the Broadband Router view configuration settings and statistics as wel...

Page 82: ...nality of your device and add any new features If you run into a problem with a specific feature of the device you could log in to our website www tendacn com to download the latest firmware to update...

Page 83: ...Wireless Modem Router User Guide 83 4 5 9 Reboot Click the Reboot button to reboot the router...

Page 84: ...ure Your PC Screens to configure TCP IP properties in other Operating Systems are similar to those below Windows 7 Click Start Control Panel Network and Sharing Center Change adapter settings select a...

Page 85: ...Wireless Modem Router User Guide 85...

Page 86: ...Wireless Modem Router User Guide 86 MAC Click on the Apple icon from the top left corner and select System Preferences...

Page 87: ...Wireless Modem Router User Guide 87...

Page 88: ...k Start Settings Control Panel b Double click Network Connections select the desired wireless network connection and then click View Available Wireless Networks When you see Connected displayed next t...

Page 89: ...Wireless Modem Router User Guide 89 Windows 7 Click Start Control Panel Network and Sharing Center Change adapter settings select a desired wireless connection and click Connect Disconnect...

Page 90: ...Wireless Modem Router User Guide 90 When you see Connected displayed next to the wireless network you selected you have connected to the wireless network successfully...

Page 91: ...Wireless Modem Router User Guide 91 MAC Click System Preferences...

Page 92: ...Wireless Modem Router User Guide 92 iPhone iPad...

Page 93: ...Wireless Modem Router User Guide 93...

Page 94: ...ze a new security key 3 If step 1 does not work press the Reset button on the device to restore factory default settings And then log in to the device web manager to customize a new security key 4 My...

Page 95: ...e center to extend wireless coverage as far as possible 2 Never place the device near to metal objects or in direct sunshine 3 Keep it far away from devices that use the 2 4 GHz radio wave frequency t...

Page 96: ...Australia Internode 8 35 PPPOE_VCMUX Australia iPrimus 8 35 PPPOA_VCMUX Australia Netspace 8 35 PPPOE_VCMUX Australia Southern Cross Telco 8 35 PPPOE_LLC Australia TPG Internet 8 35 PPPOE_LLC Argentin...

Page 97: ...Pakistan cyber net 8 35 PPPoE LLC Pakistan linkDotnet 0 35 PPPoA LLC Pakistan PTCL 8 81 PPPoE LLc Portugal 0 35 PPPoE LLC Puerto Rico Coqui net 0 35 PPPoA LLC Saudi Arabia 1 0 33 PPPoE LLC Saudi Arab...

Page 98: ...oA LLC United States Covad 0 35 PPPoE LLC United States Earthlink 1 0 35 PPPoE LLC United States Earthlink 2 8 35 PPPoE LLC United States Earthlink 3 8 35 PPPoE VC MUX United States Earthlink 4 0 32 P...

Page 99: ...LC Canada BellSouth 2 Canada 0 35 PPPoE LLC Canada Sprint 1 Canada 0 35 PPPoA LLC Canada Sprint 2 Canada 8 35 PPPoE LLC Canada Verizon 1 Canada 0 35 PPPoE LLC Canada Verizon 2 Canada 0 35 1483 Bridged...

Page 100: ...AP France Free 8 36 LLC Netherlands MXSTREAM 8 48 1483 Bridged IP LLC Netherlands BBNED 0 35 1483 Bridged IP LLC Belgium Turboline 8 35 1483 Bridged IP LLC Belgium ADSL Office 8 35 1483 Bridged IP LLC...

Page 101: ...ishgaman Tose 0 35 PPPOE LLC Iran Fan Ava 8 35 PPPOE LLC Iran Datak 0 35 PPPOE LLC Iran Laser General 0 35 PPPOE LLC Iran Laser Privates 0 32 PPPOE LLC Iran Asr Enteghal Dadeha 8 35 PPPOE LLC Iran Kar...

Page 102: ...uant to Part 15 of the FCC Rules These limits are designed to provide reasonable protection against harmful interference in a residential installation This equipment generates uses and can radiate rad...

Page 103: ...ent Radiation Exposure Statement This equipment complies with FCC radiation exposure limits set forth for an uncontrolled environment This equipment should be installed and operated with minimum dista...

Reviews: