NOTE:
THIS INSTRUCTION
BOOKLET CONTAINS
IMPORTANT
SAFETY INFORMATION.
PLEASE READ AND KEEP FOR FUTURE REFERENCE.
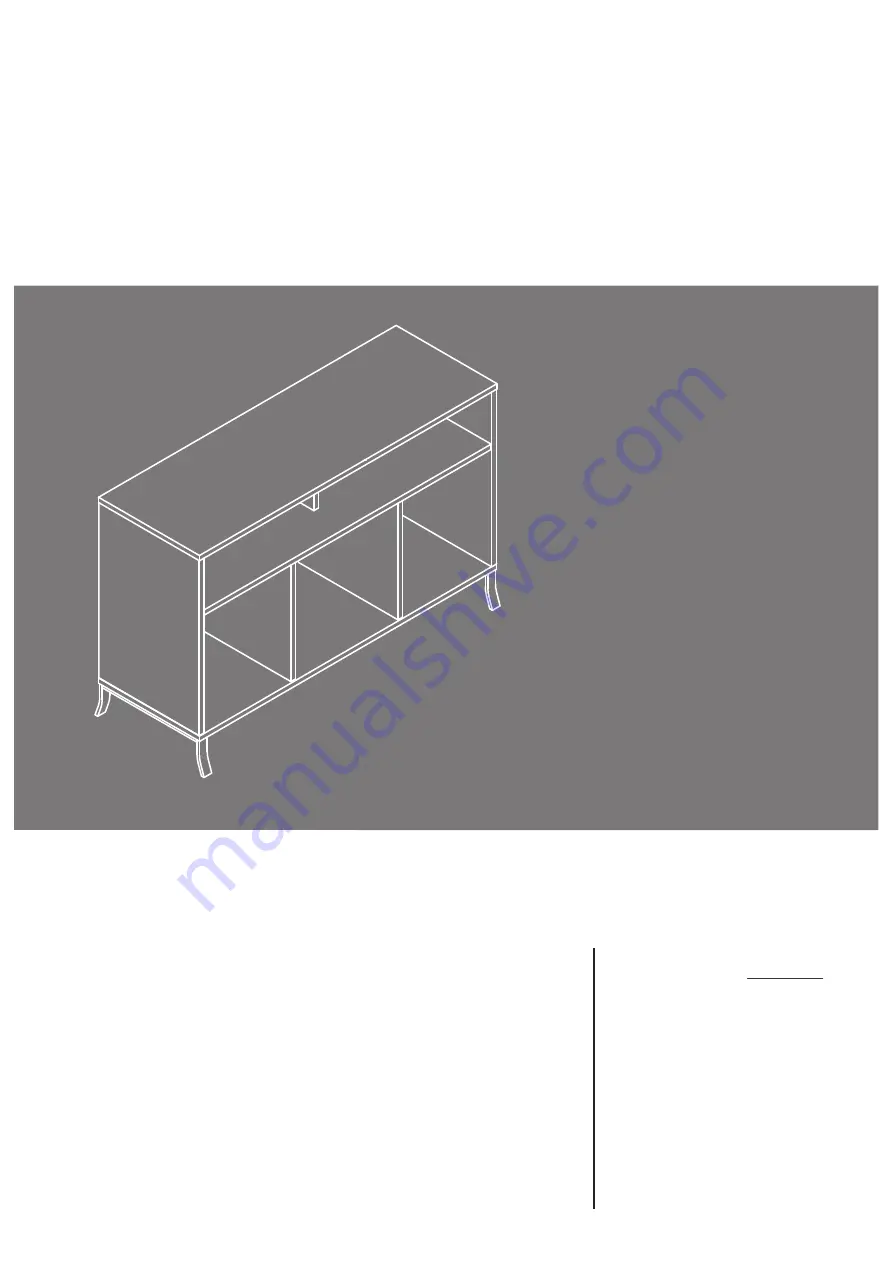
TV Stand
City
Centre
Collection |
Model
5
426059
It
stands
. You
sit
.
A thing of beauty, this one.
Teknik
www.teknikoffice.co.uk
Page 1: ...RUCTION BOOKLET CONTAINS IMPORTANT SAFETY INFORMATION PLEASE READ AND KEEP FOR FUTURE REFERENCE TV Stand City Centre Collection Model 5426059 It stands You sit A thing of beauty this one Teknik www teknikoffice co uk ...
Page 2: ...ompare it to the diagram below before you begin assembly This Sauder unit is designed for use with flat panel televisions weighing less than 50 pounds Never use with a TV that weighs more The size of the television front to back and side to side must fit within the space defined in the diagram Never place the front edge of the TV past the front edge of the TV support shelf or stop molding if equipped...
Page 3: ...nked letter on the edge to help distinguish similar parts from each other Use this part identification to help identify similar parts Now you know our ABCs A SMALL UPRIGHT 1 B SHELF 1 C UPRIGHT 2 D LEFT END 1 E RIGHT END 1 F BOTTOM 1 G LEG 2 H FOOT 2 J TOP 1 K BACK 1 A B C C D E F G G J K H Page 3 ...
Page 4: ... with your unit 1 2 PAN HEAD SCREW 30 9 CAM SCREW 14 1 HIDDEN CAM 14 2 WOOD DOWEL 10 3 1 3 8 FLAT HEAD SCREW 10 7 8 13 16 HEX HEAD SCREW 4 Page 4 APPLIQUE CARD 3 4 L WRENCH 1 5 Refer to the last step for proper location and application WARNING LABEL 1 6 5 22 68 22 68 50 lbs 22 kg 22 kg ...
Page 5: ... Turn the CAM SCREW or gently tap the CAM DOWEL until the shoulder is against the surface of the part 1 Hidden Cam Hidden Cam Arrow Push a HIDDEN CAM into the part The arrow in the HIDDEN CAM must point toward the hole in the edge of the board Hole 2 3 1 2 Insert the CAM SCREW or CAM DOWEL into the HIDDEN CAM Tighten the HIDDEN CAM Page 5 ...
Page 6: ...r unit on a carpeted floor or on the empty carton to avoid scratching your unit or the floor å Push six HIDDEN CAMS 2 into the SHELF B and SMALL UPRIGHT A å Turn four CAM SCREWS 1 into the SHELF B B 1 A 2 Arrow Arrow 2 Page 6 ...
Page 7: ...HELF B Use two 1 3 8 FLAT HEAD SCREWS 7 B A 1 3 8 FLAT HEAD SCREW 2 used in this step 7 Edge with holes Surface with HIDDEN CAMS Surface with HIDDEN CAMS Page 7 Do not stand the unit upright without the BACK fastened The unit may collapse Caution ...
Page 8: ...h HIDDEN CAMS å Push four HIDDEN CAMS 2 into the UPRIGHTS C å Insert two WOOD DOWELS 3 into the edges of the UPRIGHTS C å Fasten the UPRIGHTS C to the SHELF B Tighten four HIDDEN CAMS å NOTE Be sure the WOOD DOWELS in the UPRIGHTS insert into the SHELF 3 3 Page 8 ...
Page 9: ...å Turn four CAM SCREWS 1 into the ENDS D and E å Push four HIDDEN CAMS 2 into the ENDS D and E Step 4 E D Arrow 2 2 Arrow 1 Page 9 ...
Page 10: ...nto each END D and E å Fasten the ENDS D and E to the SHELF B Tighten four HIDDEN CAMS å NOTE Be sure the WOOD DOWELS in the ENDS insert into the SHELF Step 5 D E B 3 3 Page 10 These holes must be here These holes must be here ...
Page 11: ...å Fasten the BOTTOM F to the ENDS D and E and UPRIGHTS C Use eight 1 3 8 FLAT HEAD SCREWS 7 å NOTE Be sure the WOOD DOWELS in the ENDS and UPRIGHTS insert into the BOTTOM Step 6 D E F C C 1 3 8 FLAT HEAD SCREW 8 used in this step 7 3 3 4 used These holes must be here Page 11 ...
Page 12: ...the BACK K to the ENDS D and E SHELF B and BOTTOM F Use twenty two 1 2 PAN HEAD SCREWS 9 D E 1 2 PAN HEAD SCREW 22 used in this step 9 Do not stand the unit upright without the BACK fastened The unit may collapse Caution K F B ...
Page 13: ...X HEAD SCREW 4 used in this step 8 G G å Fasten the LEGS G to the BOTTOM F Tighten four 13 16 HEX HEAD SCREWS 8 using the L WRENCH 5 å NOTE You should start each SCREW a few turns before completely tightening any of them 5 F ...
Page 14: ...å Fasten the FEET H to the BOTTOM F Use eight 1 2 PAN HEAD SCREWS 9 å Turn six CAM SCREWS 1 into the TOP J Step 9 Page 14 1 J H H F 1 2 PAN HEAD SCREW 8 used in this step 9 ...
Page 15: ... upright å Insert a WOOD DOWEL 3 into each END D and E å Fasten the TOP J to the SMALL UPRIGHT A and ENDS D and E Tighten six HIDDEN CAMS å NOTE Be sure the WOOD DOWELS in the ENDS insert into the TOP Step 10 3 3 J Page 15 E D A ...
Page 16: ...diagram å NOTE This is a permanent label intended to last for the life of the product Once applied do not try to remove it å Peel APPLIQUES from the APPLIQUE CARDS 4 and stick them onto each visible HIDDEN CAM å NOTE Please read the back pages of the instruction booklet for important safety information å This completes assembly Clean with a damp cloth Wipe dry 5 22 6 8 22 6 8 J 6 To cover HIDDEN C...
Page 17: ...video equipment may result in death or serious injury due to furniture collapse or over turning onto a child NEVER place a TV on furniture that is not intended to support a TV NEVER exceed the maximum size and weight of the TV shown in the instructions Be sure to apply the TV warning label as shown in the instructions Overloading drawers and shelves may result in furniture that can break or sag or...