background image

3

EN

Fitting the elements on to the appliance

• Clip the end of the hose to the suction inlet - fig. 1.
• To remove it, unclip the end and pull - fig. 2.
• If your vacuum cleaner is equipped with the telescopic tube* (28): press the adjustment button, extend the length

of tube required and then release the button to lock it - fig. 3. Otherwise, assemble the tubes* (29) by turning
them slightly - fig. 4.

• Fit the required accessory on to the end of the tube:

-  For rugs and carpets: use the multi-surface nozzle (23) in the retracted brush position - fig. 5, or the mini Turbo-

brush* (26).

-  For parquets and smooth floors: use the multi-surface nozzle (23) in the extended brush position - fig. 6 or, for

best results, directly use the parquet nozzle* (25).

-  For corners and hard-to-reach areas: use the crevice nozzle (22).
-  For furniture and fragile surfaces: use the upholstery nozzle* (24).

Warning! Always switch off and unplug your vacuum cleaner before changing the accessories

Plugging in the power cord and switching on the appliance

• Unwind the power cord completely, plug in your vacuum cleaner - fig. 7 and press the ON/OFF pedal (13) - fig.

8.

• Adjust the suction power:

-  with the electronic power control* (14): turn the electronic control button* to adjust the suction power: towards

the max position for floors and to the min position for furniture and delicate fabrics - fig. 9.

-  with the grip's manual power control: open the shutter of the adjustable slider to manually decrease the suction

power, e.g.: on fragile surfaces etc. - fig. 10.

Storing and transporting the appliance 

• After use, switch off your vacuum cleaner by pressing the ON/OFF pedal (13) - fig. 8 - and unplug it - fig. 11.
• Rewind the power cord by pressing the power cord rewind pedal (15) - fig. 12.
• Place the crevice tool (22) in its storage compartment (21) behind the appliance.
• Place the multi-surface nozzle (23) in the self-standing position - fig. 13.
• Your vacuum cleaner can be easily moved thanks to its transport handle (1).

Important: Always switch off and unplug your vacuum cleaner before carrying out maintenance or cleaning.

Changing the bag

• The full bag warning light (12) indicates that the bag is full or saturated.
If you notice a reduction in the efficiency of your appliance, set the power at maximum and hold the nozzle above
the ground. If the full-bag warning light remains red, replace the bag.
• Remove the flexible pipe (27) from the suction inlet (11) - fig. 2.
• Open the lid (10) of your vacuum cleaner - fig.14.

a) If your vacuum cleaner is equipped with a paper bag*:

• remove the bag base (6) from the bag compartment (3) - fig. 15, and then remove the paper bag (7) from its

base (6) by sliding it on the runners - fig. 16;

• throw the paper bag in a dustbin - fig.17;
• put a new paper bag on the bag base - fig. 18, and then using the bag base runner (5), place it inside the com-

partment - fig. 19;

5. CLEANING AND MAINTENANCE

4. USE

* Model dependent: these parts are specific to certain models or they are accessories that can be purchased separately.

NC00903690-03_TW22_micro-space.qxp_NC00903690/03  21/06/2016  09:54  Page3

Summary of Contents for Micro Space TW22

Page 1: ...Micro Space TW22 www tefal com EN TH VI MS HK NC00903690 03 24 16 NC00903690 03_TW22_micro space qxp_NC00903690 03 21 06 2016 09 54 PageC2 ...
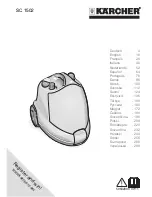
Page 2: ...25 24 23 22 19 16 4 5 1 18 1 21 2 10 1 1 20 26 28 27 2 8 6 7 11 9 12 13 14 3 15 NO NO NC00903690 03_TW22_micro space qxp_NC00903690 03 21 06 2016 09 54 PageC3 ...

Page 3: ... 8 fig 9 fig 10 fig 11 fig 12 fig 13 fig 14 fig 15 fig 19 fig 20 fig 16 fig 17 fig 18 fig 23 fig 21 fig 24 fig 22 24h 2 1 2 1 fig 25 fig 26 fig 27 fig 28 1 2 24h MIN MAX NEW NC00903690 03_TW22_micro space qxp_NC00903690 03 21 06 2016 09 54 PageC4 ...

Page 4: ... appliance and its cord out of the reach of children Do not use the appliance if the power cord is damaged The cord win der and cord of your vacuum cleaner must be replaced by a Tefal Ap proved Service Centre to avoid any risks Never leave the vacuum on unsupervised Do not place the nozzle or the end of the tube near the eyes or ears Do not vacuum wet surfaces water or any type of liquids hot subs...

Page 5: ...iance Do not unplug the appliance by pulling on the power cord Never use the vacuum cleaner without a bag or without a filtration system in place microfilter air outlet foam filter Check that the filters are fitted correctly Only use original Tefal bags and filters Use only original Tefal accessories If you have any difficulties in finding accessories or filters for this vacuum cleaner contact the...

Page 6: ...ble slider to manually decrease the suction power e g on fragile surfaces etc fig 10 Storing and transporting the appliance After use switch off your vacuum cleaner by pressing the ON OFF pedal 13 fig 8 and unplug it fig 11 Rewind the power cord by pressing the power cord rewind pedal 15 fig 12 Place the crevice tool 22 in its storage compartment 21 behind the appliance Place the multi surface noz...

Page 7: ...e compartment fig 19 Make sure that the bag and the bag base are correctly positioned before closing the lid 10 Clean the air outlet foam filter 19 Important clean the air outlet foam filter every 6 months Remove the air outlet grill 20 positioned behind the appliance fig 26 Remove the air outlet foam filter 19 wash it in clean water fig 27 and leave it to dry for 24 hours Refit the air outlet foa...

Page 8: ...floors use the nozzle in the extended brush position fig 6 If the power cord does not wind up completely The power cord is slow to wind up pull the cord out again and press on the power cord rewind pedal If a problem persists take your vacuum cleaner to your nearest Tefal Approved Service Centre Guarantee This appliance is for domestic use only any misuse or use that does not comply with the instr...

Page 9: ...ซ อมบำรุงเครื องใช ไฟฟ านี เว นแต จะได รับการกำกับดูแลจากผู ใหญ ที มีความรับผิดชอบ เก บเครื องและสายไฟให พ นจากมือเด ก อย าใช เครื องหากสายไฟชำรุด เพื อหลีกเลี ยงอันตราย ควรให ศูนย บริการที ได รับการรับรองของ Tefal เป นผู เปลี ยนสายไฟของเครื องดูดฝุ น ใช และเก บให ห างจากมือเด ก อย าปล อยเครื องทิ งไว อย าทิ งเครื องดูดฝุ นไว โดยไม ได ตรวจสอบ อย าดูดฝุ นบริเวณที เป น น ำ หรือของเหลว ของร อน วัสดุข...

Page 10: ...ัวกรอง โฟมกรองอากาศออก ตรวจสอบว ามีตัวกรองอยู ใช เฉพาะถุงและตัวกรองจาก Tefal ใช เฉพาะอุปกรณ จาก Tefal ในกรณีที เกิดปัญหากับอุปกรณ และตัวกรองของเครือ งนี ติดต อศูนย บริการลูกค าของ Tefal การประกอบเครื อง 1 การเคลื อนย าย 2 ล อ 3 ช องเก บ 4 ไมโครฟิลเตอร 5 ตัวเลื อนสำหรับถุง 6 ที รองถุง 7 ถุงกระดาษ 8 ถุงผ า 9 ที รองถุงดักจับฝุ น 10 ฝา 11 ฝาเครื องดูดฝุ น 12 ไฟสัญญาณเตือนขยะเต ม 13 ปุ มกด เปิด ปิด เคร...

Page 11: ...ณ สำหรับเคลื อนย าย หลังใช งาน เปิดเครื องดูดฝุ นโดยกดปุ มกด เปิด ปิด 13 fig 8 แล วถอดปลั ก fig 11 เก บสายไฟโดยกดปุ มม วนสายไฟ 15 fig 12 เก บหัวดูดช องแคบ 22 ในช องเก บเฉพาะ 21 ด านหลังเครื อง วางหัวสำหรับพื นทุกประเภท 23 Fig 13 ยกเครื องดูดฝุ นได โดยจับที จับ 1 สิ งสำคัญ ปิดและถอดปลั กเครื องดูดฝุ นก อนบำรุงรักษาหรือทำความสะอาด เปลี ยนถุงเก บขยะ ไฟสัญญาณเตือนขยะเต ม 12 แสดงว าฝุ นเต มถุง หากพบว า...

Page 12: ...ากาศออก 19 แล วล างโดยเปิดน ำไฟลผ าน fig 27 ทิ งไว ให แห ง 24 ชั วโมง เปลี ยนแผ นกรองอากาศออก 19 แล วใส ในช องและปิดด วยตะแกรงกรองอากาศออก 20 fig 28 การทำความสะอาดเครื องดูดฝุ น เช ดเครื องและอุปกรณ ด วยผ าชุบน ำหมาดๆ แล วเช ดให แห ง เช ดฝาครอบด วยผ าแห ง อย าใช สารทำความสะอาดหรือผลิตภัณฑ ที มีฤทธิ กัดกร อน สิ งสำคัญ หากเครื องทำงานอยู เป นปกติ ก อนตรวจสอบให กดที ปุ ม เปิด ปิด เครื อง ควรใช ผู ชำน...

Page 13: ...ลายสายไฟ หากยังคงเป นปัญหาอยู นำเครื องดูดฝุ นไปยังศูนย บริการที ได รับการรับรองของ Tefal ที ใกล ที สุด การรับประกัน เครื องนี สำหรับใช ภายในอาคารเท านั น หากใช ไม เหมาะสมหรือไม เป นไปตามคู มือ การประกันจะเป นโมฆะ อ านคู มือการใช งานอย างละเอียดก อนใช เครื อง บริษัท Tefal จะไม รับผิดชอบต อการใช งานที ไม เหมาะสม ตามข อกำหนด หากไม ใช เครื องอีกต อไป ถอดปลั กเครื องตัดสายไฟก อนนำไปทิ ง มาร วมรักษาสิ ...

Page 14: ... bi pha i đươ c câ t xa tầm tay trẻ em Không sử dụng máy khi dây bị hỏng Nhằm tránh mọi nguy hiểm tiềm tàng toàn bộ hệ thống ống cuộn và dây dẫn của máy hút bụi của bạn phải được thay thế bởi Trung tâm dịch vụ ủy quyền của Tefal Không được phép để máy vận hành mà không có sự giám sát thích đáng Không để đầu hút hoặc đầu ống vào gần mắt hoặc tai Không được phép hút bề mặt ẩm nước hoặc chất lỏng dướ...

Page 15: ... cách giật dây dẫn Không được phép vận hành máy hút khi không có túi chứa và hệ thống lọc tấm lọc micro và tấm mút lọc khí thổi Kiểm tra chắc chắn rằng các tấm lọc đã được lắp đúng vị trí Chỉ sử dụng túi chứa và tấm lọc chính hãng Tefal Chỉ sử dụng linh kiện chính hãng Tefal Trong trường hợp khó kiếm được linh kiện và lõi lọc cho máy hút này hãy liên hệ với dịch vụ khách hàng của Tefal 1 Tay nắm d...

Page 16: ...ối với bộ biến thiên công suất cơ của đầu hút cong mở hết các cánh của đầu hút để giảm công suất hút ví dụ đối với các bề mặt dễ vỡ Hình 10 Thu dọn và di chuyển thiết bị Sau khi sử dụng dừng máy bằng cách nhấn lại lên bàn đạp khởi động dừng 13 Hình 8 và cắt thiết bị khỏi nguồn điện Hình 11 Thu lại dây dẫn bằng cách nhấn lên bàn đạp cuộn thu dây dẫn 15 Hình 12 Câ t đâ u hu t de p 22 va o trong ngăn...

Page 17: ...giá đỡ khoang chứa đã được lắp đúng vị trí trước khi đóng nắp máy 10 Vệ sinh tấm mút lọc khí thổi 19 Nội dung quan trọng vệ sinh tấm mút lọc khí thổi 6 tháng 1 lần Tháo lưới lọc khí thổi 20 ở phía sau máy Hình 26 Tháo tấm mút lọc khí thổi 19 và giặt bằng nước sạch Hình 27 để tấm mút khô trong vòng 24 giờ Lắp lại tấm mút lọc khí thổi 19 về vị trí cũ và đóng lưới lọc khí thổi 20 Hình 28 Vệ sinh máy ...

Page 18: ... 6 Nếu dây dẫn không thu về hoàn toàn Dây dẫn bị chậm khi thu về kéo lại dây dẫn ra ngoài nhấn lên bàn đạp thu dây Nếu 1 vấn đề xảy ra thường xuyên hãy mang máy của bạn tới Trung tâm dịch vụ ủy quyền của Tefal nơi gần nhất Bảo hành Thiết bị này chỉ được sử dụng vào các công việc nội trợ và trong gia đình nếu sử dụng không thích hợp hoặc không đúng với hướng dẫn sử dụng sẽ không có trách nhiệm nào ...

Page 19: ...kakas dan kordnya daripada capaian kanak kanak Jangangunakanperkakas jikakabelkuasarosak Untukmengelakkanda ripada bahaya penggulung dan kabel kuasa alat pembersih vakum anda mesti digantikan di salah sebuah Pusat Perkhidmatan PelangganTefal Jangan biarkan perkakas tanpa pengawasan semasa beroperasi Jangan letakkan muncung atau hujung tiub berdekatan dengan mata atau telinga Jangan vakumkan permuk...

Page 20: ...ntuk mengangkat perkakas Jangan tanggalkan perkakas melalui menarik kabel kuasa Jangan jalankan alat pembersih vakum tanpa memasangkan sistem penapisan buih mikropenapis dan penapis Pastikan semua penapis dipasangkan dengan baik Hanya gunakan beg dan penapisTefal Hanya gunakan aksesoriTefal sahaja Jika anda mengalami masalah semasa mencari aksesori aksesori atau penapis untuk alat pembersih vakum ...

Page 21: ...rhadapkedudukan minimum untuk perabot dan kain halus gambarajah 9 denganmenggunakanpenyelaraskuasamekanik bukaslaidkawalanuntukmengurangkankuasasedutansecara manual contohnya pada permukaan halus gambarajah 10 Penstoran dan pengangkutan perkakas Selepas digunakan tutup alat pembersih vakum anda dengan menekan pemijak ON OFF 13 gambarajah 8 dan menanggalkan perkakas daripada sumber tenaga gambaraja...

Page 22: ...galkan beg daripada kompartmen beg fig 15 Tanggalkan mikropenapis gambarajah 23 dan buang ke dalam tong ampah gambarajah 23 Letakkan mikropenapis baru ke dalam ruang fig 25 Letakkan semula beg pada bahagian dalam kompartment gambarajah 19 Pastikan kedudukan beg dan penyokong beg adalah betul sebelum menutupkan penutup semula 10 Bersihkan buih salur keluar udara 19 Penting bersihkan buih salur kelu...

Page 23: ...permaidani utilisez gunakan muncung penyedut dalam kedudukan ditarik balik gambarajah 5 untuk lantai parket dan lantai licin gunakan muncung penyedut dalam kedudukan berus dikeluarkan gambarajah 6 Jika kabel kuasa tidak dapat digulungkan dengan sepenuhnya Kabel kuasa sukar digulungkan tarik kabel semula dan tekan pada pemijak penggulung kabel kuasa Jika masalah tidak dapat diselesaikan sila bawa a...

Page 24: ...成人在旁監督 否則不應允許孩童清理裝置或執 行裝置之保養程序 請將本裝置與其線材放置於孩童可接觸範圍之外 如果電線損壞 請勿使用本吸塵機 為避免發生危險 如需更 換吸塵機的捲線器和電線 請送到特福授權的服務中心 切勿讓兒童在無人看管時使用吸塵機 請勿讓吸頭或吸管末端接近眼睛和耳朵 請勿吸潮濕 有水或其他液體的表面 任何性質液體 發熱物 體 極細碎物體 石膏 水泥 灰燼 大型鋒利碎片 玻 璃 有害 溶劑 去污劑 腐蝕性物質 硫酸 清潔劑 易燃及易爆物品 燃油或酒精 請勿將本吸塵機浸入水中 勿潑水於吸塵機上 勿放置於室外 如果吸塵機被摔落 並出現明顯的損壞或者故障時 請勿使用 吸塵機 在此情況下 切勿啟動吸塵機 請將吸塵機送至最近的 授權服務中心 或聯絡特福客戶部門 有關清潔與保養作業之說明 請參第23頁 1 安全提示 根據型號 某些型號有特定裝置或可選用配件 NC00903690 03_TW...

Page 25: ...廠吸塵袋和過濾器 只能使用特福原廠配件 如購買本吸塵器的配件和過濾器遇到困難 請聯絡特福客戶服務部門 裝配吸塵機的各個配件 將軟管插入吸塵機的軟管接口上 圖1 拔出軟管時 請沿相反方向拔出 圖2 如果您的吸塵機配有伸縮管 28 推動調整按鈕 將管拉出至需要的長度 然後松開按鈕以將其固定在 該位置 圖3或者輕輕轉動將管件 29 接合 圖4 套接適合管件端部的配件 4 使用 1 提把 2 輪子 3 集塵盒 4 微型過濾器 5 集塵袋支架導軌 6 集塵袋支架 7 紙塵袋 8 布塵袋 9 集塵袋支架感應器 10 集塵盒頂蓋 11 吸塵軟喉接口 12 塵袋更換指示燈 13 開 關按鍵 14 吸力調節器 15 電線回捲按鍵 16 卡榫 17 全向小輪 18 電源線 19 出氣柵濾網 20 出氣柵 21 縫隙吸咀存放格 22 縫隙吸咀 23 兩用地面吸咀 24 傢俬吸咀 25 防刮花地板吸咀 26 細渦...

Page 26: ...請務必關閉吸塵機並拔除電源插頭 更換吸塵袋 塵袋更換指示燈 12 提示您吸塵袋是否處於充滿或飽和狀態 如果您發現吸塵機的效能降低 請將吸力調整至最小並保持吸咀在地面上 如果指示燈為紅色 請更換吸 塵袋 取下吸塵軟喉接口 11 處的軟管 27 圖2 打開吸塵機的集塵盒頂蓋 10 圖14 a 如果吸塵機配有紙塵袋 取下集塵盒 3 的集塵袋支架 6 圖15 然後通過在導軌上滑動其支架 6 取出紙塵袋 7 圖16 將紙塵袋扔入垃圾桶 圖17 在集塵袋支架上放置一個新的紙塵袋 圖18 然後借助集塵袋支架導軌 5 將其置入集塵盒內 圖19 重新蓋上集塵盒頂蓋 10 之前 請確保紙塵袋及集塵袋支架的位置良好 b 如果吸塵機配有布塵袋 取下集塵盒 3 的集塵袋支架 6 圖15 然後通過在導軌上滑動其支架 6 取出布塵袋 8 圖 16 借助擋杆打開塵袋 圖20 然後將其內部的垃圾全部倒入垃圾桶 圖21 用清...

Page 27: ...布擦洗吸塵機及其配件 然後晾乾 用幹布擦拭集塵盒頂蓋 請勿使用除垢 腐蝕性或研磨性產品 重要提示 當您一旦發現吸塵機有任何不正常 在檢查前先按開 關按鍵關掉吸塵機 吸塵機的維修必須由專業人員使用原廠配件執行 如果您的吸塵機無法啟動 沒有電源 檢查吸塵機是否接通了電源 如果您的吸塵機不能吸塵 某一附件或軟管堵塞 疏通附件或軟管 集塵盒頂蓋未蓋好 檢查塵袋是否放置好 重新蓋上集塵盒頂蓋 如果您的吸塵機吸塵效果不佳 發出噪音或鳴叫聲 某一附件或軟管部分堵塞 疏通附件或軟管 塵袋被細微灰塵填滿或充滿 更換紙塵袋 7 或倒空布塵袋 8 過濾系統被填滿 取下微型過濾器 更換一個新微型過濾器 手柄吸力調節器的調節活門打開 關閉調節活門 如果塵袋充滿指示燈為紅色 塵袋被填滿 更換紙塵袋 7 或倒空布塵袋 8 如果集塵盒頂蓋没有關上 集塵袋支架感應器 9 的動作 檢查是否有塵袋及集塵袋支架 6 或其位置是否...

Page 28: ...慢 請將電線再次拉出 按住電線回捲按鍵 如果問題仍然存在 請帶着您的吸塵機到 最近的特福授權服務中心進行咨詢修理 保養 該吸塵機僅限於家庭範圍使用 如使用不當或不按照使用說明書使用 本品牌不負任何責任 保養資格也 將取消 首次使用本吸塵機之前 請仔細閱讀使用說明書 如您不按照使用說明書使用 特福公司將不承擔任何責 任 根據現行法規規定 應確保任何報廢的機器最終無法使用 丢棄機器之前 請切斷電源並剪斷電線 參與環境保護 吸塵機包含很多有價值或可回收的材料 將您的吸塵機放到回收點以便進行處理 7 環境 HK 根據型號 某些型號有特定裝置或可選用配件 NC00903690 03_TW22_micro space qxp_NC00903690 03 21 06 2016 09 54 Page25 ...

Reviews: