TechniSat TechniPlayer LP 300, Instruction Manual
Get your hands on the Instruction Manual for TechniSat TechniPlayer LP 300 for free download. Simply visit manualshive.com and get all the information you need to set up and use this cutting-edge product. Don't miss out on this essential manual to enhance your user experience.
Share
Download


Reviews:
No comments
Related manuals for TechniPlayer LP 300
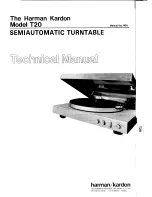
T20
Brand: Harman Kardon Pages: 8

OliPadSmart
Brand: Olivetti Pages: 28

7C+
Brand: UBISLATE Pages: 17

TAC-10031 MK2
Brand: Denver Pages: 14

PoE Touch Monitor
Brand: Winmate Pages: 28

PDK-50HW2
Brand: Pioneer Pages: 82

PLX-1000
Brand: Pioneer Pages: 44

pl-x50
Brand: Pioneer Pages: 60

PLX-1000
Brand: Pioneer Pages: 116

Super Tuner III D DEH-P4800MP
Brand: Pioneer Pages: 154

TT-N503
Brand: Yamaha Pages: 2

YP-D71
Brand: Yamaha Pages: 11

YP-D71
Brand: Yamaha Pages: 12

P-850
Brand: Yamaha Pages: 12

PF-800
Brand: Yamaha Pages: 12

P-520
Brand: Yamaha Pages: 12

P-07
Brand: Yamaha Pages: 12

YP-700
Brand: Yamaha Pages: 16


