Thank you for purchasing our product.
MODEL RTA-2018
ASSEMBLY INSTRUCTIONS
REV.032021-2
Page 1: ...Thank you for purchasing our product MODEL RTA 2018 ASSEMBLY INSTRUCTIONS REV 032021 2 ...
Page 2: ...ead carefully the assembly instructions before the installation Do not discard this manual or any of the packaging material until the unit has been completely assembled Might require two people P 1 RTA 2018 P 1 ...
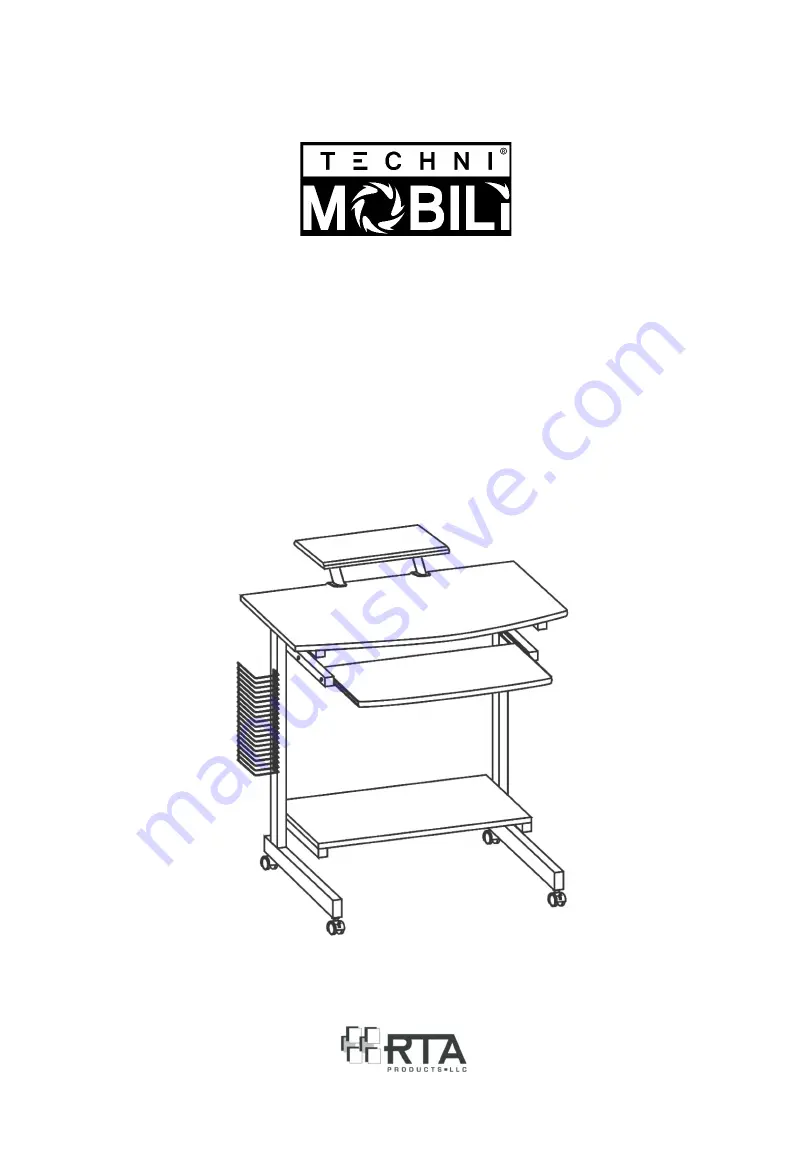
Page 3: ...t structure Locking caster Non locking caster MAIN PARTS LIST 3 x1 Back panel 4 x1 Lower panel 5 x1 Main panel 6 X1 SET 7 x1 Keyboard slider SET Keyboard panel 8 x1 9 x1 Printer Monitor panel CD holder 10A x2 10B x2 Support tube Protection clip 10C x2 Screw knob ...
Page 4: ...MAIN PARTS LAYOUT FOR REFERENCE P 3 RTA 2018 P 3 LIST OF SCREWS AND TOOLS PART QTY ITEM A 4 M6x45 B 8 M6x30 C 6 M6x12 D 4 ST4x12 E 4 M4x12 1 Hex wrench Spanner 1 Allen wrench 8 10 9 5 7 4 1R 1L 2L 2N ...
Page 5: ...ot overtighten or force the screws as they might break strip damage the threads of the holes or get stuck inside the part Make sure you understand which hardware will be used on each step Using the wrong size of screw bolt or pin might strip the threads or cause damage to the part in which it is being used To avoid misalignments always leave the screws loose and tighten them until all pieces are p...
Page 6: ...nserts in the back panel 3 then assemble it to the structures 1L and 1R with screws A STEP 2 Screws Tools A M6x45 4 Pcs L N Locking at front Non locking at back Panel 3 comes with pre aligned metal inserts on its interior face If the screws don t want to enter in the panel you will have to use the Allen wrench to turn and re align the inserts as shown below The middle and lower bars face towards t...
Page 7: ...ctures 1L and 1R with screws B from underneath as shown STEP 4 Screws Tools B M6x30 4 Pcs STEP 5 Screws Tools E M4x12 4 Pcs Assemble the keyboard sliders 6 on their respective sides to the middle bars of the structures 1L and 1R with screws E from the inside The screws have to go through the sliders holes and insert into the holes on the structures as shown The flat side goes against the bar The t...
Page 8: ...k 9 to either structure 1L or 1R with screws C according to your preference STEP 6 Screws Tools D ST4x12 4 Pcs STEP 7 Screws Tools C M6x12 2 Pcs OR STEP 8 Screws Tools C M6x12 4 Pcs Assemble the support tubes 10A to the monitor printer panel 8 with screws C then insert the protection clips 10B in the support tubes as shown ...
Page 9: ...ur preference making sure that the protection clips 10B are positioned in between then use the screw knobs 10C to secure the tubes as shown STEP 9 IMPORTANT Place the protection clips 10B first This view is from the back side ALL DONE Give yourself a nice pat on the back You did a great job ...
Page 10: ...the unit with the front casters locked Before moving the unit make sure to unlock the front casters and secure or remove any object that might fall off When lifting the unit use both hands and bend your knees not your backs When transporting the unit to places far away lock the front casters and protect and secure the unit to avoid damage in transit Shall any part of the unit become defective duri...
Page 11: ...ranty or merchantability or of fitness for a particular purpose Please note all desks made with PVC Laminate surface should not be exposed to direct sunlight as it may damage the material Damage of this nature is not covered under this warranty RTA Products will not be responsible for indirect special incidental or consequential damages This warranty is limited to merchandise purchased in the Cont...
Page 12: ...G REPLACEMENT PARTS ORDERS _________________________________________________________________ VISIT WWW TECHNIMOBILI COM CLICK ON SUPPORT TAB Scan QR Code to order replacement parts OR EMAIL US SUPPORT RTAPRODUCTS COM P 11 RTA 2018 P 11 ...