background image


Copies  of  the  I/B.  Please  reproduce  them  without  any 
changes  except  under  special  instruction  from  Team 
International  BELGIUM.  The  pages  must  be  reproduced  and 
folded in  order  to  obtain  a  booklet  A5  (+/-  148.5  mm  width  x 
210 mm height). When folding, make sure you keep the good 
numbering when you turn the pages of the I/B. Don’t change 
the page numbering. Keep the language integrity. 


Front cover page (first page) 


Assembly page 1/56 


Fax +32 2 359 95 50 


Küchenmaschine 

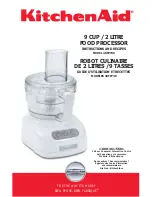
Food Processor 

Robot Multifonctions 

Keukenmachine 

Robot de cocina 

Robot de Cozinha 

Robot da cucina 

Robot kuchenny 


TKG RB 3 

230V~ 800W 

I/B Version 

071212 

Summary of Contents for TKG RB 3

Page 1: ... mm width x 210 mm height When folding make sure you keep the good numbering when you turn the pages of the I B Don t change the page numbering Keep the language integrity Front cover page first page Assembly page 1 56 Fax 32 2 359 95 50 Küchenmaschine Food Processor Robot Multifonctions Keukenmachine Robot de cocina Robot de Cozinha Robot da cucina Robot kuchenny TKG RB 3 230V 800W I B Version 07...

Page 2: ...nal BELGIUM The pages must be reproduced and folded in order to obtain a booklet A5 148 5 mm width x 210 mm height When folding make sure you keep the good numbering when you turn the pages of the I B Don t change the page numbering Keep the language integrity 2 TKG RB 3 071212 Assembly page 2 56 Fax 32 2 359 95 50 ...

Page 3: ...blade G Plastic whisking blade F A Base 1 Couvercle de sécurité 2 Sélecteur marche arrêt et de vitesses 3 Bloc moteur 4 Axe du bol du blender 5 Axe du bol du robot B Bol du blender 6 Capuchon du couvercle du blender 7 Couvercle du blender 8 Poignée 9 Bol du blender C Bol du robot 10 Poussoir 11 Couvercle avec tube de remplissage 12 Bol du robot D Support des lames 13 Lames 14 Support des lames E L...

Page 4: ...minas 13 Lâminas 14 Suporte das lâminas E Lâmina de cortar em plástico F Lâmina metálica de triturar G Lâmina misturadora em plástico IT A Base 1 Coperchio di sicurezza 2 Selettore acceso spento e di velocità 3 Base motore 4 Asse del bicchiere frullatore 5 Perno Asse del recipiente B Bicchiere 6 Tappo del coperchio del frullatore 7 Coperchio del frullatore 8 Manico della brocca 9 Bicchiere del fru...

Page 5: ...d and folded in order to obtain a booklet A5 148 5 mm width x 210 mm height When folding make sure you keep the good numbering when you turn the pages of the I B Don t change the page numbering Keep the language integrity 5 TKG RB 3 071212 Assembly page 5 56 Fax 32 2 359 95 50 BEDIENUNG HOW TO USE UTILISATION GEBRUIK USO UTILIZAÇÃO UTILIZZO UśYTKOWANIE ...

Page 6: ... das Gerät reinigen Benutzen Sie das Gerät nicht im Freien und bewahren Sie es an einem trockenen Platz auf Benutzen Sie nur Zubehör welches vom Lieferanten empfohlen wurde Anderes Zubehör stellt eine Gefahr für den Benutzer dar und das Gerät könnte dadurch beschädigt werden Ziehen Sie niemals an der Anschlussleitung um das Gerät zu bewegen Achten Sie darauf dass zufälligerweise die Anschlussleitu...

Page 7: ...ollten mindestens 10 Minuten betragen BEDIENUNG Zur Benutzung der Arbeitsschüssel 12 muss der Verschlussdeckel für den Mixerantrieb 1 geschlossen sein Abb A Seite 2 Vergewissern Sie sich auch dass der Stecker aus der Steckdose ist und der EIN AUS Geschwindigkeitsschalter auf 0 steht Stellen Sie die Arbeitsschüssel 12 auf die Schüsselachse 5 Vergewissern Sie sich dass die 3 kleinen Blöckchen an der...

Page 8: ...Festigkeit haben VORSICHT Versuchen Sie nicht sehr harte Produkte Eis Zucker Kaffeebohnen zu hacken Falls Sie Flüssigkeiten oder andere Zutaten während der Zubereitung hinzufügen wollen füllen Sie durch den Fülltrichter bei und benutzen Sie den Stopfer 10 um die Nahrungsmittel durch den Fülltrichter zu drücken Benutzen Sie nie Ihre Finger oder andere Utensilien Falls Nahrungsmittel an der Schüssel...

Page 9: ...e 5 Stellen Sie den Halter 14 auf die Schüsselachse 5 Abb b Seite 5 Stellen Sie den Schüsseldeckel mit Fülltrichter auf die Schüssel wie im Abschnitt Bedienung beschrieben und vergewissern Sie sich dabei dass die Metallachse des Halters für die Klingen in das Loch des Deckels hineinpasst Schneiden Sie die Kartoffeln die Karotten die Gurken u a in Stücke die der Größe des Zufuhrschachtes im Schüsse...

Page 10: ...sen von mindestens 1 Minute zwischen zwei Benutzungen einzuschieben damit der Motor abkühlt REINIGUNG UND AUFBEWAHRUNG Reinigung des Blenders Stellen Sie die Blenderkanne auf den Motorblock wie im Abschnitt Mischen anhand des Blenders erklärt Lassen Sie die Arbeitsschüssel mit Deckel am Platz Geben Sie niemals Zubehörteile oder Nahrung in die Arbeitsschüssel Gießen Sie etwas Seifenwasser in die Bl...

Page 11: ... 1 Esslöffel Öl eine Prise Salz Gießen Sie alle Zutaten in die Arbeitsschüssel mit dem Schnellzerhacker Schließen Sie den Deckel Drehen Sie den Geschwindigkeitsschalter zur Einstellung 2 bis Sie homogenen Teig erhalten Wenn Sie leichteres Teig möchten ersetzen Sie Milch durch Bier MAYONNAISE 1 Eigelb 1 Esslöffel Senf 1 Esslöffel Essig Öl Salz und Pfeffer Die Zutaten dürfen nicht zu kalt sein Geben...

Page 12: ... environment Never use accessories that are not recommended by the producer They could constitute a danger to the user and risk to damage the appliance Never move the appliance by pulling the cord Make sure the cord cannot get caught in any way Do not wind the cord around the appliance and do not bend it Unplug the appliance when not in use Only use consumable food This kind of appliance cannot fu...

Page 13: ...age 5 Make sure the bowl is well fitted if not the appliance will not work Depending on the desired preparation you will have to use various accessories For more details please check the instructions below Place the lid with feeding tube 11 on the bowl and turn it anticlockwise until the tabs of the lid are locked in place in the slots on top of the bowl and base and until the symbol on the lid en...

Page 14: ... such as tart pastry or pizza dough Make sure the appliance is unplugged that the ON OFF speed switch 2 is in 0 position and that the safety lid 1 is closed Place the processor bowl 12 onto the shaft and turn it anticlockwise until it locks into place and the handle is on the right hand side fig d page 5 Then put the whisking blade G on the shaft in the middle of the bowl Put the ingredients into ...

Page 15: ...e bottom of the jug has to be right above the symbol on the base Shut the lid with its cap 6 put the cap in the hole of the lid and turn it clockwise to lock it into place and screw the lid onto the blender Make sure the tabs of the lid fit into the slots of the jug and its handle Make sure the assembly has been done properly the lid and the jug have to be locked Depending on the type of food you ...

Page 16: ...lean them in hot soapy water Handle the blades carefully when cleaning They are extremely sharp Storage Never store the appliance with the lid locked since this gives continuous pressure on the safety mechanism This also avoids unpleasant smells which may linger in the bowl Your appliance is equipped with a drawer which can be used to store the stainless steel blades 13 fig e page 5 To attach the ...

Page 17: ...ax 32 2 359 95 50 PROTECTION OF THE ENVIRONMENT DIRECTIVE 2002 96 EC In order to preserve our environment and protect human health the waste electrical and electronic equipment should be disposed of in accordance with specific rules with the implication of both suppliers and users For this reason as indicated by the symbol on the rating label or on the packaging your appliance should not be dispos...

Page 18: ...lez à ne pas utiliser l appareil à l extérieur et entreposez le dans un endroit sec Ne pas utiliser des accessoires non recommandés par le fabricant cela peut présenter un danger pour l utilisateur et risque d endommager l appareil Ne déplacez jamais l appareil en tirant sur le câble Veillez à ce que le cordon d alimentation ne puisse être accidentellement accroché et ce afin d éviter toute chute ...

Page 19: ...nulerait vos droits de garantie UTILISATION Pour utiliser le bol du robot 12 le couvercle de sécurité 1 doit être fermé Fig A page 2 Assurez vous que l appareil est débranché et que le sélecteur marche arrêt vitesses 2 soit sur la position 0 Placez le bol du robot 12 sur son axe 5 en vous assurant que les 3 petits ergots sur le fond du bol s emboîtent dans les petites fentes de la base et faites l...

Page 20: ...tonnoir N utilisez jamais vos doigts ou un autre ustensile Si de la nourriture adhère au bol ou si le bol doit être raclé pendant la préparation l appareil doit être éteint Attendez quelques instants que la lame ait fini de tourner avant de retirer le couvercle Lorsque vous utilisez votre appareil de façon intensive il est nécessaire d effectuer des pauses d au moins 1 minute entre chaque opératio...

Page 21: ...eil et positionnez le sélecteur marche arrêt vitesses sur 1 pour mettre l appareil en marche Ajustez ensuite la vitesse si nécessaire Positionnez toujours le sélecteur marche arrêt vitesses sur 0 arrêt et débranchez l appareil avant de vider la préparation et manipulez les lames avec précaution car elles sont coupantes Lorsque vous utilisez votre appareil de façon intensive il est nécessaire d eff...

Page 22: ...t d eau Servez vous d une éponge si nécessaire tout en prenant garde de ne pas vous blesser avec les lames Rincez de nouveau le bol du blender sous un jet d eau et laissez sécher Rincez les accessoires sous un jet d eau et laissez sécher Le bloc moteur ne doit être nettoyé qu avec un chiffon légèrement humide Nettoyage du robot et de ses accessoires Débranchez l appareil Tournez le couvercle avec ...

Page 23: ... de vinaigre Huile Sel Poivre Les ingrédients ne doivent pas être trop froids Mettez les ingrédients sauf l huile dans le bol du robot muni du mélangeur Verrouillez le couvercle Positionnez le sélecteur sur la vitesse 2 Mélangez quelques secondes puis sans arrêter votre robot versez lentement l huile par le tube de remplissage du couvercle PROTECTION DE L ENVIRONNEMENT DIRECTIVE 2002 96 CE Afin de...

Page 24: ...it aan het snoer om het toestel te verplaatsen Zorg dat het elektriciteitssnoer nergens kan achterhaken en daardoor de val van het toestel veroorzaken Draai het snoer niet rond het toestel en plooi het niet Trek het snoer uit het stopcontact wanneer het toestel niet in gebruik is Gebruik dit toestel enkel voor culinaire doeleinden Dit soort toestel kan niet doorlopend werken het is geen toestel vo...

Page 25: ...gkom in de openingen van de basis passen en draai de mengkom tegen de wijzers van de klok in totdat ze vast komt te zitten Afb b c d pagina 5 Zorg ervoor dat de mengkom goed geïnstalleerd is anders zal het toestel niet werken Naargelang van het soort bereiding dient u van verschillende accessoires gebruik te maken in overeenstemming met onderstaande instructies Plaats het deksel met vulbuis 11 op ...

Page 26: ...anneer u het toestel intensief gebruikt is het noodzakelijk pauzes van minstens 1 minuut in te lassen om de motor te laten afkoelen Als u bloem of gerezen deeg hakt is de maximaal toegelaten hoeveelheid in de mengkom 500g en de maximaal toegelaten gebruiksduur is 45 seconden Laat het toestel na elk gebruik 1 minuut afkoelen Het metalen hakmes is zeer scherp U kan de plastic mesbescherming gebruike...

Page 27: ...nsief gebruikt is het noodzakelijk pauzes van minstens 1 minuut in te lassen om de motor te laten afkoelen d Mengen met de blender Om de blender te gebruiken moet de mengkom 12 geïnstalleerd zijn en moet het deksel ervan gesloten zijn Doe geen accessoire of ingrediënten in de mengkom Neem het veiligheidsdeksel 1 af door het los te draaien Open het deksel van de blenderkan en doe de gewenste ingred...

Page 28: ...ochtige doek Reiniging van de mengkom van de keukenmachine en van de accessoires Trek de stekker van het toestel uit het stopcontact Draai het deksel van de mengkom met de wijzers van de klok mee om het los te koppelen Verwijder de accessoires en de mengkom van de keukenmachine Pas op voor verwondingen bij het hanteren van de messen Spoel de mengkom van de keukenmachine en de accessoires onder str...

Page 29: ...mogen niet te koud zijn Doe de ingrediënten behalve de olie in de mengkom van de keukenmachine uitgerust met het roeraccessoire Sluit het deksel Zet de snelheidsregelaar op snelheid 2 Laat de keukenmachine enkele seconden werken en giet vervolgens zonder de keukenmachine uit te zetten heel langzaam de olie door de vulbuis naar binnen MILIEUBESCHERMING RICHTLIJN 2002 96 EG Om ons milieu en onze gez...

Page 30: ...esenchufada antes de limpiar el aparato Procure no utilizar el aparato en el exterior y colóquelo en un sitio seco No utilice accesorios no recomendados por el fabricante ello puede entrañar un riesgo para el usuario y puede dañar el aparato No mueva nunca el aparato estirando del cable Procure que el cable no se enganche en algún saliente a fin de evitar posibles caídas del mismo Evite enrollar e...

Page 31: ...r por los menos 10 minutos Una utilización contraria a esas instrucciones anularía sus derechos de garantía UTILIZACIÓN Para utilizar el tazón del robot 12 la tapa de seguridad 1 tiene que estar cerrada Fig A página 2 Asegúrese que el aparato está desenchufado y el selector encendido apagado y velocidades 2 está en la posición 0 Coloque el tazón del robot 12 en el eje 5 compruebe que las 3 uñas en...

Page 32: ...empujador 10 para empujar los ingredientes hacia las cuchillas No empuje nunca con los dedos o con otro utensilio Si comida adhiera al vaso y que el vaso necesita estar raspado durante la preparación el aparato debe estar apagado Espere un rato hasta que la hoja deje de girar antes de remover la tapa Cuando utiliza su aparato de modo intensivo es necesario efectuar pausas de un minuto por lo menos...

Page 33: ...endido apagado y velocidades sobre 1 para poner el aparato en marcha Luego puede ajustar la velocidad Antes de vaciar el tazón posicione siempre el selector encendido apagado y velocidades en 0 apagado y desenchufe el aparato Toque las cuchillas con cuidado porque están muy afiladas Cuando utiliza su aparato de modo intensivo es necesario efectuar pausas de un minuto por lo menos entre cada operac...

Page 34: ...chufe el aparato quite el vaso de la batidora y páselo por agua Si necesario utilice una esponja teniendo cuidado de no herirse con las cuchillas Pase de nuevo el vaso por agua y déjelo secar Pase los accesorios por agua y déjelos secar El bloque motor sólo puede limpiarse con un paño ligeramente humedecido Limpieza del robot y de los accesorios Desenchufe el aparato Gire la tapa con el tubo de ll...

Page 35: ...za MAYONEZA 1 yema de huevo 1 cucharada sopera de mostaza 1 cucharada sopera de vinagre aceite sal y pimienta Los ingredientes no deben estar demasiado fríos Ponga los ingredientes excepto el aceite en el tazón del robot con el misturador Cierra la tapa Elija la velocidad 2 con el selector Misture durante unos segundos y sin parar el robot derrame despacio el aceite por el tubo de llenado de la ta...

Page 36: ... casa e deve ser guardado em locais secos Use sempre os acessórios recomendados pelo fabricante Não retire o cabo da alimentação da tomada puxando pelo mesmo pois danifica o aparelho e pode provocar a sua queda Verifique se o cabo da alimentação não se encontra preso em alguma coisa Nunca enrole o cabo da alimentação à volta do aparelho Logo que não precise do aparelho desligue o e retire a ficha ...

Page 37: ...ixam nas pequenas ranhuras da base do aparelho e gire a no sentido contrário ao dos ponteiros do relógio até se ouvir um click fig b c d página 5 Verifique que a taça está bem alojada Se não for o caso o aparelho não funcionará Conforme as preparações desejadas vários acessórios têm de ser utilizados Para mais informações leia as instruções a seguir Coloque a tampa com a abertura tipo chaminé 11 n...

Page 38: ... Quando utilizar o seu aparelho de forma intensiva tem que efectuar pausas de um minuto no mínimo entre cada operação para deixar arrefecer o motor Se amassar farinha ou outra massa a quantidade máxima a colocar na taça é de 500 gr e o máximo tempo de funcionamento 45 segundos No intervalo de cada utilização faça uma paragem de 1 minuto para que o aparelho arrefeça A lâmina metálica é muito afiada...

Page 39: ... de manipular com todo o cuidado as lâminas para que não se corte coloque o botão ligar desligar e velocidades na posição 0 desligado e retire a ficha do cabo da alimentação da tomada Quando utilizar o seu aparelho de forma intensiva tem que efectuar pausas de um minuto no mínimo entre cada operação para deixar arrefecer o motor d Bater com o liquidificador Para utilizar o liquidificador a taça do...

Page 40: ... Retire a ficha do cabo da alimentação da tomada eléctrica e tire o copo liquidificador e lave o com água corrente Se necessário utilize uma esponja tendo sempre o cuidado em não se cortar nas lâminas Lave novamente o copo liquidificador com água e deixe o secar Passe por água os acessórios e deixe os secar O bloco do motor só pode ser limpo com um pano pouco húmido Limpeza do robot e dos acessóri...

Page 41: ... das de sopa com vinagre óleo sal e pimenta Os ingredientes não podem estar muito frios Coloque os ingredientes sem o óleo na taça com o acessório do misturador Ponha o selector das velocidades em 2 Amasse e sempre com o processador em funcionamento verta muito lentamente óleo pelo tubo de enchimento da tampa até engrossar PROTECÇÃO DO MEIO AMBIENTE DIRECTIVA 2002 96 CE Para a preservação do ambie...

Page 42: ...gliati dal fabbricante l utilizzo di accessori diversi potrebbe essere pericoloso per l utente ed inoltre potrebbe danneggiare l apparecchio Non tirare il cavo d alimentazione per spostare l apparecchio Per evitare eventuali cadute del prodotto assicurarsi sempre che il cavo non si possa impigliare e che sia libero da ostacoli Non avvolgere il cavo attorno all apparecchio e non torcerlo Togliere s...

Page 43: ...ette poste sul fondo della ciotola si adattino alle bande situate sulla base e farlo ruotare in senso antiorario fino a ché non raggiunge la giusta posizione fig b c d pagina 5 Verificare che il recipiente sia correttamente posizionato in caso contrario l apparecchio non si metterà in funzione Gli accessori devono essere selezionati in base al tipo di preparazione che volete effettuare per ulterio...

Page 44: ...elle pause di almeno 1 minuto tra ogni operazione perché il motore si possa raffreddare Se volete tritare farina o lievito per preparare un impasto la quantità massima da mettere nella ciotola è 0 500 g mentre il tempo massimo di funzionamento dell apparecchio è di 45 minuti Dopo ogni uso spento il robot da cucina per almeno un minuto La lama di metallo utilizzata per tritare è molto pericolosa do...

Page 45: ...l preparato bisogna sempre portare il selettore acceso spento e velocità a 0 spento ed attendere che le lame siano ferme dopodiché staccare la spina dalla presa di corrente Fare molta attenzione nel maneggiare le lame poiché sono molto taglienti Quando si utilizza l apparecchio in modo intensivo è necessario effettuare pause di almeno 1 minuto tra ogni operazione affinché il motore possa raffredda...

Page 46: ...ore e risciacquarlo nel lavandino Qualora sia necessario si può utilizzare una spugna ma bisogna prestare attenzione a non toccare le lame perché sono molto taglienti Risciacquare di nuovo il bicchiere e lasciarlo asciugare Risciacquare gli accessori e lasciarli asciugare La base del motore può essere pulita solo con un panno leggermente umido Pulizia del robot e dei suoi accessori Staccare la spi...

Page 47: ...ti gli ingredienti escluso l olio nel recipiente del robot con il mixer Bloccare il coperchio Scegliere la velocità 2 con il selettore Mescolare per qualche secondo e senza spegnere il robot versare lentamente l olio nel tubo del coperchio DIRETTIVA 2002 96 CE PER LO SMALTIMENTO DELLE APPARECCHIATURE ELETTRICHE ED ELETTRONICHE Per preservare l ambiente e la nostra salute l eliminazione dei vecchi ...

Page 48: ...ka Mogą one równieŜ wpłynąć na wadliwe działanie urządzenia lub jego uszkodzenie Nigdy nie ciągnij nie podnoś itp urządzenia za kabel ani nie wyłączaj wtyczki z sieci w ten sposób Nie owijaj kabla wokół urządzenia nie zginaj go nie skręcaj Wyłącz urządzenie z sieci kiedy nie jest uŜywanie oraz przed jego czyszczeniem UŜywaj urządzenia wyłącznie do prac kuchennych Aby urządzenie nie uległo przegrza...

Page 49: ... w stronę przeciwną do ruchu wskazówek zegara tak aby wypustki weszły dokładnie w otwory a symbol na pokrywie zgrał się z symbolem na misie Uwaga urządzenie nie będzie działać w przypadku nie prawidłowego montaŜu Włącz urządzenie do sieci Ustaw regulator prędkości 2 na jednym z 4 biegów w zaleŜności od przygotowywanego produktu UŜyj biegów 1 i 2 do delikatnego miksowania napojów zup sosów Do ubija...

Page 50: ... trzonek ostrzy załoŜony jest w otworze na środku pokrywy Akcesoria do ubijania naleŜy stosować do przygotowania białek jaj majonezu czy kremów Naraz moŜna przygotować 0 5 l produktu Nie uzywaj do mieszania produktów z uŜyciem droŜdŜy Włącz urządzenie do sieci i ustaw regulator prędkości w pozycję 1 JeŜeli podczas przygotowania chcesz dodać składniki uŜyj w tym celu tuby wlotowej JeŜeli urządzenie...

Page 51: ...akcie pracy blendera obraca się równieŜ trzonek misy Nie naleŜy wewnątrz zostawiać Ŝadnych akcesoriów Przepychacz 10 zawsze przechowuj w tubie wlotowej Po zakończeniu miksowania ustaw wyłącznik w pozycję 0 i odłącz kabel zasilający z sieci Przed zdjęciem dzbanka poczekaj aŜ urządzenie całkowicie się zatrzyma JeŜeli urządzenie uŜywane jest intensywnie konieczne są przerwy w pracy Aby nieco ostudzić...

Page 52: ...eju w misie robota wyposaŜonej w ostrza do mieszania Zamknij pokrywę Ustaw regulację prędkości w pozycję 2 Po kilku sekundach kiedy składniki zamienią się w płyn dodaj olej powoli wlewając go przez tubę wlotową OCHRONA ŚRODOWISKA NATURALNEGO Symbol na tabliczce znamionowej urządzenia oznacza Ŝe produktu nie wolno wyrzucać razem z innymi odpadami z gospodarstw domowych Polskie prawo zabrania pod ka...

Page 53: ...al BELGIUM The pages must be reproduced and folded in order to obtain a booklet A5 148 5 mm width x 210 mm height When folding make sure you keep the good numbering when you turn the pages of the I B Don t change the page numbering Keep the language integrity 53 TKG RB 3 071212 Assembly page 53 56 Fax 32 2 359 95 50 ...

Page 54: ...al BELGIUM The pages must be reproduced and folded in order to obtain a booklet A5 148 5 mm width x 210 mm height When folding make sure you keep the good numbering when you turn the pages of the I B Don t change the page numbering Keep the language integrity 54 TKG RB 3 071212 Assembly page 54 56 Fax 32 2 359 95 50 ...

Page 55: ...al BELGIUM The pages must be reproduced and folded in order to obtain a booklet A5 148 5 mm width x 210 mm height When folding make sure you keep the good numbering when you turn the pages of the I B Don t change the page numbering Keep the language integrity 55 TKG RB 3 071212 Assembly page 55 56 Fax 32 2 359 95 50 ...

Page 56: ...rder to obtain a booklet A5 148 5 mm width x 210 mm height When folding make sure you keep the good numbering when you turn the pages of the I B Don t change the page numbering Keep the language integrity Back cover page last page Assembly page 56 56 Fax 32 2 359 95 50 Deutsch 6 English 12 Français 18 Nederlands 24 Español 30 Português 36 Italiano 42 Polska 48 TKG RB 3 ...

Reviews: