VIII) Adjustment of Picture Geometry (PAL)
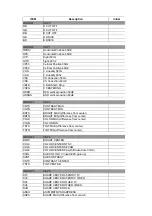
1. Apply the crosshatch pattern (PAL signal) to the RF input, in STANDARD status.
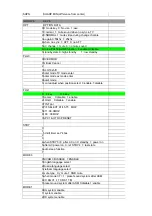
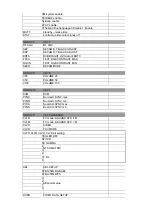
2. Select HPOS to adjust the Horizontal center.
3. Select VP50 to adjust the Vertical center.
4. Select HIT to adjust the Vertical amplitude.
5. Select VLIN to adjust the vertical linearity.
6. Select VSC to adjust the vertical S-correction.
IX) Adjustment of Picture Geometry (NTSC)
1. Apply the crosshatch pattern (NTSC signal) to the RF input, in STANDARD status.
2. Select HPS to adjust the Horizontal center.
3. Select VP60 to adjust the Vertical center.
4. Select HITS to adjust the Vertical amplitude.
5. Select VLIS to adjust the vertical linearity.
6. Select VSS to adjust the vertical S-correction.
X) Adjustment of OSD position
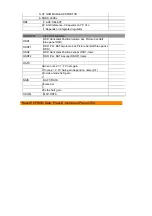
1. Enter D-mode and press key “1”, then choose OSDH(OSDHS) item and adjust the OSD vertical
position 50HZ(60HZ).
2. Enter D-mode and press key “NOTE”, then choose the OSD1 item and adjust the OSD horizontal
position(Volume bar,Picture bar,Half blue panel OSD).
3. Enter D-mode and press key “NOTE”, then choose the OSD2 item and adjust the OSD horizontal
position except OSD1 item.
XI)D-mode
:
1. press D-Mode ON/OFF key, and then you can enter the D-mode.
2. press VOLUME DOWN key on the unit until the volume decrease to minimum level, then press the
DISPLAY key on the remote handset (don’t release the volume key) and you can enter D- mode.
After enter D-mode you can adjust the setting according to the following procedure,

