6
TASCAM VS-R264 / VS-R265
3 - Preparation
Installing the attachment brackets
By installing the included attachment brackets on this unit, you
can fix it in place on top of or underneath a desk, for example.
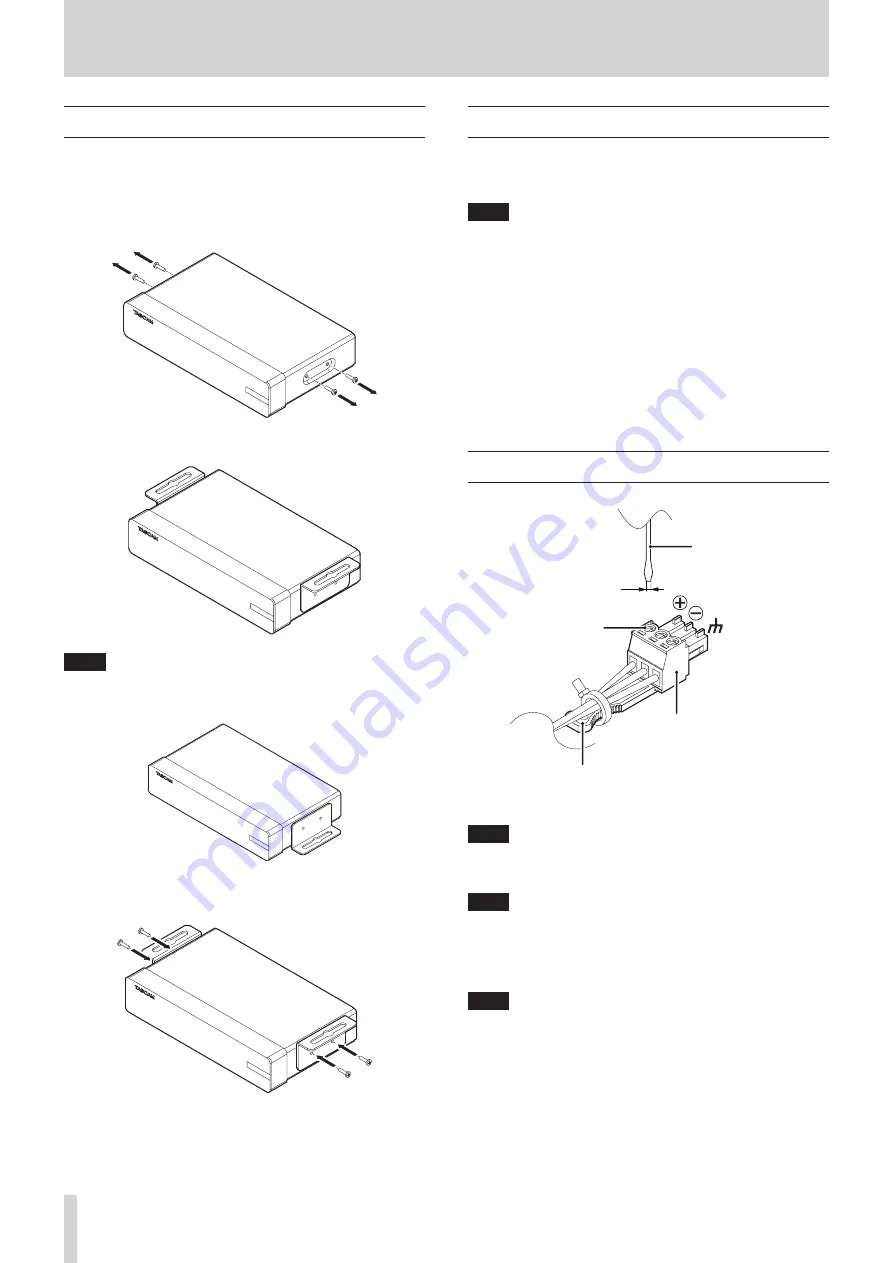
1. Remove the four screws installed in the left and right sides
of the enclosure.
2. Align the included attachment brackets with the enclosure.
NOTE
When installing this unit on a desk, align the brackets as
shown in the illustration below.
3. Use the four removed screws to install the attachment
brackets on the unit.
Installing on or under a desk
To install this unit on or under a desk, use 4 commercially-
available screws that are suitable for the material and thickness
of the desk.
NOTE
The width of the attachment bracket openings is 7.1 mm.
See the dimensional diagrams at the end of this manual for
details about the attachment brackets.
1. With the two attachment brackets already installed on the
unit, align the unit with the desk as desired.
2. Make marks where the screw holes will be made in the
desk.
3. Drill pilot holes for the screws in the desk.
4. Attach the unit to the desk with 4 screws.
Connecting Euroblock plugs
Euroblock plug
Terminal screw
2.5 mm or less
Euroblock plug tab
Flat-blade screwdriver
1. Loosen the Euroblock plug terminal screws.
NOTE
Use a flat-blade screwdriver with a width of 2.5mm or less.
2. Insert wires.
NOTE
AWG16–AWG28 wires are compatible with the included
Euroblock plugs. Using wires within the compatible range,
trim about 7 mm of the protective sheaths from their ends.
3. Tighten the Euroblock plug terminal screws.
NOTE
Confirm that the wires cannot be pulled out.
4. Use an included wire band to attach the wires to the
Euroblock plug tab.
Summary of Contents for VS-R264
Page 27: ......


